Enwikuna Helper can be installed and uninstalled like any other WordPress plugin and is used to activate your Enwikuna Agency licenses and deliver updates.
When Enwikuna Helper is enabled, several elements are added to your WordPress site to make Enwikuna Helper work properly:
- Menu items in the admin dashboard
- Database tables
- Cron jobs for the automation of functions
Please plan about 5 minutes for installation & setup if you want to install Enwikuna Helper yourself. Usually, Enwikuna Helper will be installed automatically within the background during the installation of one of our plugins. Alternatively, you can download Enwikuna Helper here and install it manually. This is necessary if the automatic installation fails. You will now find a file named enwikuna-helper.zip within your downloads’ folder. All details can be found below.
If you have an existing WordPress site and want to install Enwikuna Helper, using the admin dashboard is the easiest option. Alternatively, the plugin can be installed by uploading the unzipped installation file to the WordPress plugins folder via FTP.
Installation & activation via admin dashboard
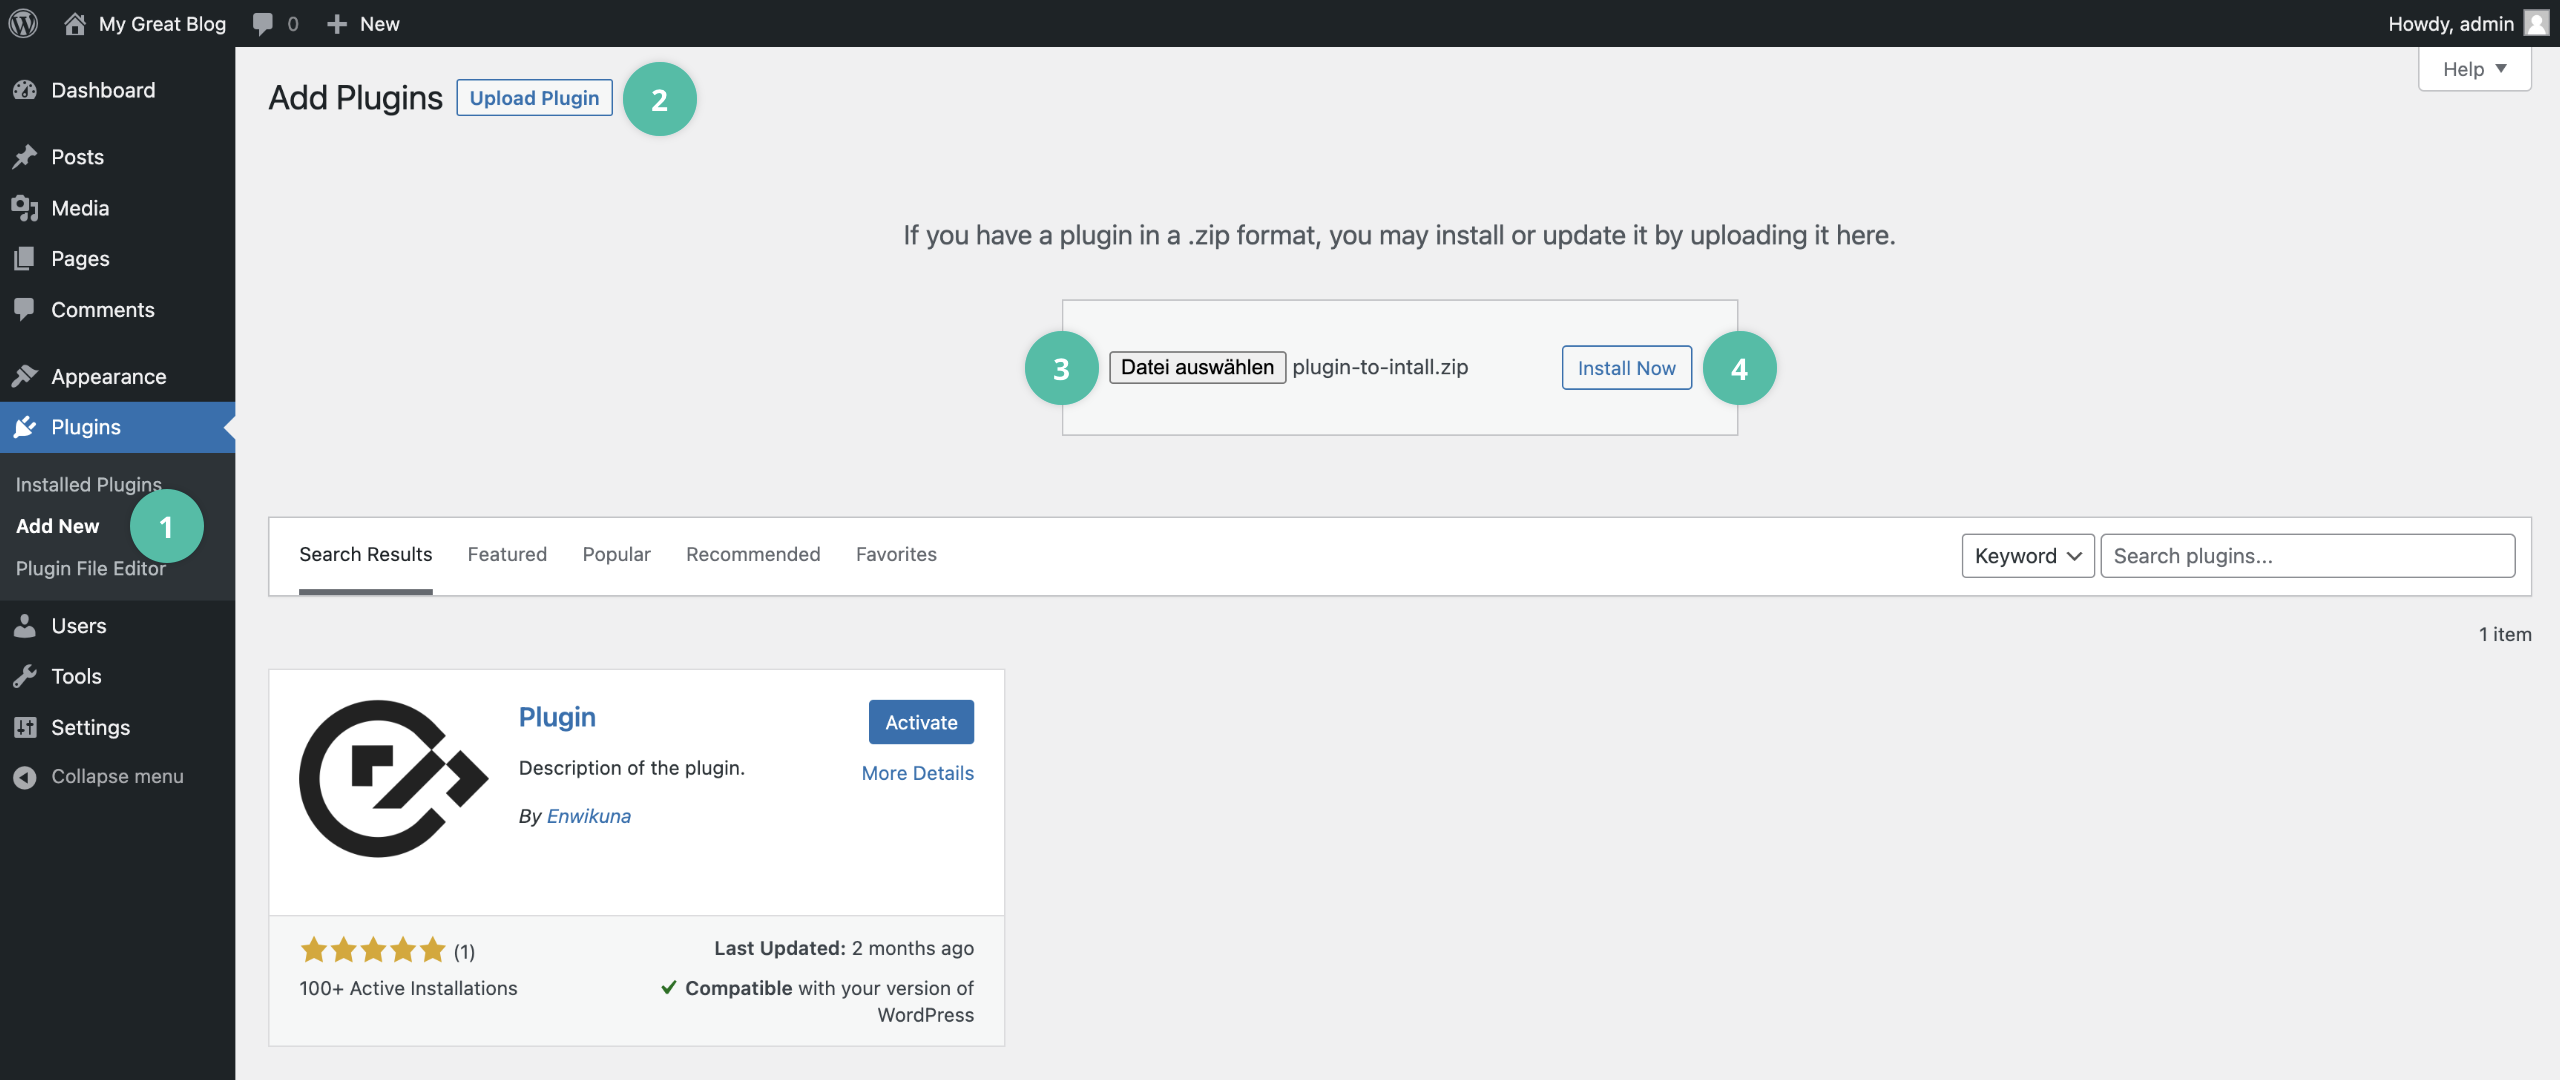
Step 1: Log in to your WordPress site and open the admin dashboard. Go to Plugins > Add New > Upload Plugin. Now use the Select file button to select the enwikuna-helper.zip file you just downloaded from your downloads’ folder. Now start the installation by clicking the Install Now button.
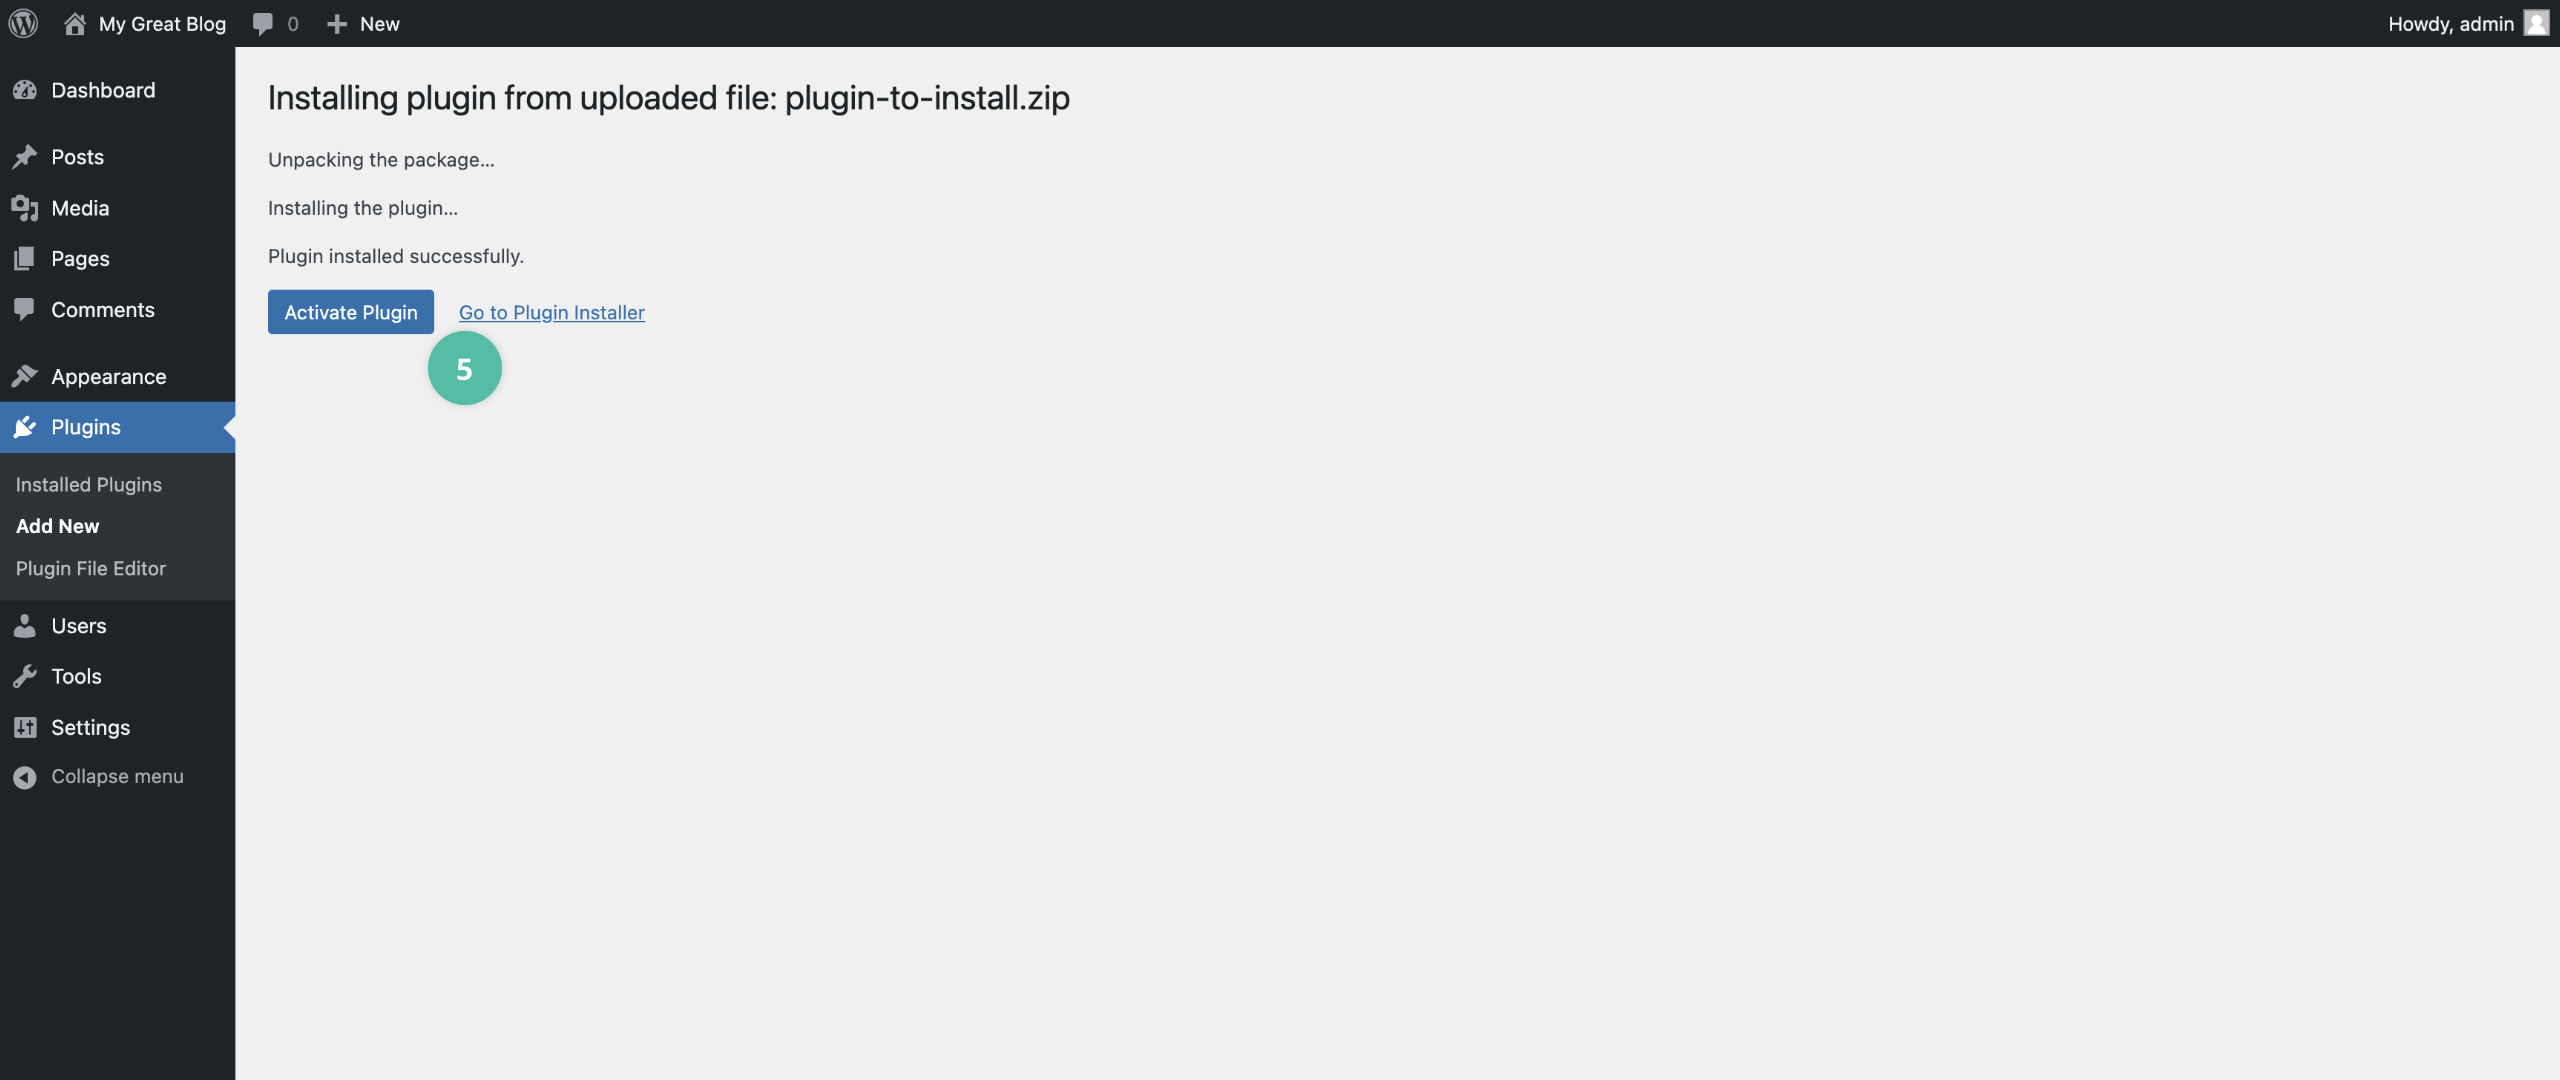
Step 2: After the installation is complete, click Activate Plugin to activate the plugin.
Installation & activation via FTP file upload
Step 1: Unzip the enwikuna-helper.zip file you just downloaded.
Step 2: Log in to your server using e.g. FileZilla and open the path wp-content > plugins. Now upload the just unzipped folder enwikuna-helper from your downloads’ folder to the plugins folder on your server. The plugin is now uploaded and ready for activation.
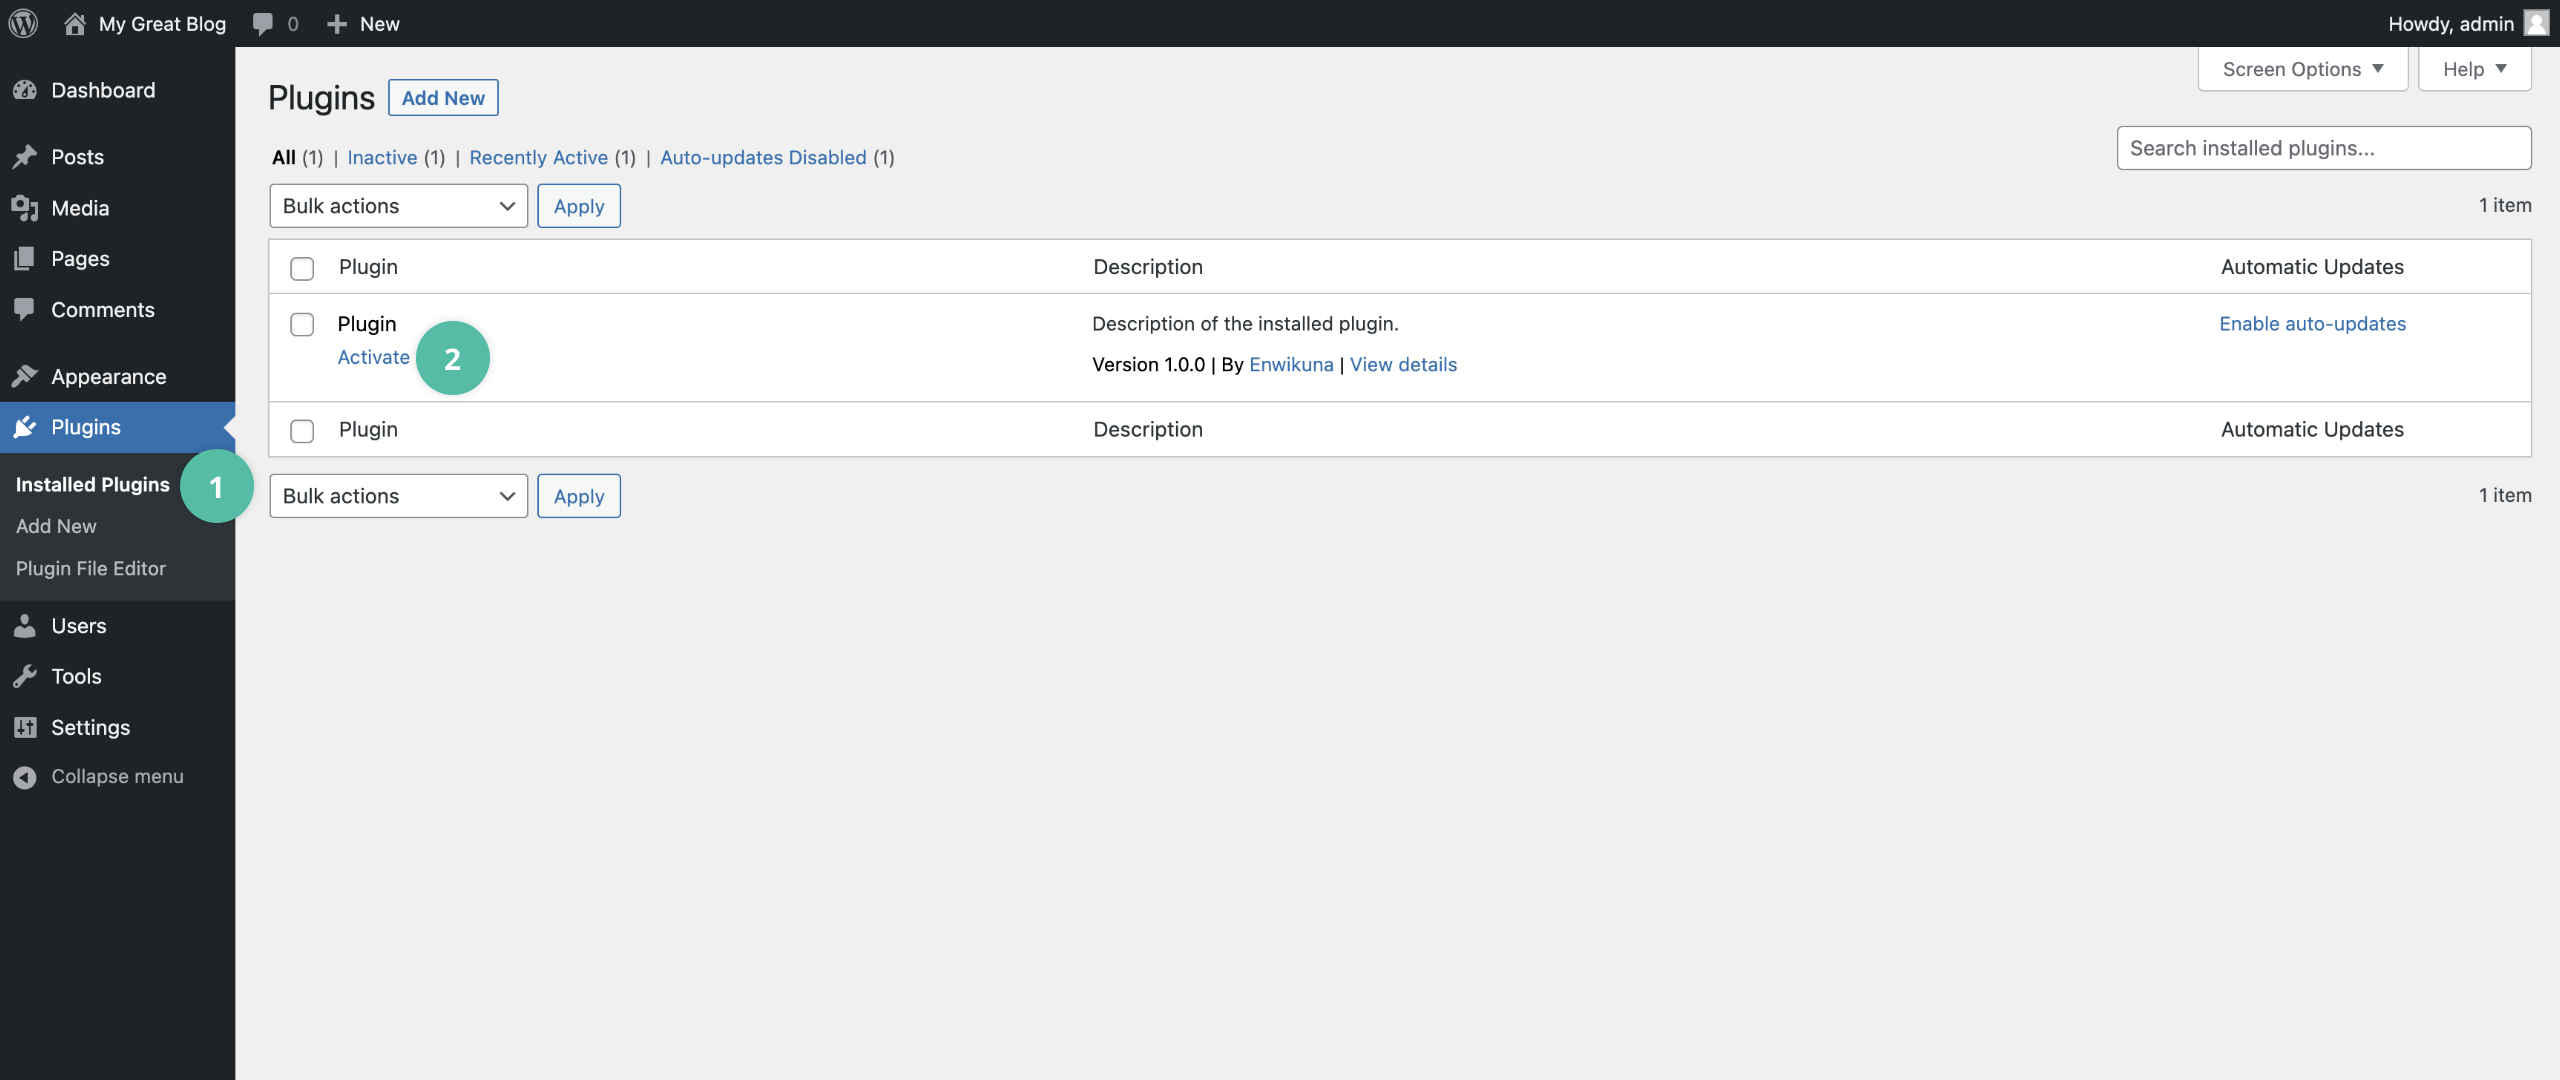
Step 3: Log in to your WordPress site and open the admin dashboard. Go to Plugins > Installed Plugins. There you will find the (installed) plugin you just uploaded. Now click Activate to activate the plugin.
Next steps
Congratulations! You have just successfully installed and activated the plugin. You can now activate your first Enwikuna Agency product.