Overview
To help you manage your releases, we have provided you a table that will help you with this. You can find this table at Enwikuna License Manager > Releases. Within the table there are several functions available, which we would like to explain in the next sections.
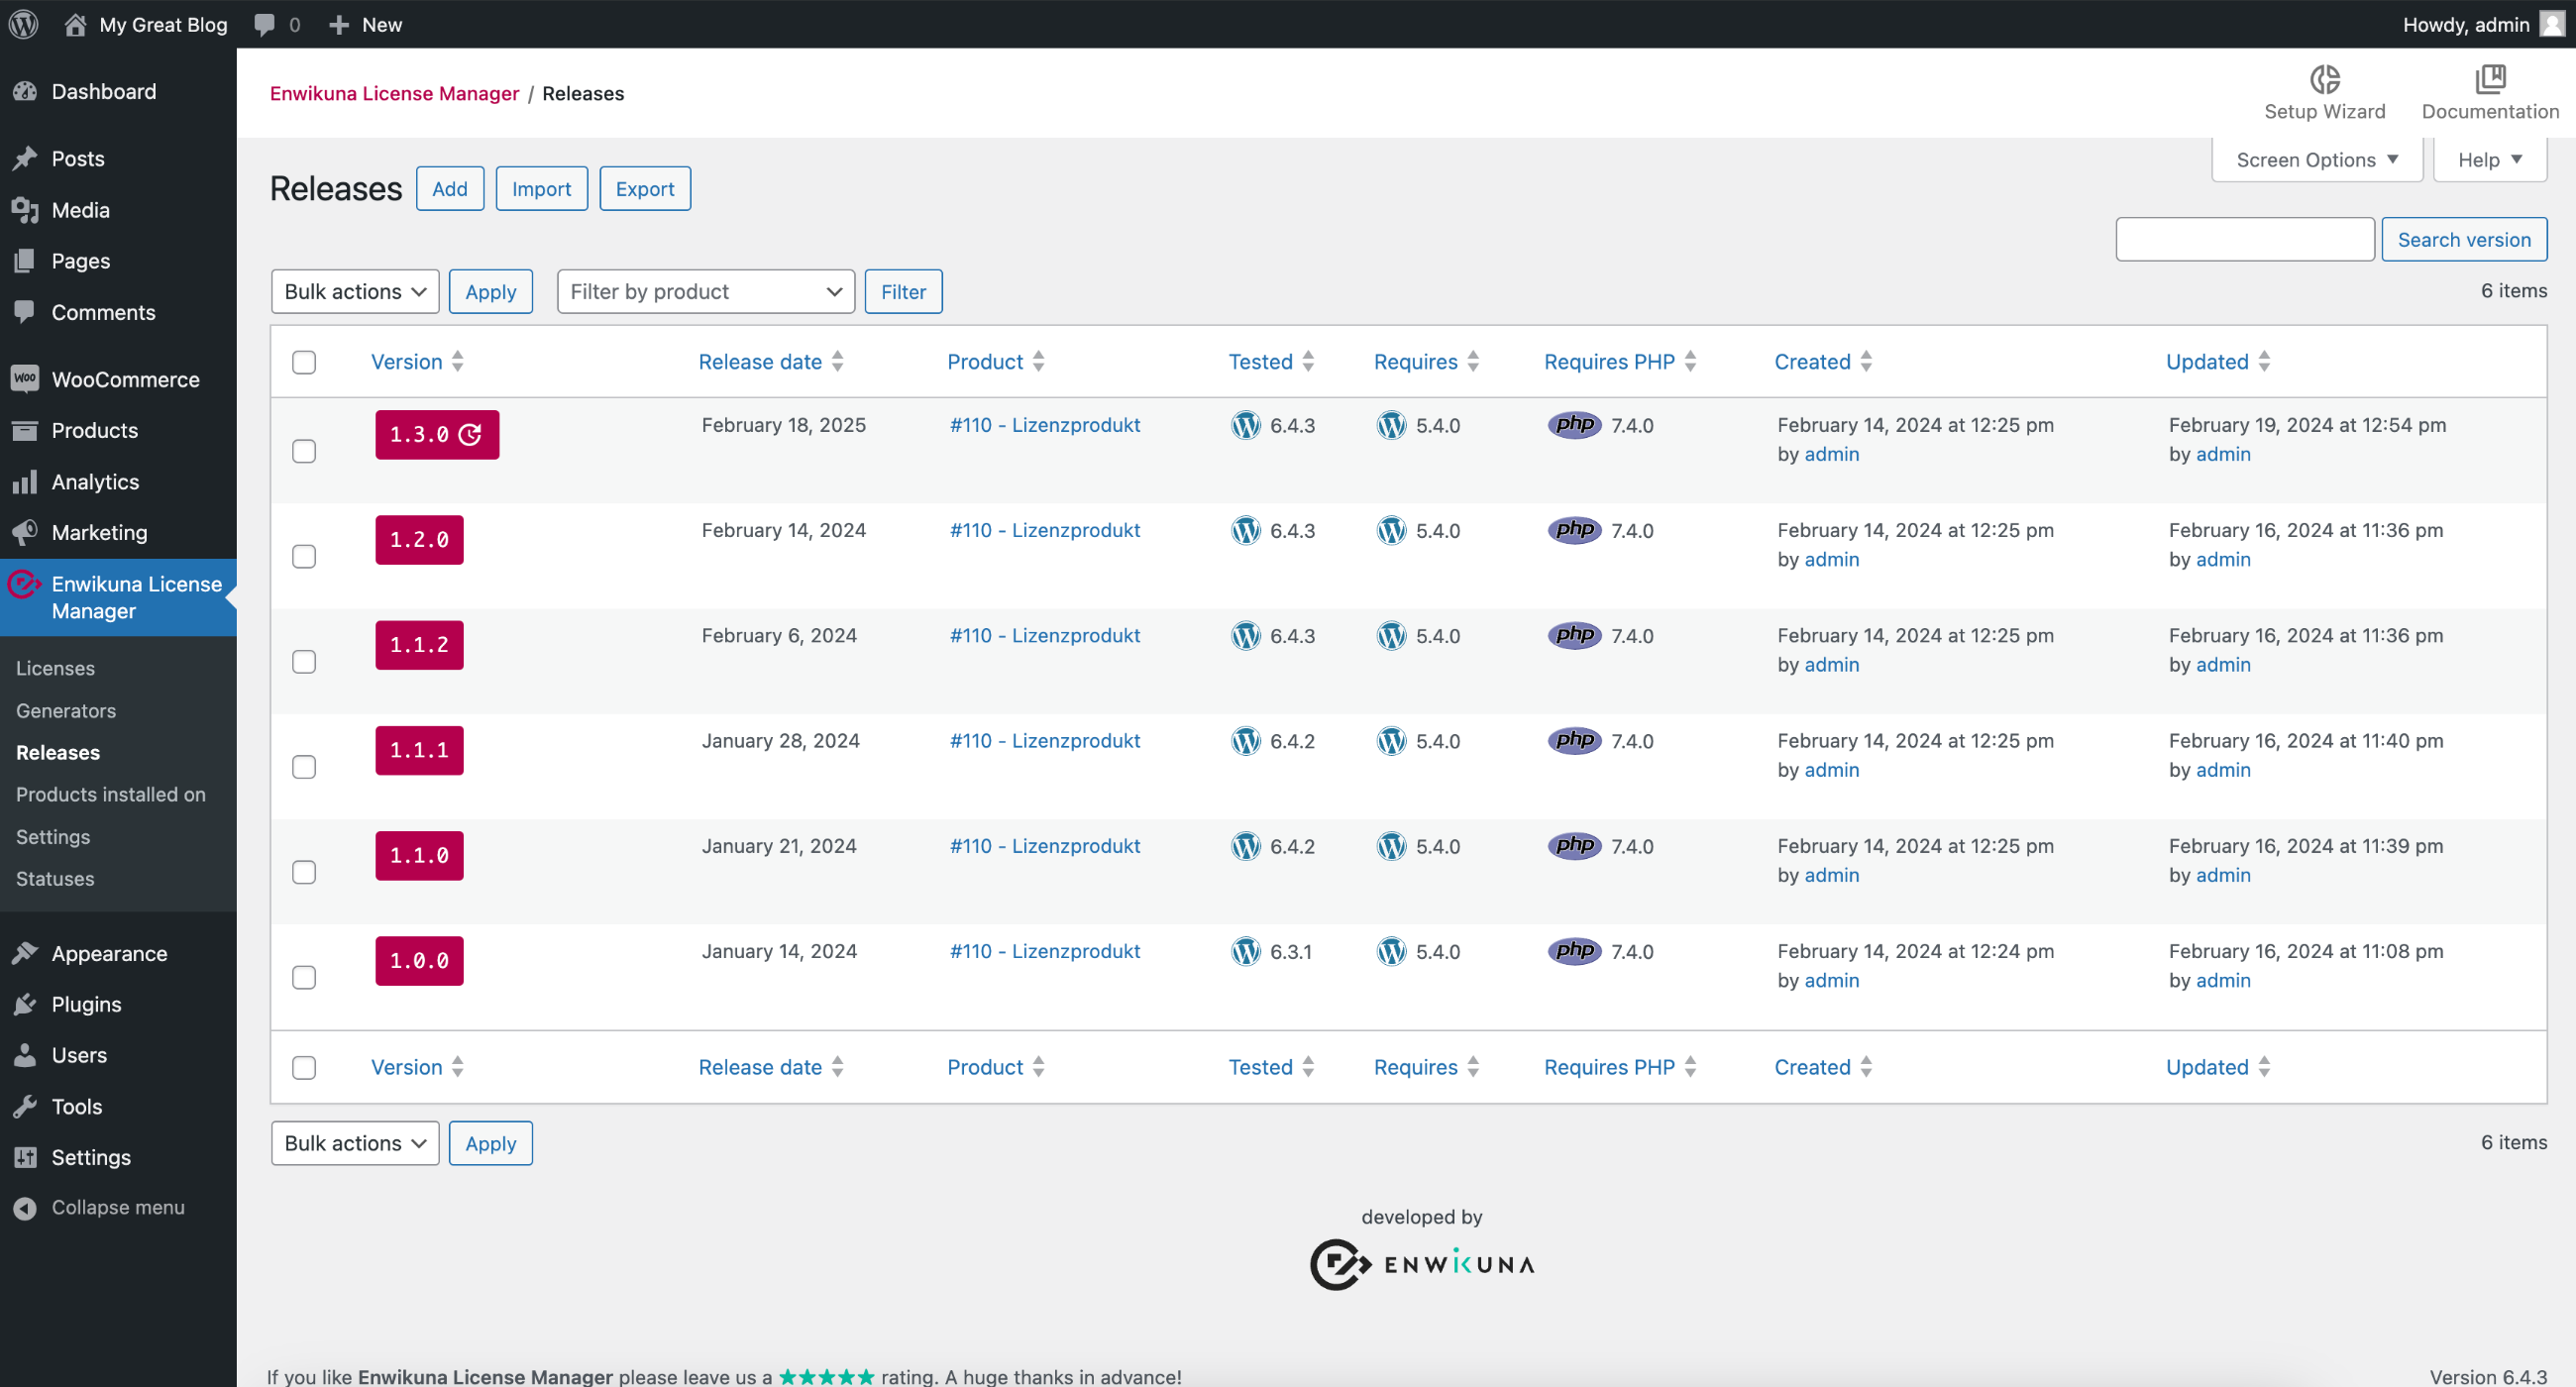
The releases table has several columns, each of which contains the details of the releases. The following columns are available:
| Column | Description |
|---|---|
| Version | This column contains the version of a release. If the release date is in the future, it is also shown here whether it is an upcoming release. |
| Release date | This column contains the date on which a release will be published. The date can also be in the future. In that case, this is an upcoming release. |
| Product | This column contains the assigned product. This is important for the update function of WordPress themes & plugins. |
| Tested | This column shows the version of WordPress a release has been tested up to. |
| Requires | This column shows the version of WordPress a release requires. |
| Requires PHP | This column shows the version of PHP a release requires. |
| Created | This column shows when and by whom a release was created. |
| Updated | This column shows when and by whom a release was last updated. |
Filter, Search & Sort
In order to make the administration of the releases as simple as possible for you, we have built in various functions:
Filter
You will find a selection of filters above the table at the right of the bulk actions, which can help you to filter releases according to corresponding filter criteria.

Search
If you want to find an explicit release inside the table, you can also use the search. Just enter the version and start the search by pressing the button. You will now see exactly the release you were looking for (if it exists). If you manage releases for several products, there may of course be identical versions for several products. In this case, you must first set the product filter.

Sort
In addition to the filters, it is possible to sort the entries within the table. To do so, click on the blue highlighted headings of the columns. You can sort either ascending or descending.

Release actions
Each release within the table has actions that allow you to modify the release. To do this, move the mouse over a release entry inside the table. You will notice that an additional section becomes visible under the version. Here you will find various information and entries:

ID
Probably the most important information is the ID that the release has. Under this ID, the release is stored within the database. An ID is always unique and can never exist twice.
View / Edit
The first and most important action is to view or edit a release. Click on the action to go to the view or edit page of a release. You can read how to edit an existing release below.
Delete
You can delete the release using the Delete action.
Add a new release
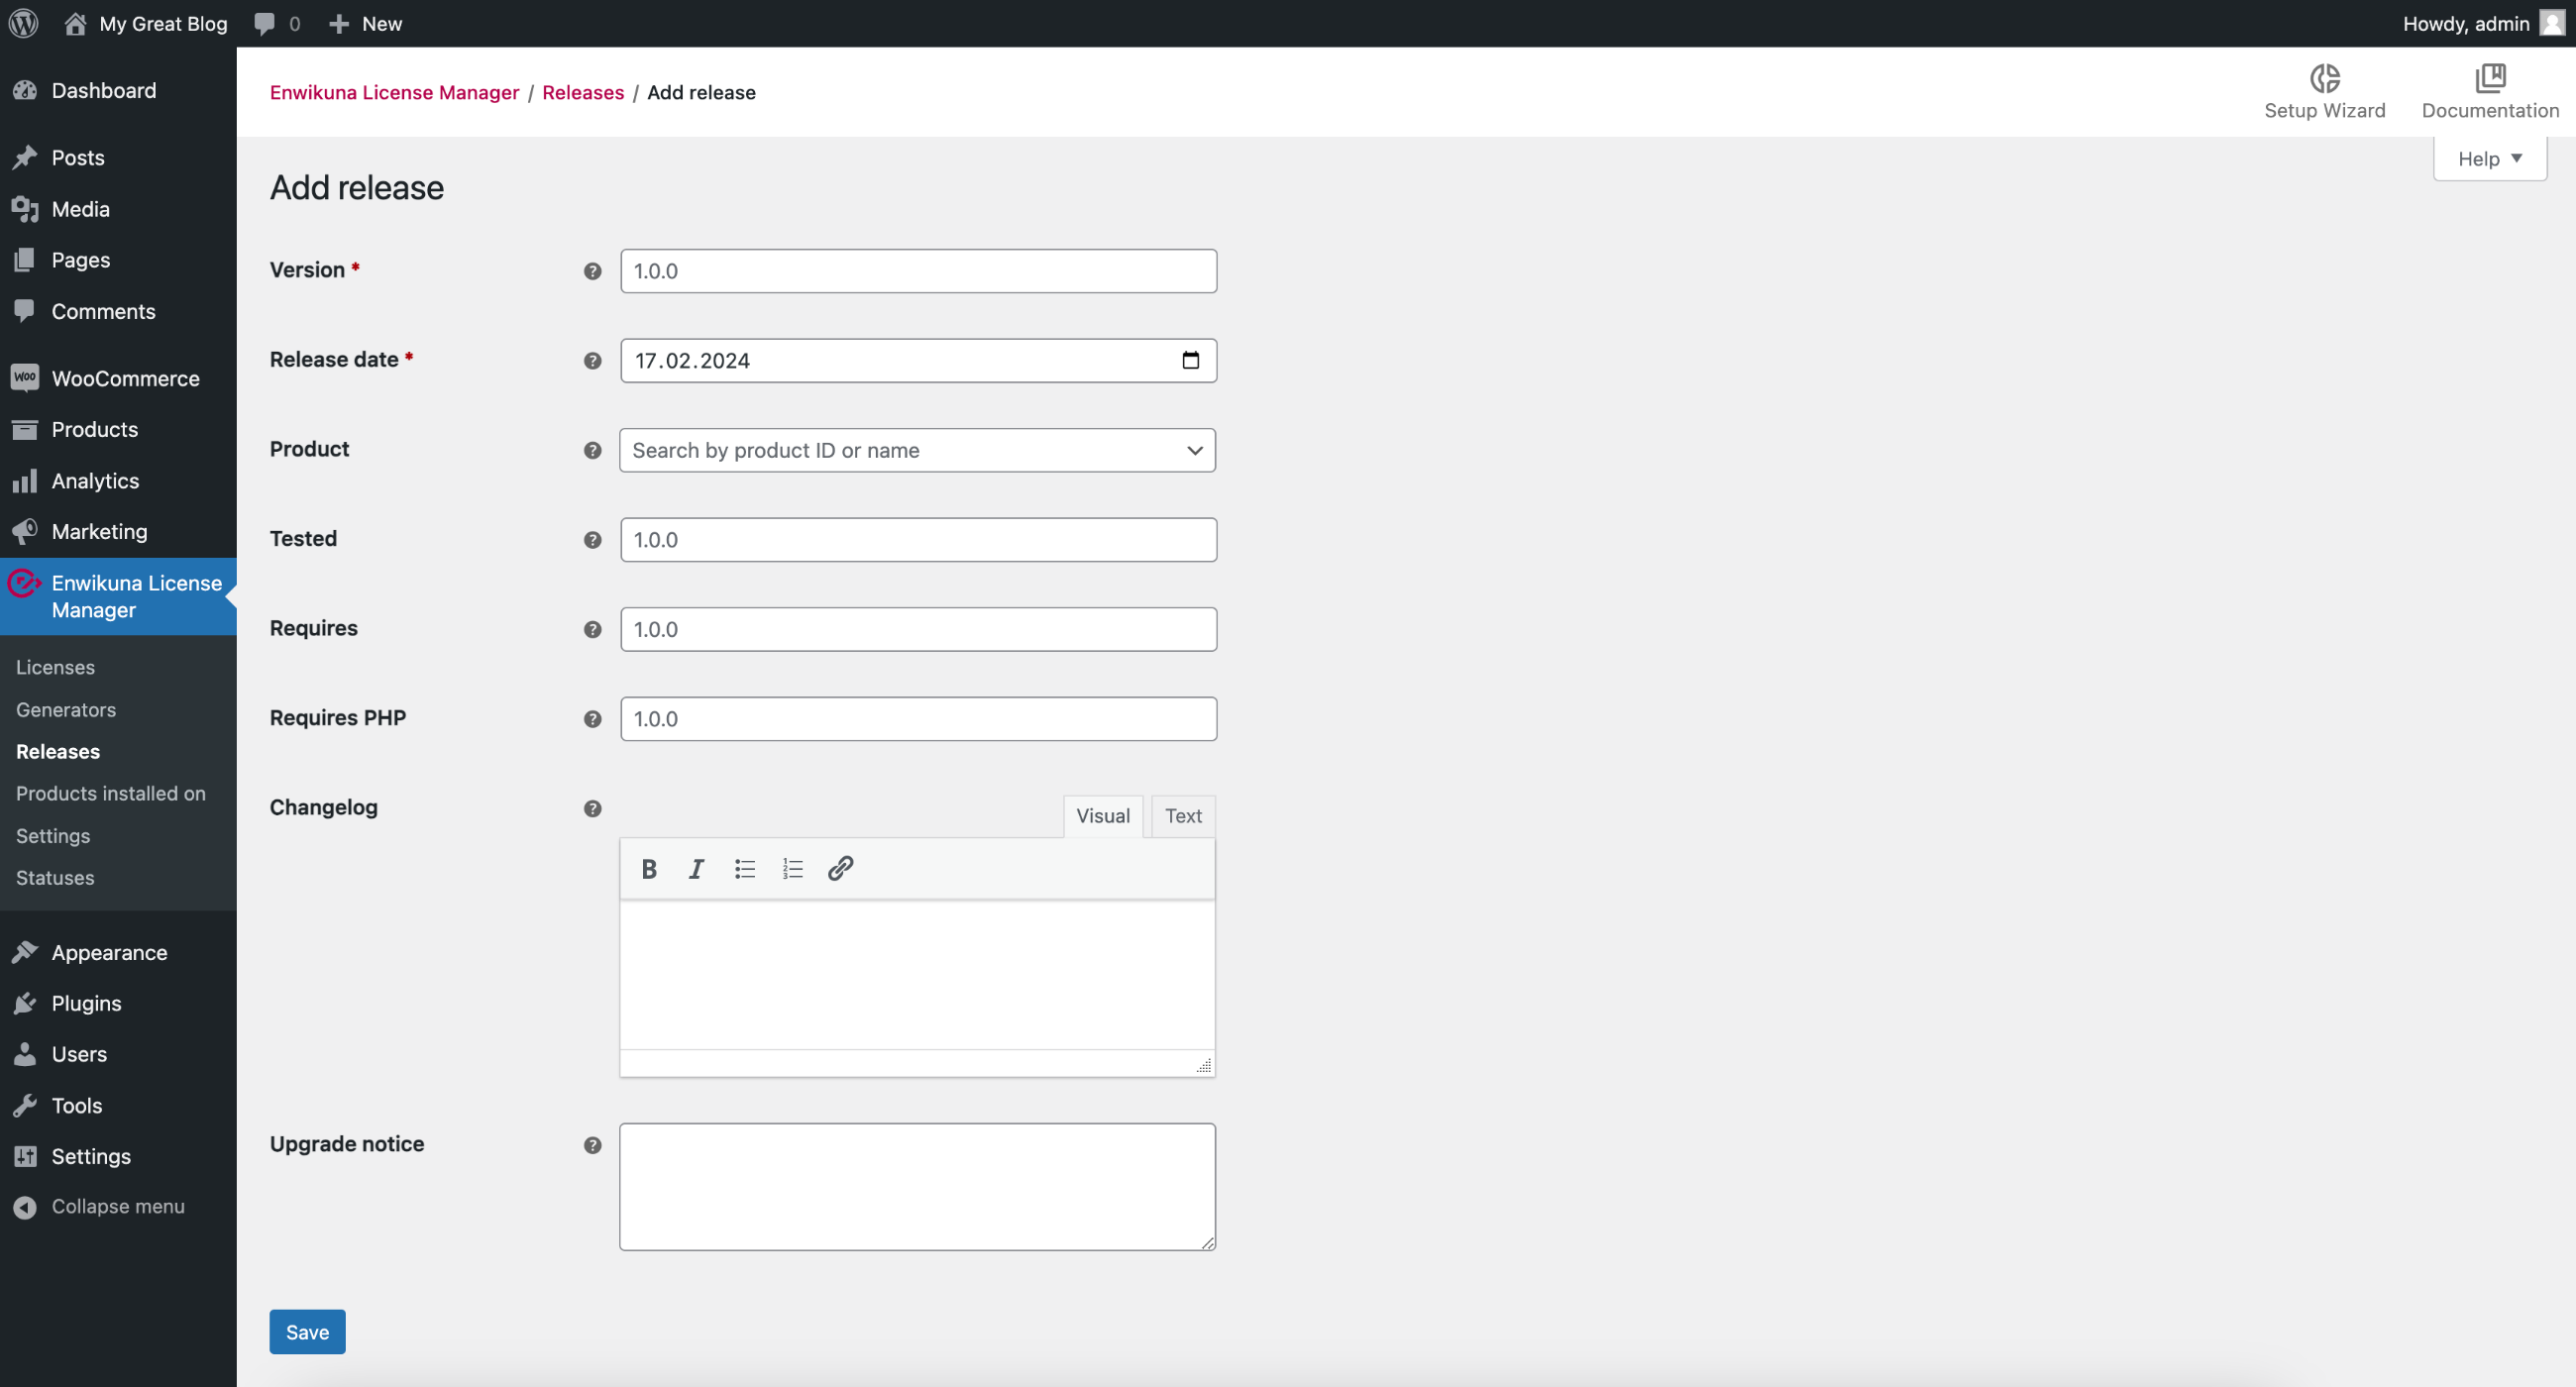
If you want to add a new release, you can do it easily. To do this, click the Add button under Enwikuna License Manager > Releases.

A page will then open where you can define some settings:
Version
Define here the version of the release. You can find helpful tips on version numbers here. This cannot be changed once it has been created.
Release date
Define here the release date on which a release should be published. The date can also be in the future. In that case, this is an upcoming release.
Product
Select a product here if you want to assign the release to a product. This is important for the update function of WordPress themes & plugins.
Tested
Define here the version of WordPress where the release has been tested up to. If your software is not a WordPress plugin or theme, you can leave this field empty and hide it within the releases table in the upper right corner via Screen Options.
Requires
Define here the version of WordPress that the release requires. If your software is not a WordPress plugin or theme, you can leave this field empty and hide it within the releases table in the upper right corner via Screen Options.
Requires PHP
Define here the version of PHP that the release requires. If your software does not use PHP, you can leave this field empty and hide it within the releases table in the upper right corner via Screen Options.
Changelog
Define here a list of changes that the release contains. These can be new features, improvements or bugfixes. It is not necessary to re-enter the version. When you do a request via the REST API, the entire history will be assembled hierarchically so that you have a perfect changelog which you can output in your software if required.
Upgrade notice
Define here a note to upgrade to the version of this release. When you do a request via the REST API, the notice will be included, which you can output in your software if required.
Finally, save the release by clicking the corresponding button.
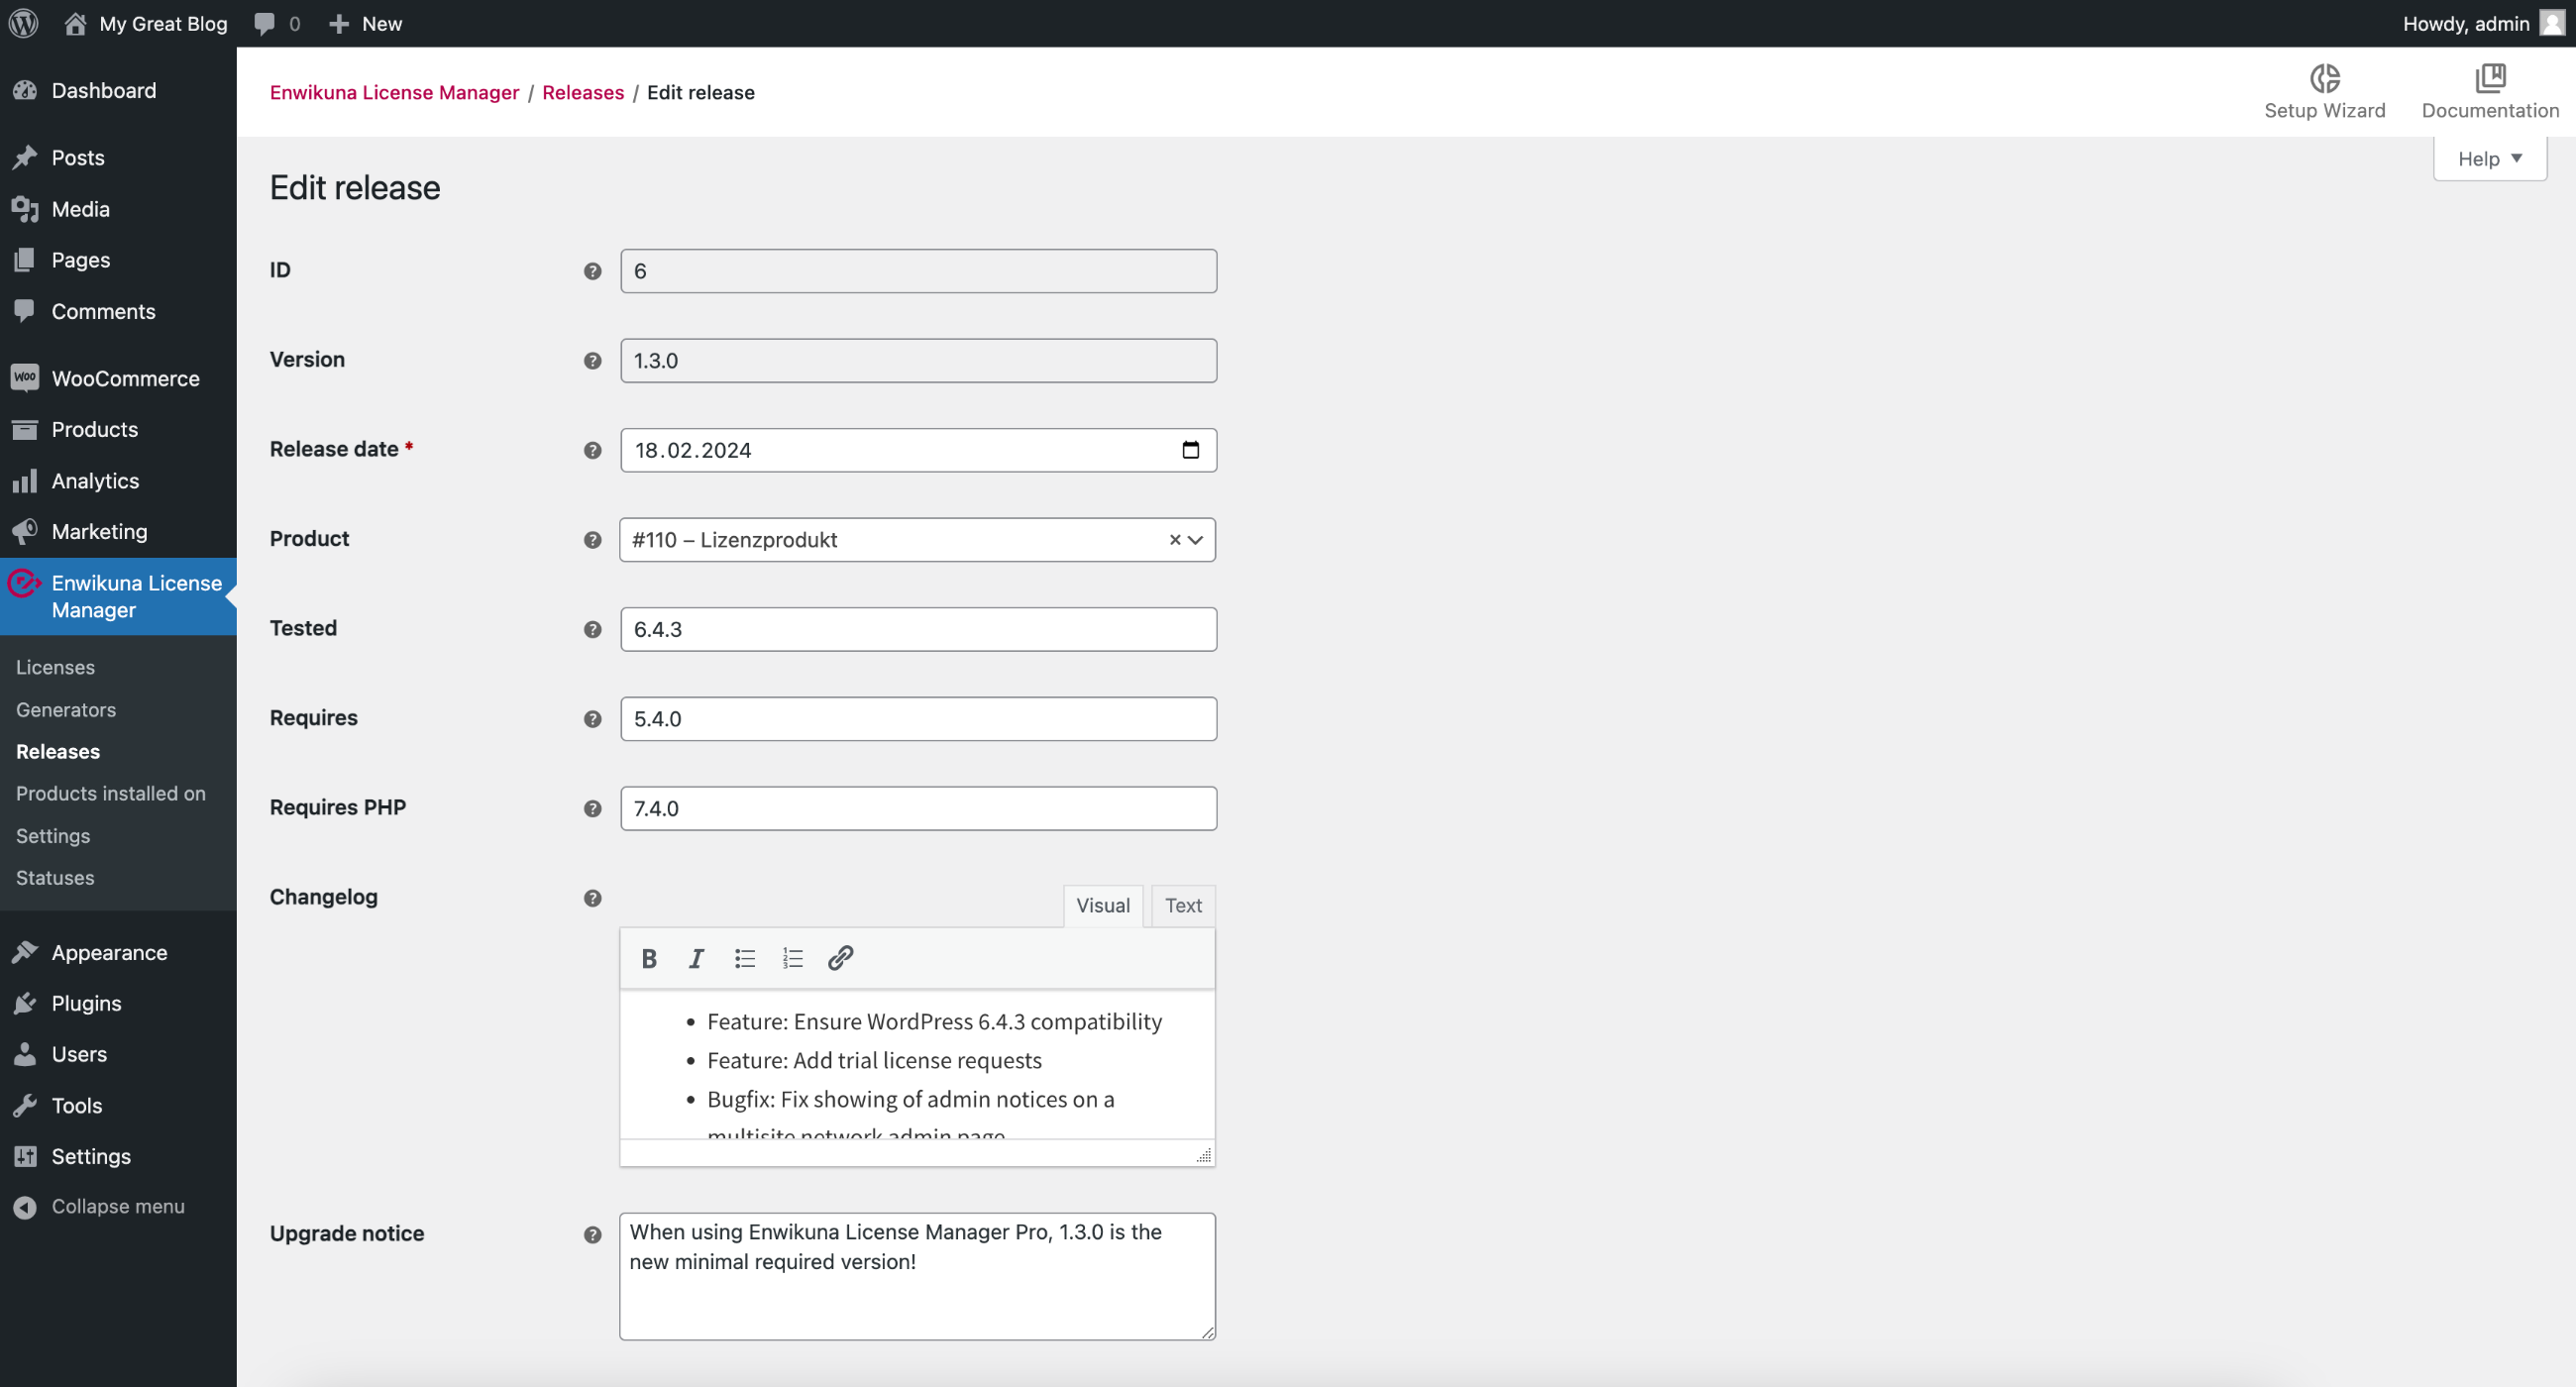
View / edit an existing release
If you want to view or edit an existing release, you can do this easily. To do this, move the mouse over a release entry in the table and then click View / Edit.

A page will then open where you can view and edit the settings of a release:
ID
The ID under which the release was stored within the database.
Version
Define here the version of the release. You can find helpful tips on version numbers here. This cannot be changed once it has been created.
Release date
Define here the release date on which a release should be published. The date can also be in the future. In that case, this is an upcoming release.
Product
Select a product here if you want to assign the release to a product. This is important for the update function of WordPress themes & plugins.
Tested
Define here the version of WordPress where the release has been tested up to. If your software is not a WordPress plugin or theme, you can leave this field empty and hide it within the releases table in the upper right corner via Screen Options.
Requires
Define here the version of WordPress that the release requires. If your software is not a WordPress plugin or theme, you can leave this field empty and hide it within the releases table in the upper right corner via Screen Options.
Requires PHP
Define here the version of PHP that the release requires. If your software does not use PHP, you can leave this field empty and hide it within the releases table in the upper right corner via Screen Options.
Changelog
Define here a list of changes that the release contains. These can be new features, improvements or bugfixes. It is not necessary to re-enter the version. When you do a request via the REST API, the entire history will be assembled hierarchically so that you have a perfect changelog which you can output in your software if required.
Upgrade notice
Define here a note to upgrade to the version of this release. When you do a request via the REST API, the notice will be included, which you can output in your software if required.
Save the release afterwards via the corresponding button, if you have made changes.
Delete an existing release
If you want to delete an existing release, you can do this in three ways. Either via the bulk actions (we describe this procedure below), in the release itself, or via the Delete release action. To do this, move the mouse over a release entry in the table and then click Delete.

Bulk actions
In order to manage multiple releases, we have provided some bulk actions. You can find them at the beginning and at the end of the table. Mark all entries which you want to address via a bulk action.

The following bulk actions are available:
Delete
Select the bulk action Delete if you want to delete all selected entries.
Finally, confirm the execution of the bulk action by clicking the corresponding button.
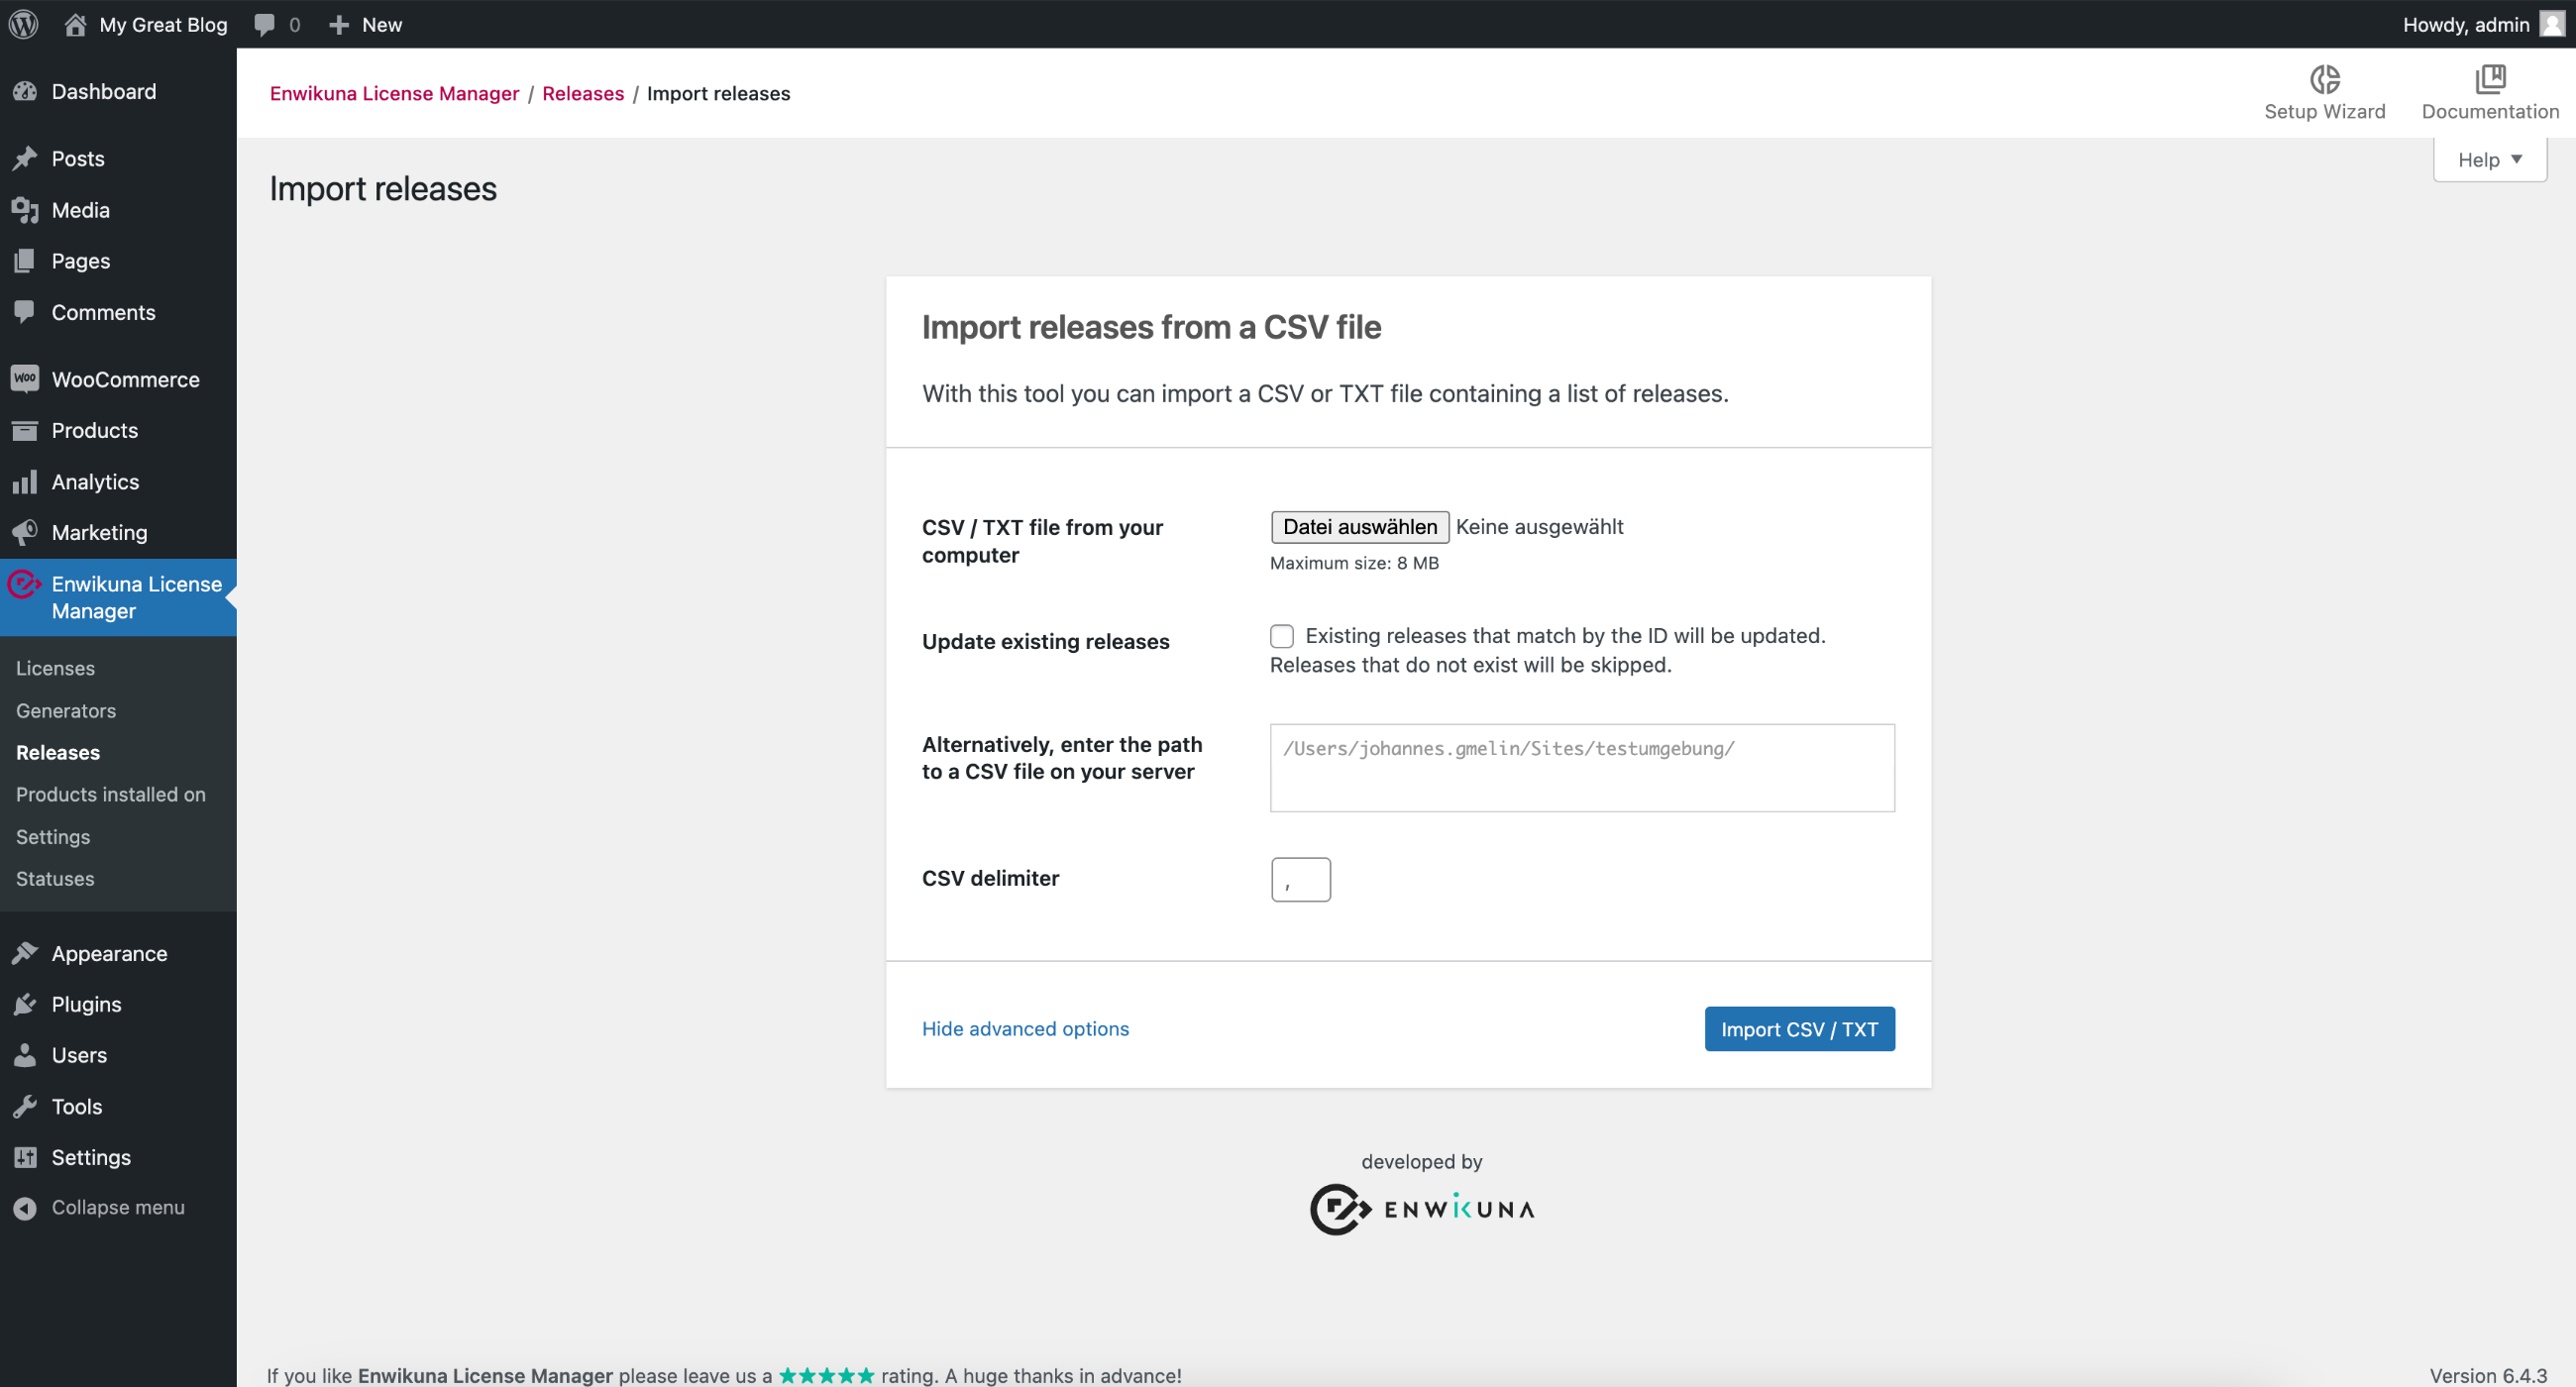
Import releases
Click the Import button under Enwikuna License Manager > Releases to import releases.

This opens the Importer, which is responsible for importing releases. Now select a CSV or TXT file containing releases. Next, decide whether you want to update existing releases or not.
You can also perform an advanced import by opening the advanced options. You can alternatively specify a path to a CSV or TXT file on your server instead of selecting the file locally. You can also change the delimiter if you want to use a different delimiter. By default, a , is used as a delimiter.
Finally, start the import process by clicking the corresponding button.
You will find a sample-data folder inside the Enwikuna License Manager Pro plugin folder. Inside this folder we have placed a sample file for you, which you can use as a template. Alternatively, you can of course create a release by hand and then export that release, which will give you your own template.
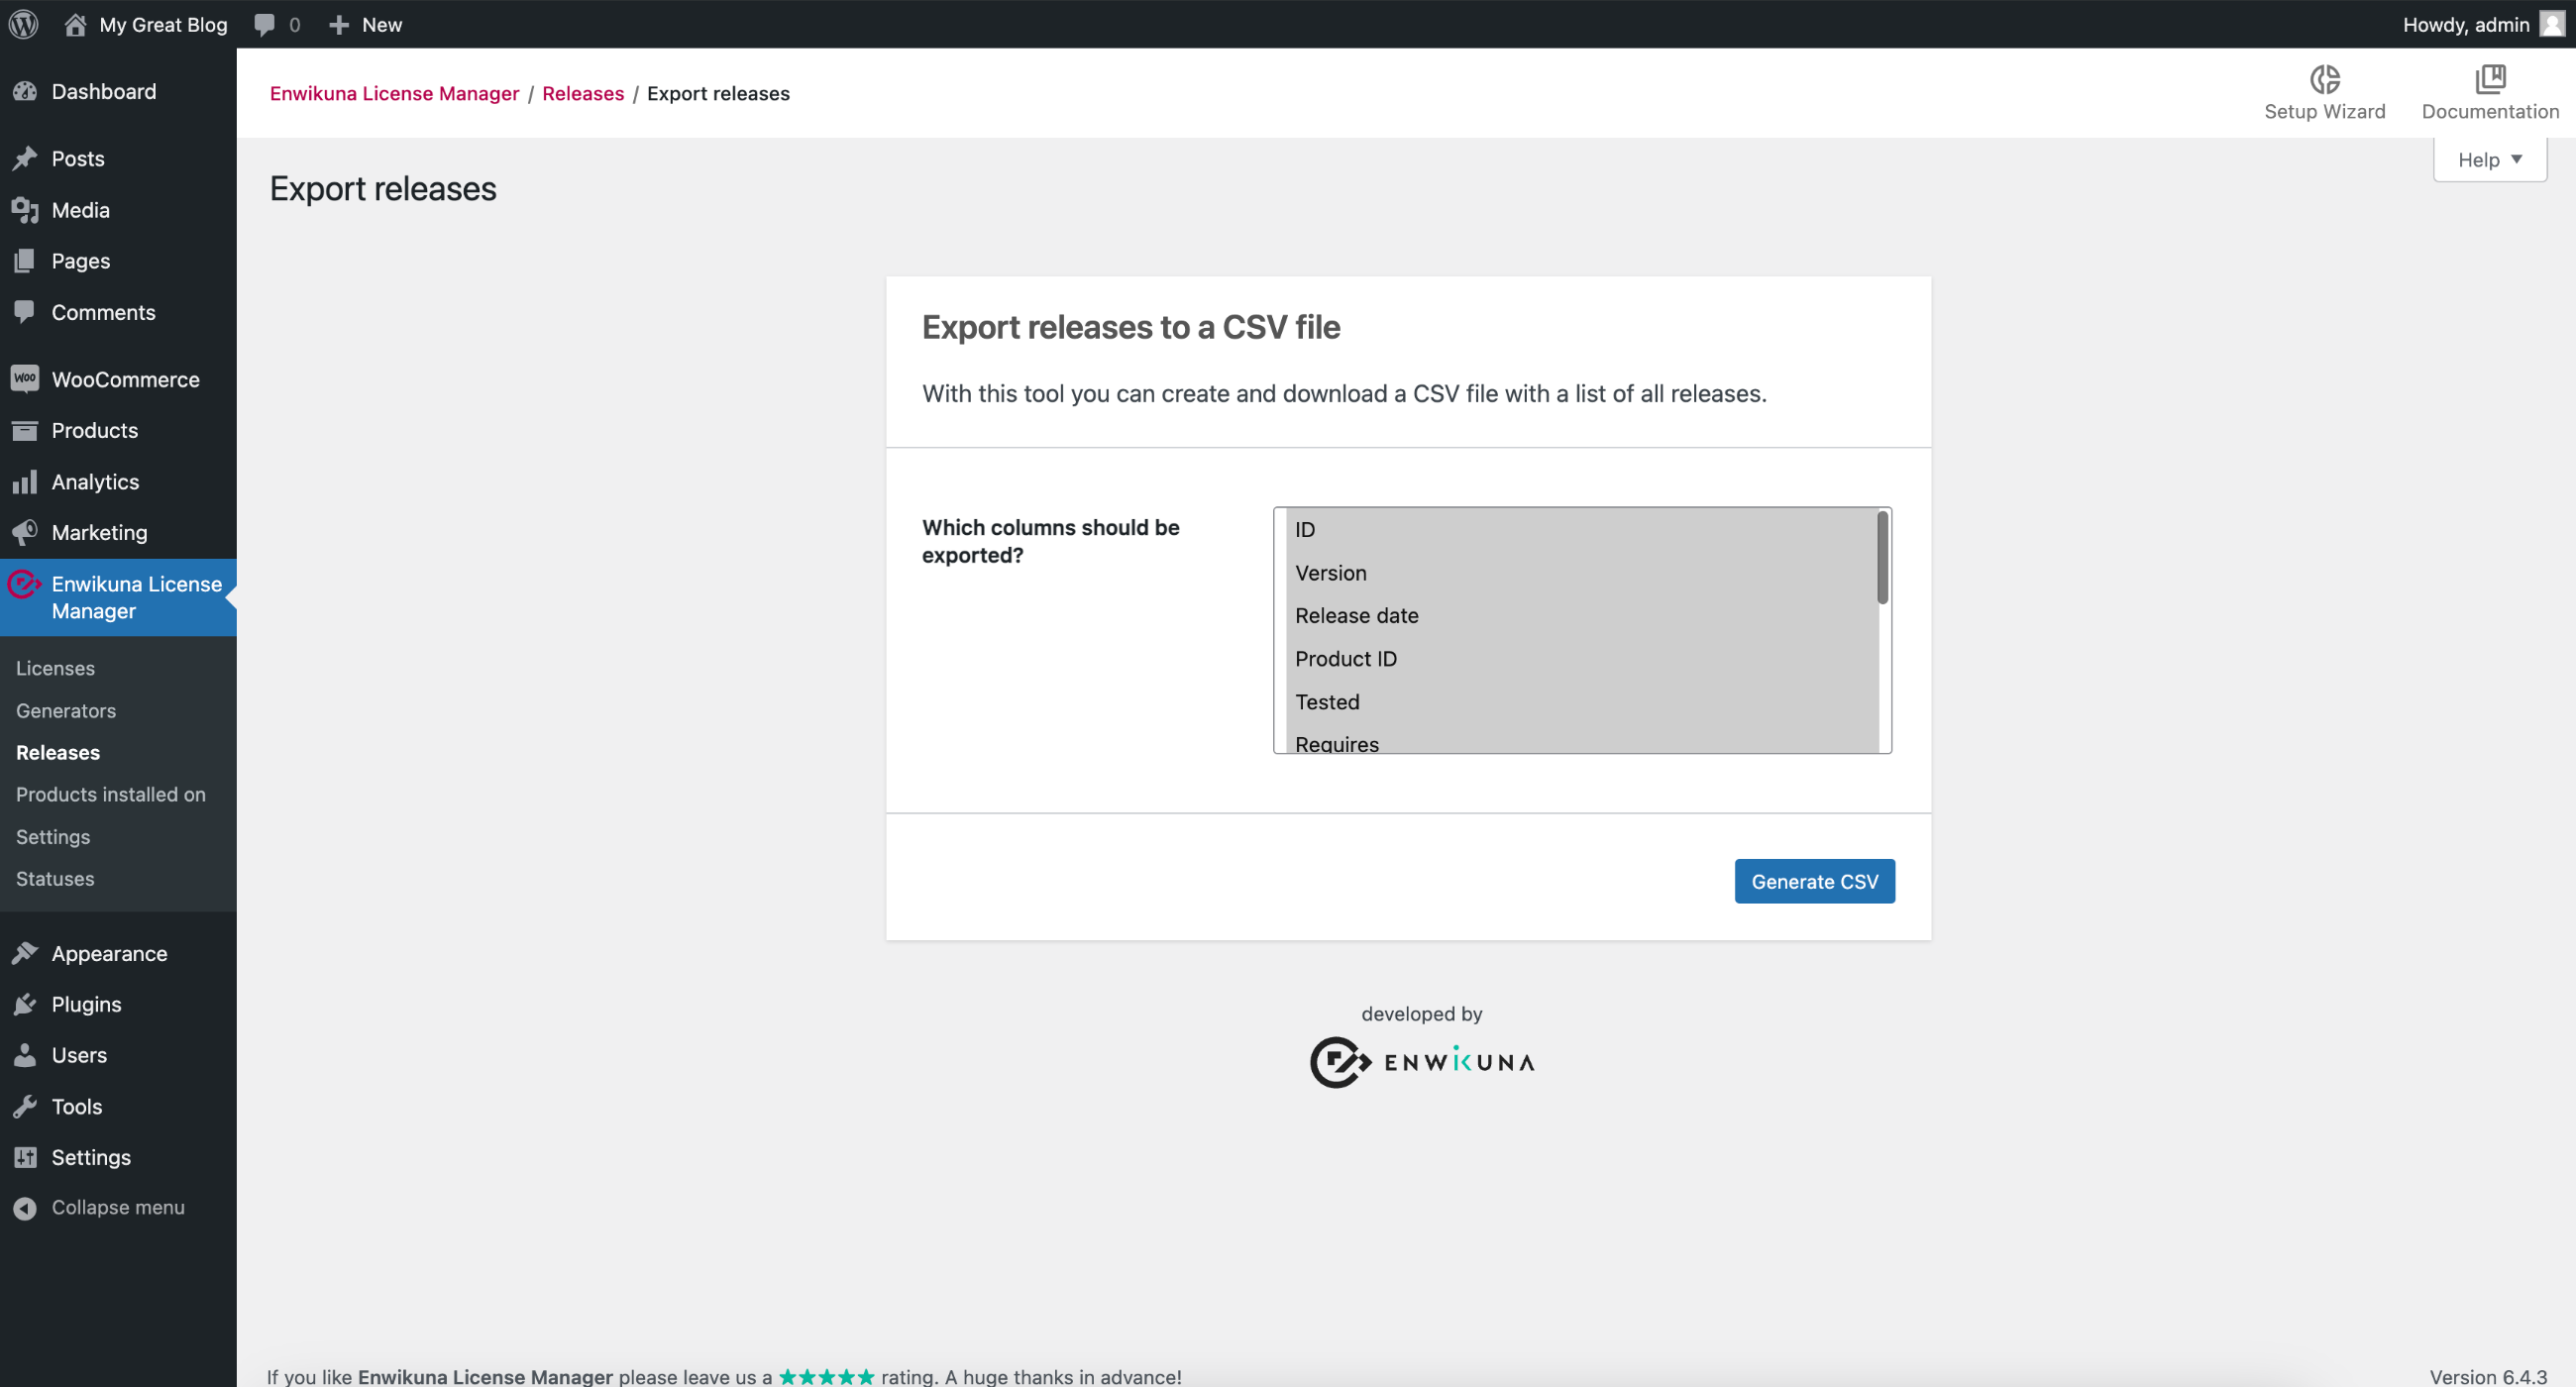
Export releases
Click the Export button under Enwikuna License Manager > Releases to export releases.

This opens the Exporter, which is responsible for exporting releases. Now select the data you want to export. By default, all release data will be exported.
Now, start the export by clicking on the corresponding button.
Your releases should now be exported.