Overview
Enwikuna License Manager Pro can be installed and uninstalled like any other WordPress plugin. The full installation and configuration of Enwikuna License Manager Pro on your WordPress site is an additional optional step available in the setup wizard to help with setup.
Please note that Enwikuna License Manager Pro is an extension for Enwikuna License Manager and therefore only works if you have Enwikuna License Manager installed. In addition, Enwikuna License Manager Pro explicitly supports other WooCommerce extensions:
This does not mean that other extensions will not work in combination with Enwikuna License Manager Pro, but that special fields and properties of the mentioned plugins will be partially read and used or adapted by Enwikuna License Manager Pro.
When Enwikuna License Manager Pro is enabled, several elements are added to your WordPress site to make Enwikuna License Manager Pro work properly:
- Submenu item in the admin dashboard
- Database tables
- User Roles & Permissions
- Cron jobs for the automation of functions
- Folder in the file system for storing e.g. license imports
Please plan about 10 minutes for installation & setup, and also have your license key ready. You can find it within your order confirmation email or your Enwikuna Agency account.
If you have an existing WordPress site and want to install Enwikuna License Manager Pro, using the admin dashboard is the easiest option. Alternatively, the plugin can be installed by uploading the unzipped installation file to the WordPress plugins folder via FTP.
After purchasing Enwikuna License Manager Pro and successfully received payment, you will receive a link to download Enwikuna License Manager Pro. You can find this link inside your order confirmation email or your Enwikuna Agency account. You will now find a file named enwikuna-license-manager-pro.zip within your downloads’ folder.
Installation & activation via admin dashboard
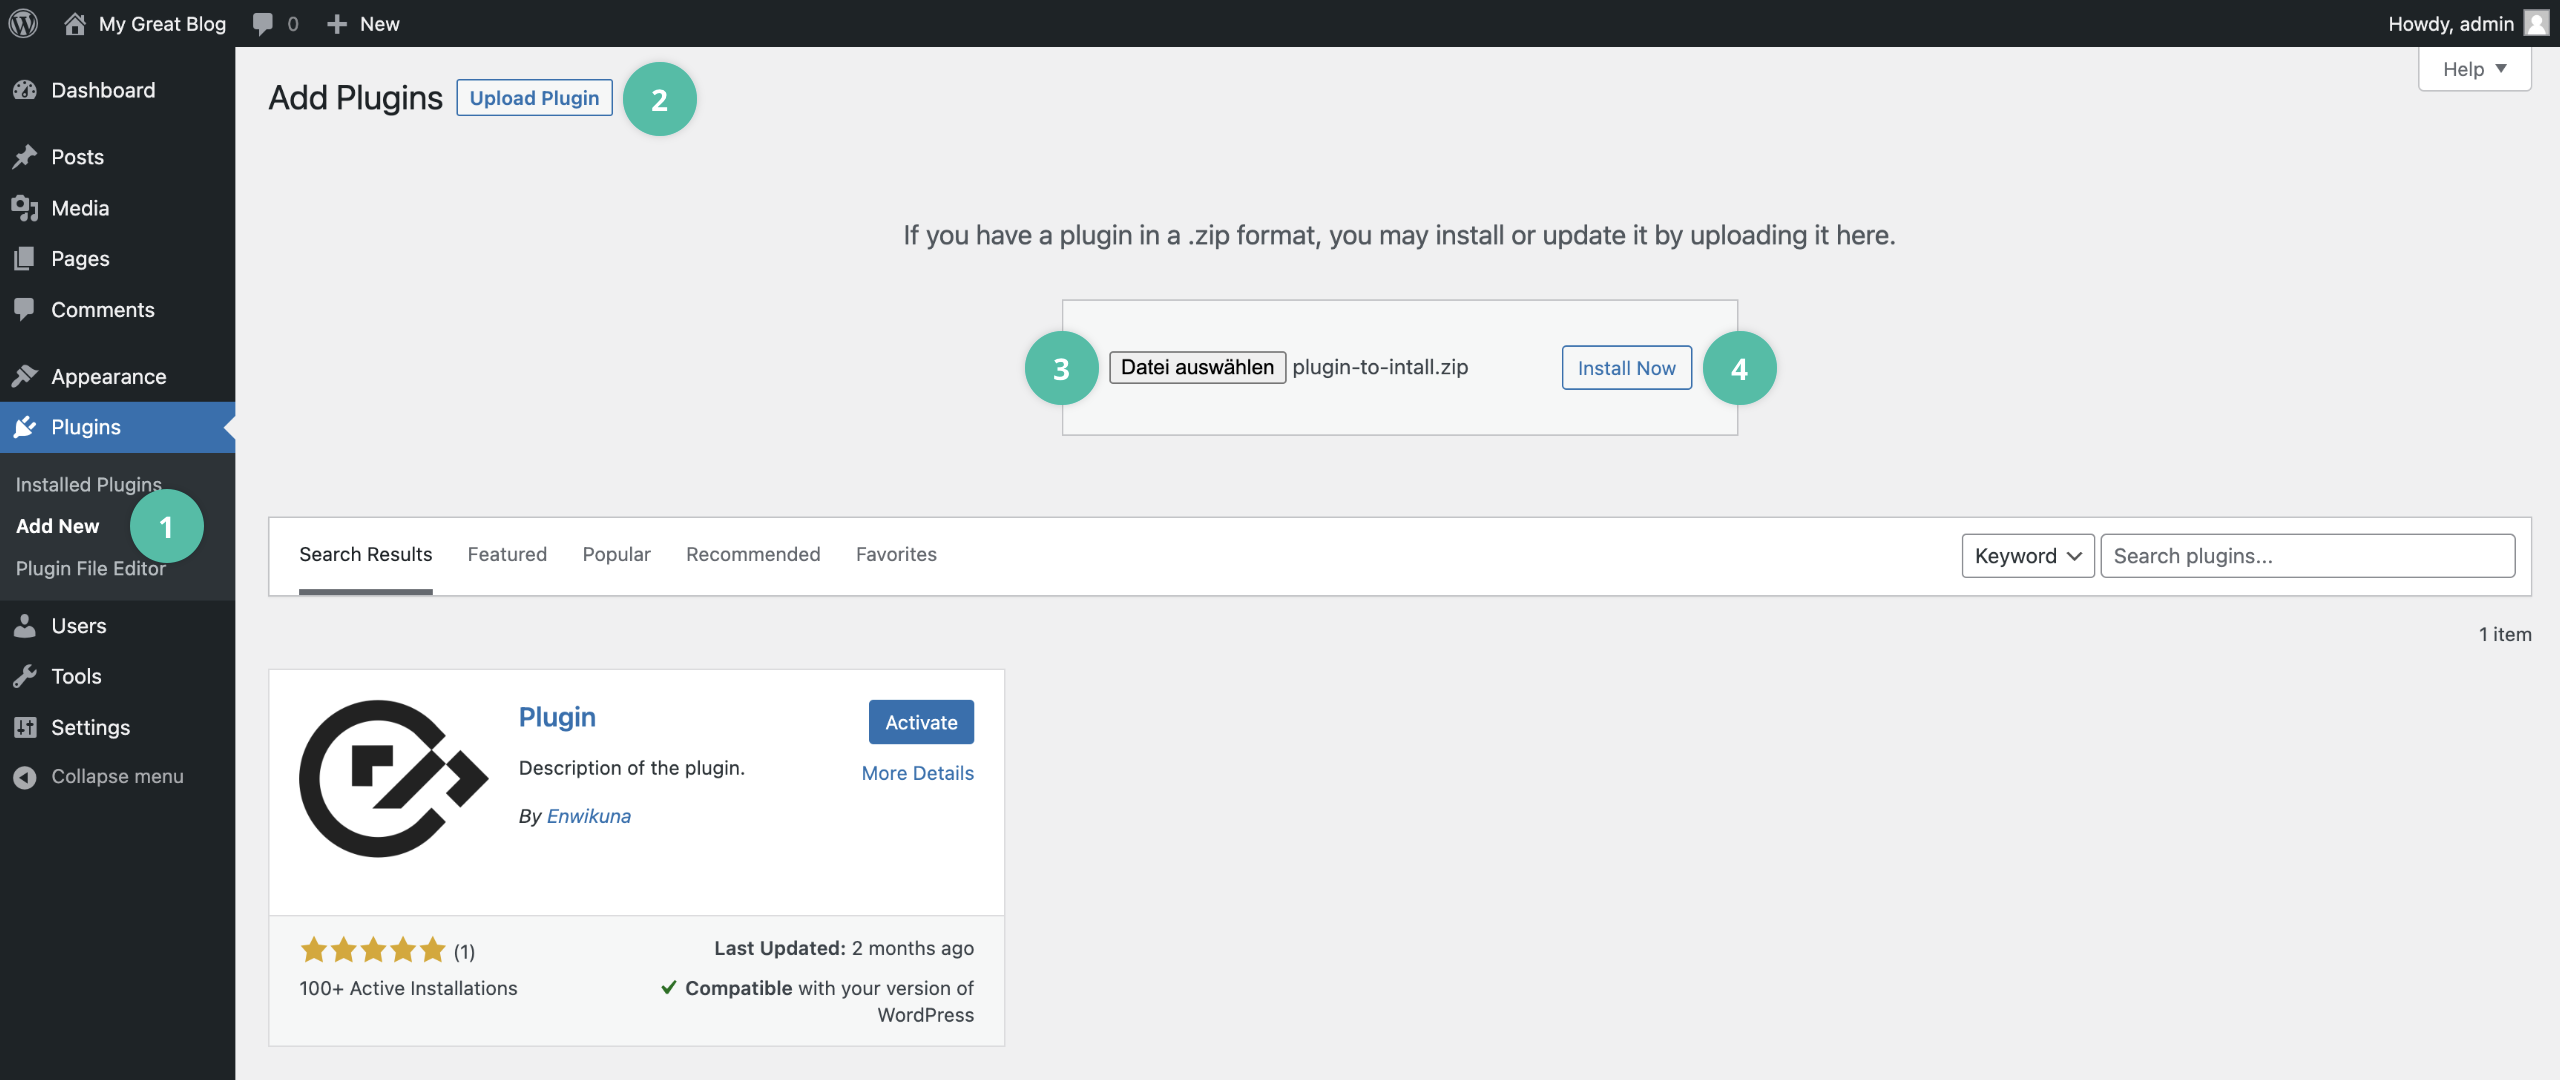
Step 1: Log in to your WordPress site and open the admin dashboard. Go to Plugins > Add New > Upload Plugin. Now use the Select file button to select the enwikuna-license-manager-pro.zip file you just downloaded from your downloads’ folder. Now start the installation by clicking the Install Now button.
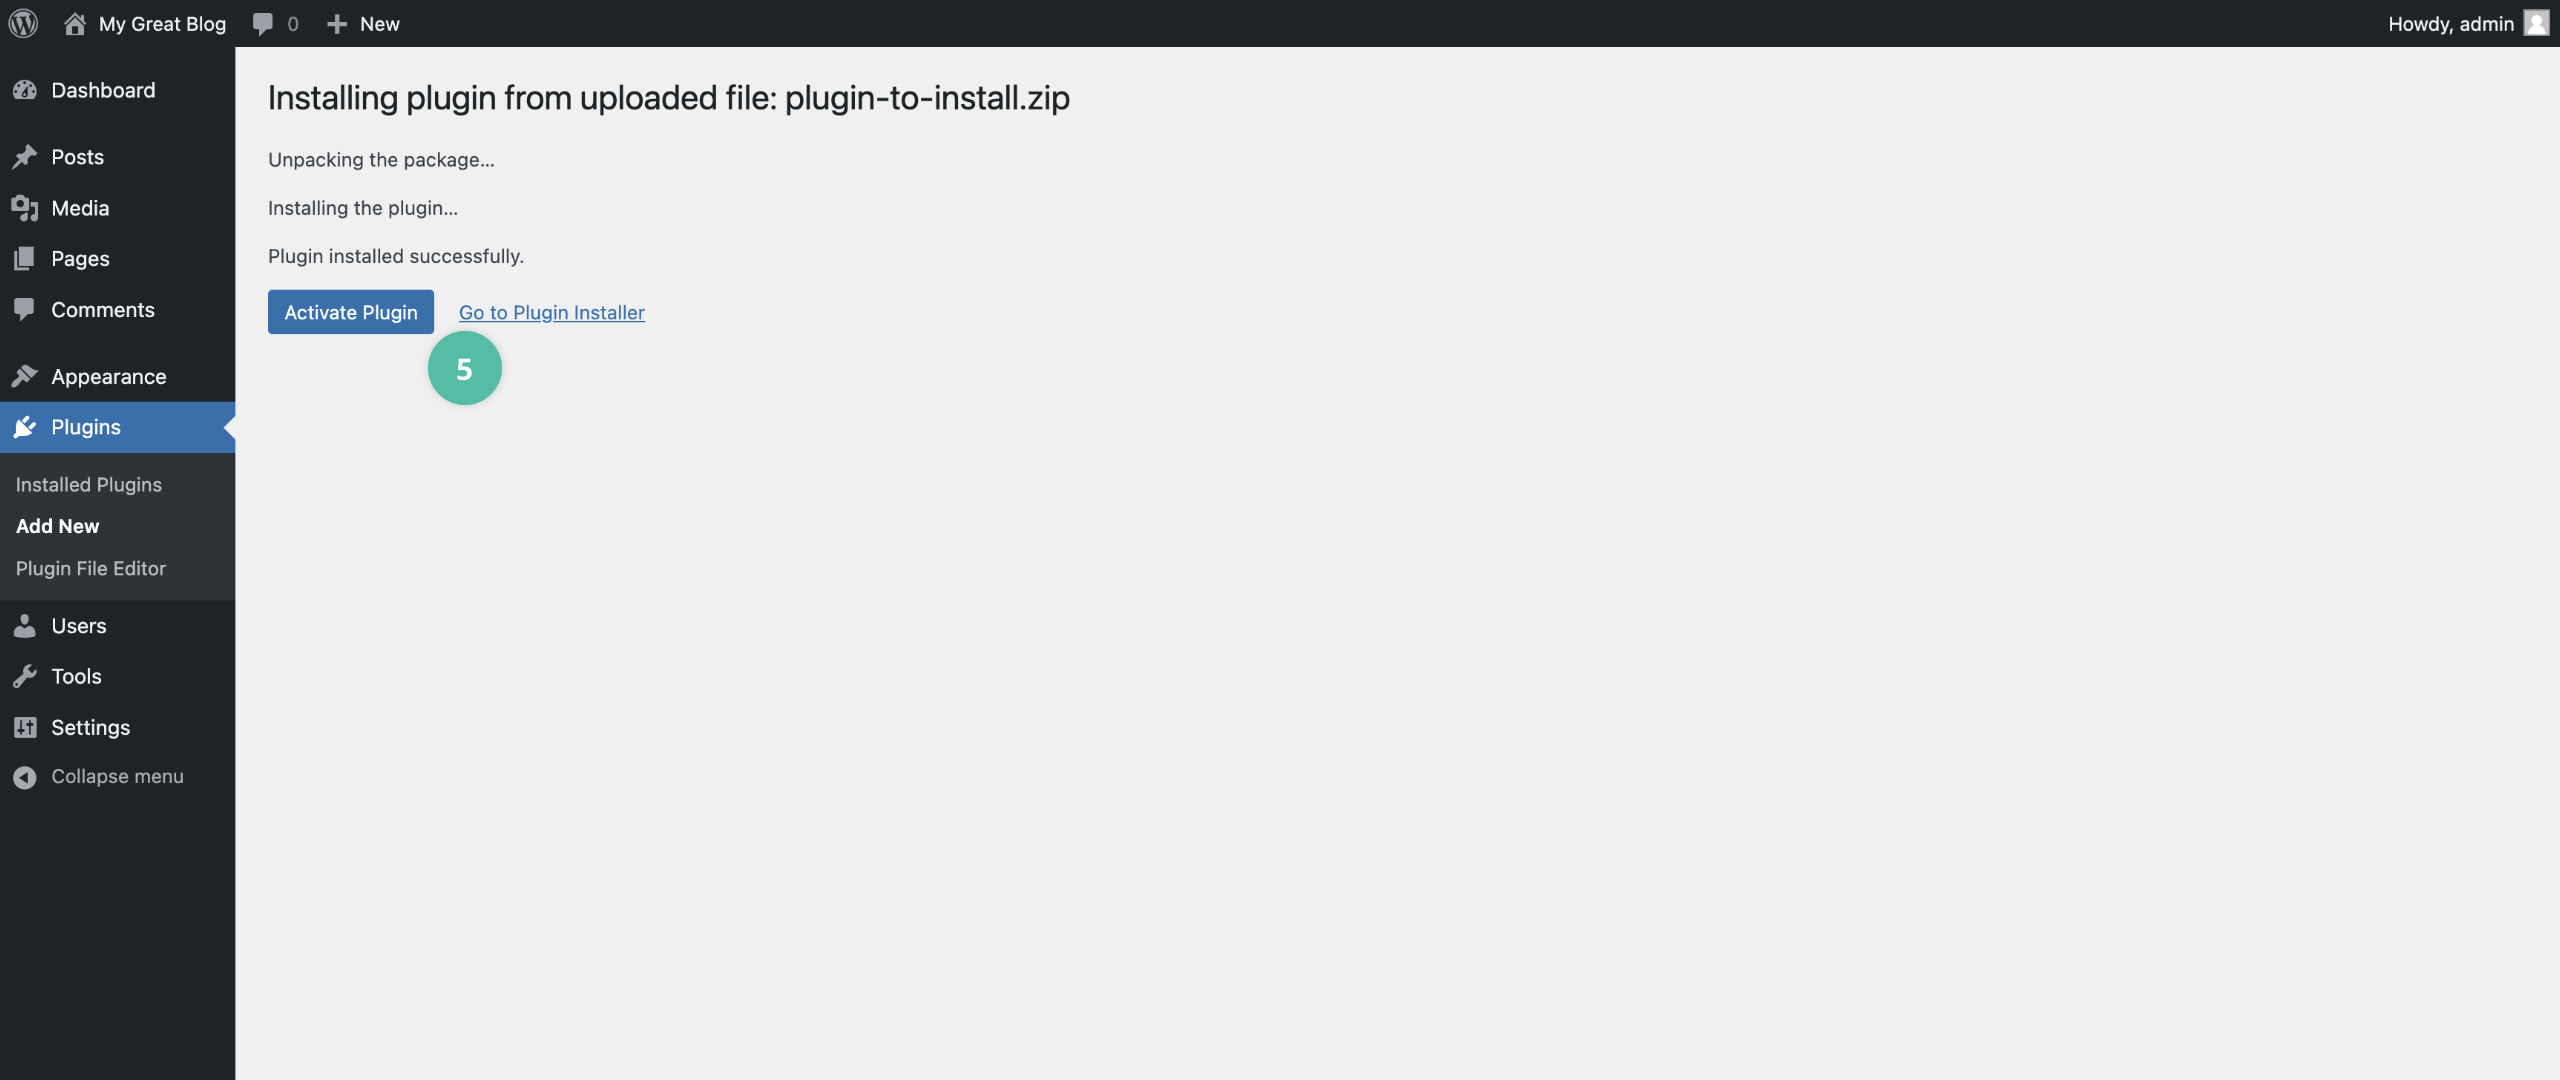
Step 2: After the installation is complete, click Activate Plugin to activate the plugin.
Installation & activation via FTP file upload
Step 1: Unzip the enwikuna-license-manager-pro.zip file you just downloaded.
Step 2: Log in to your server using e.g. FileZilla and open the path wp-content > plugins. Now upload the just unzipped folder enwikuna-license-manager-pro from your downloads’ folder to the plugins folder on your server. The plugin is now uploaded and ready for activation.
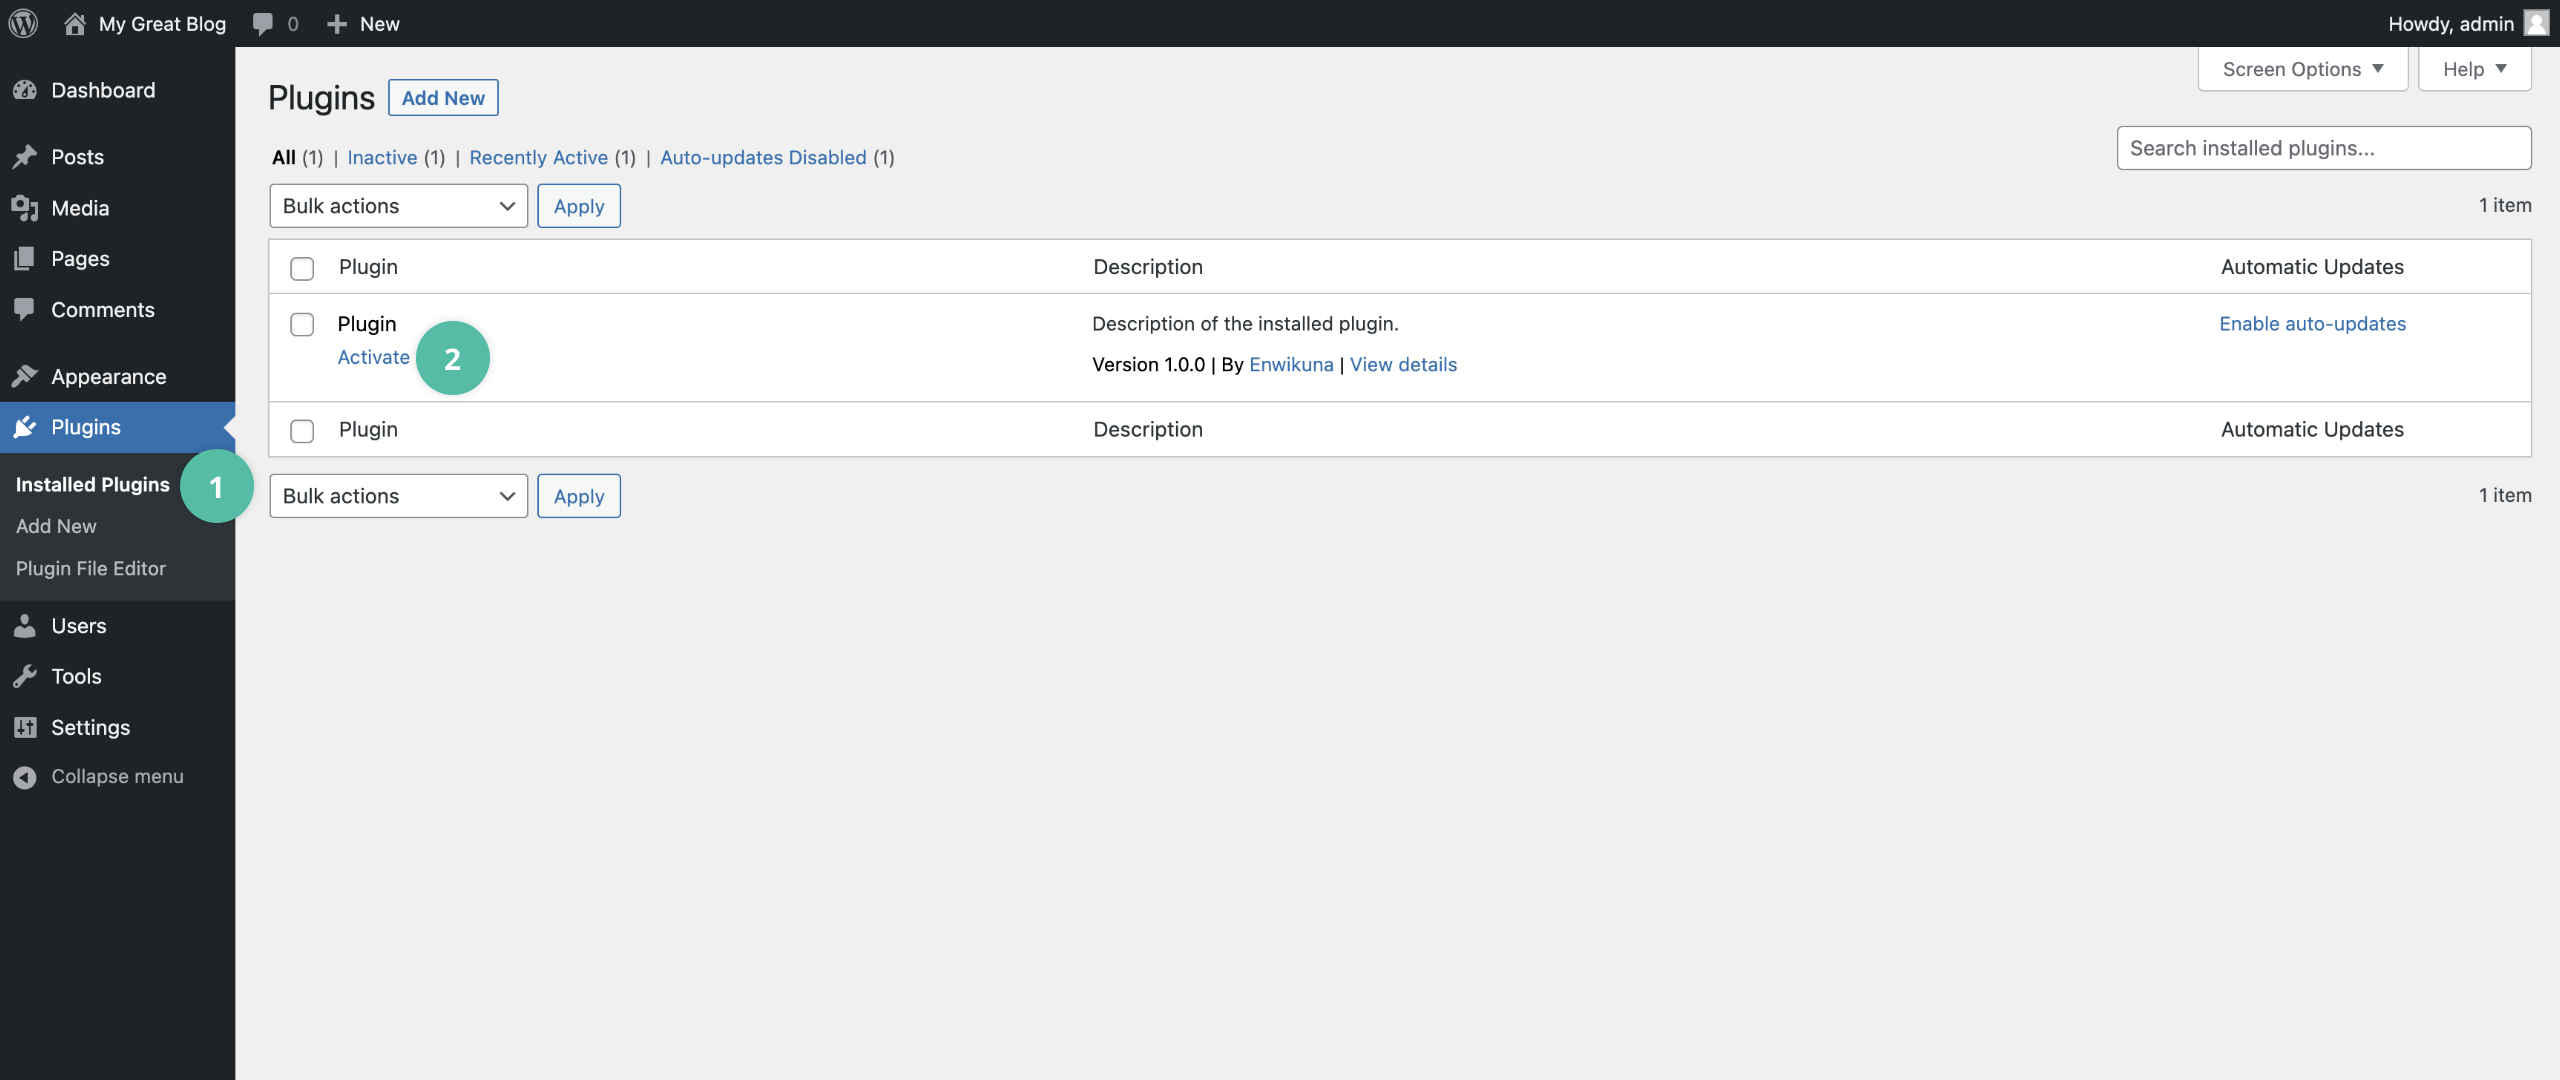
Step 3: Log in to your WordPress site and open the admin dashboard. Go to Plugins > Installed Plugins. There you will find the (installed) plugin you just uploaded. Now click Activate to activate the plugin.
Next steps
Congratulations! You have just successfully installed and activated the plugin. After activating Enwikuna License Manager Pro, the Enwikuna License Manager setup wizard is automatically displayed, since both plugins share a setup wizard. It will guide you through the activation process of your license and the most important settings. Please follow the setup wizard carefully. As an expert, you can skip the setup wizard and make all the settings manually. Learn more about the setup wizard.
Note: For the activation of your license, full functionality of Enwikuna License Manager Pro and receiving updates, the installation of Enwikuna Helper is required. You can find more information about Enwikuna Helper here, as well as in the setup wizard.