Overview
Updates of Enwikuna Helper, WordPress and other plugins are part of a secure operation of a WordPress site. Our development team works hard every day to release updates that add new features, fix issues, improve security, and generally make your user experience better than ever. But how can you update Enwikuna Helper without causing problems? Below, we’ll go over some common options.
Preparation
Please make sure you backup your WordPress site before each update. The backup should include the wp-content folder, as well as the database of your WordPress site. This ensures that your WordPress site can be recovered after a failed update.
Generally we test every update before we release it, however there may be some specifics on some WordPress sites that may interrupt or affect the update.
The easiest way to update Enwikuna Helper is from the Updates page in the admin dashboard of your WordPress site. Alternatively, you can download the latest version here and update it via the Plugins page in the admin dashboard or by uploading the unzipped installation file to the WordPress plugins folder via FTP.
Update via admin dashboard
Learn how to update Enwikuna Helper via the admin dashboard. Unlike the installation of Enwikuna Helper, there are two different ways to perform the update.
Option 1: Updates page
Probably the easiest way to update Enwikuna Helper is by using the Updates page in the admin dashboard.
Step 1: Log in to your WordPress site and open the admin dashboard. Go to Dashboard > Updates. You will now see a list of existing updates of your plugins including WordPress updates. If no updates are visible, you can clear the update cache by clicking the Check again button, which will ideally show new updates, since the cache only clears automatically once a day. This avoids excessive requests to our backend, which provides the updates.
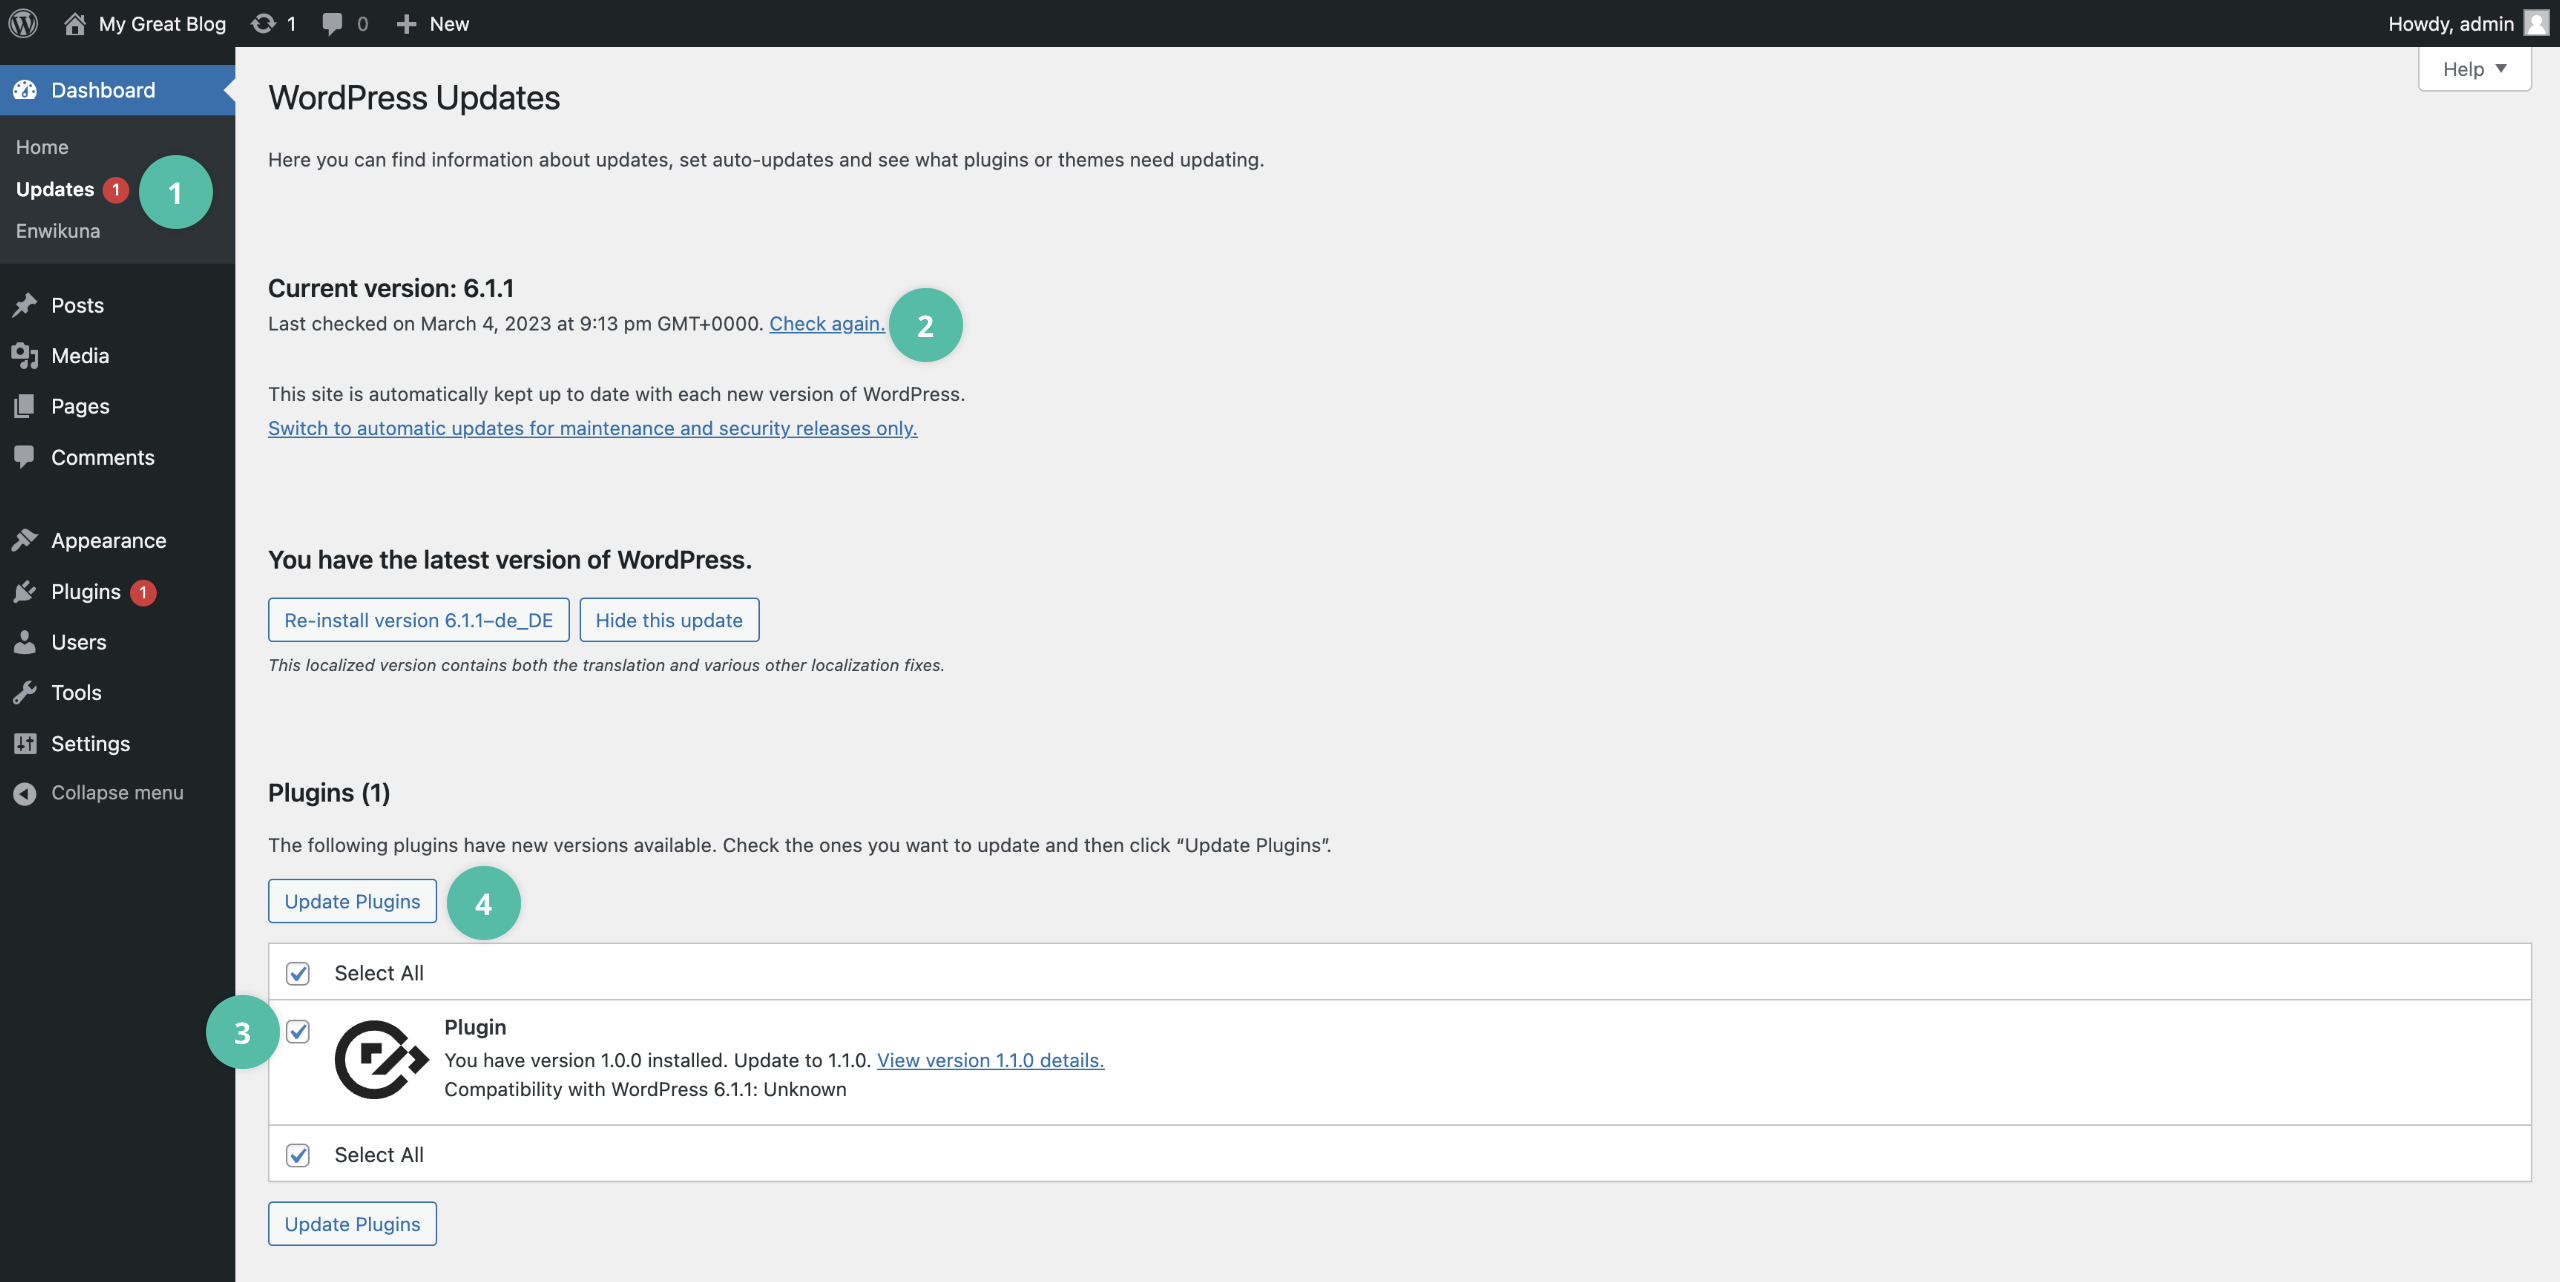
Step 2: If there is an update for Enwikuna Helper, you can find it in the Plugins update table. Now activate the checkbox in the table and press the Update Plugins button. Enwikuna Helper will now be updated automatically.
Option 2: Plugins page
Another way to update is via the Plugins page in the admin dashboard. For this you need the latest installation file of Enwikuna Helper.
Step 1: Log in to your WordPress site and open the admin dashboard. Go to Plugins > Add New > Upload Plugin. Now use the Select file button to select the enwikuna-helper.zip file you just downloaded from your downloads’ folder. Now start the installation by clicking the Install Now button.
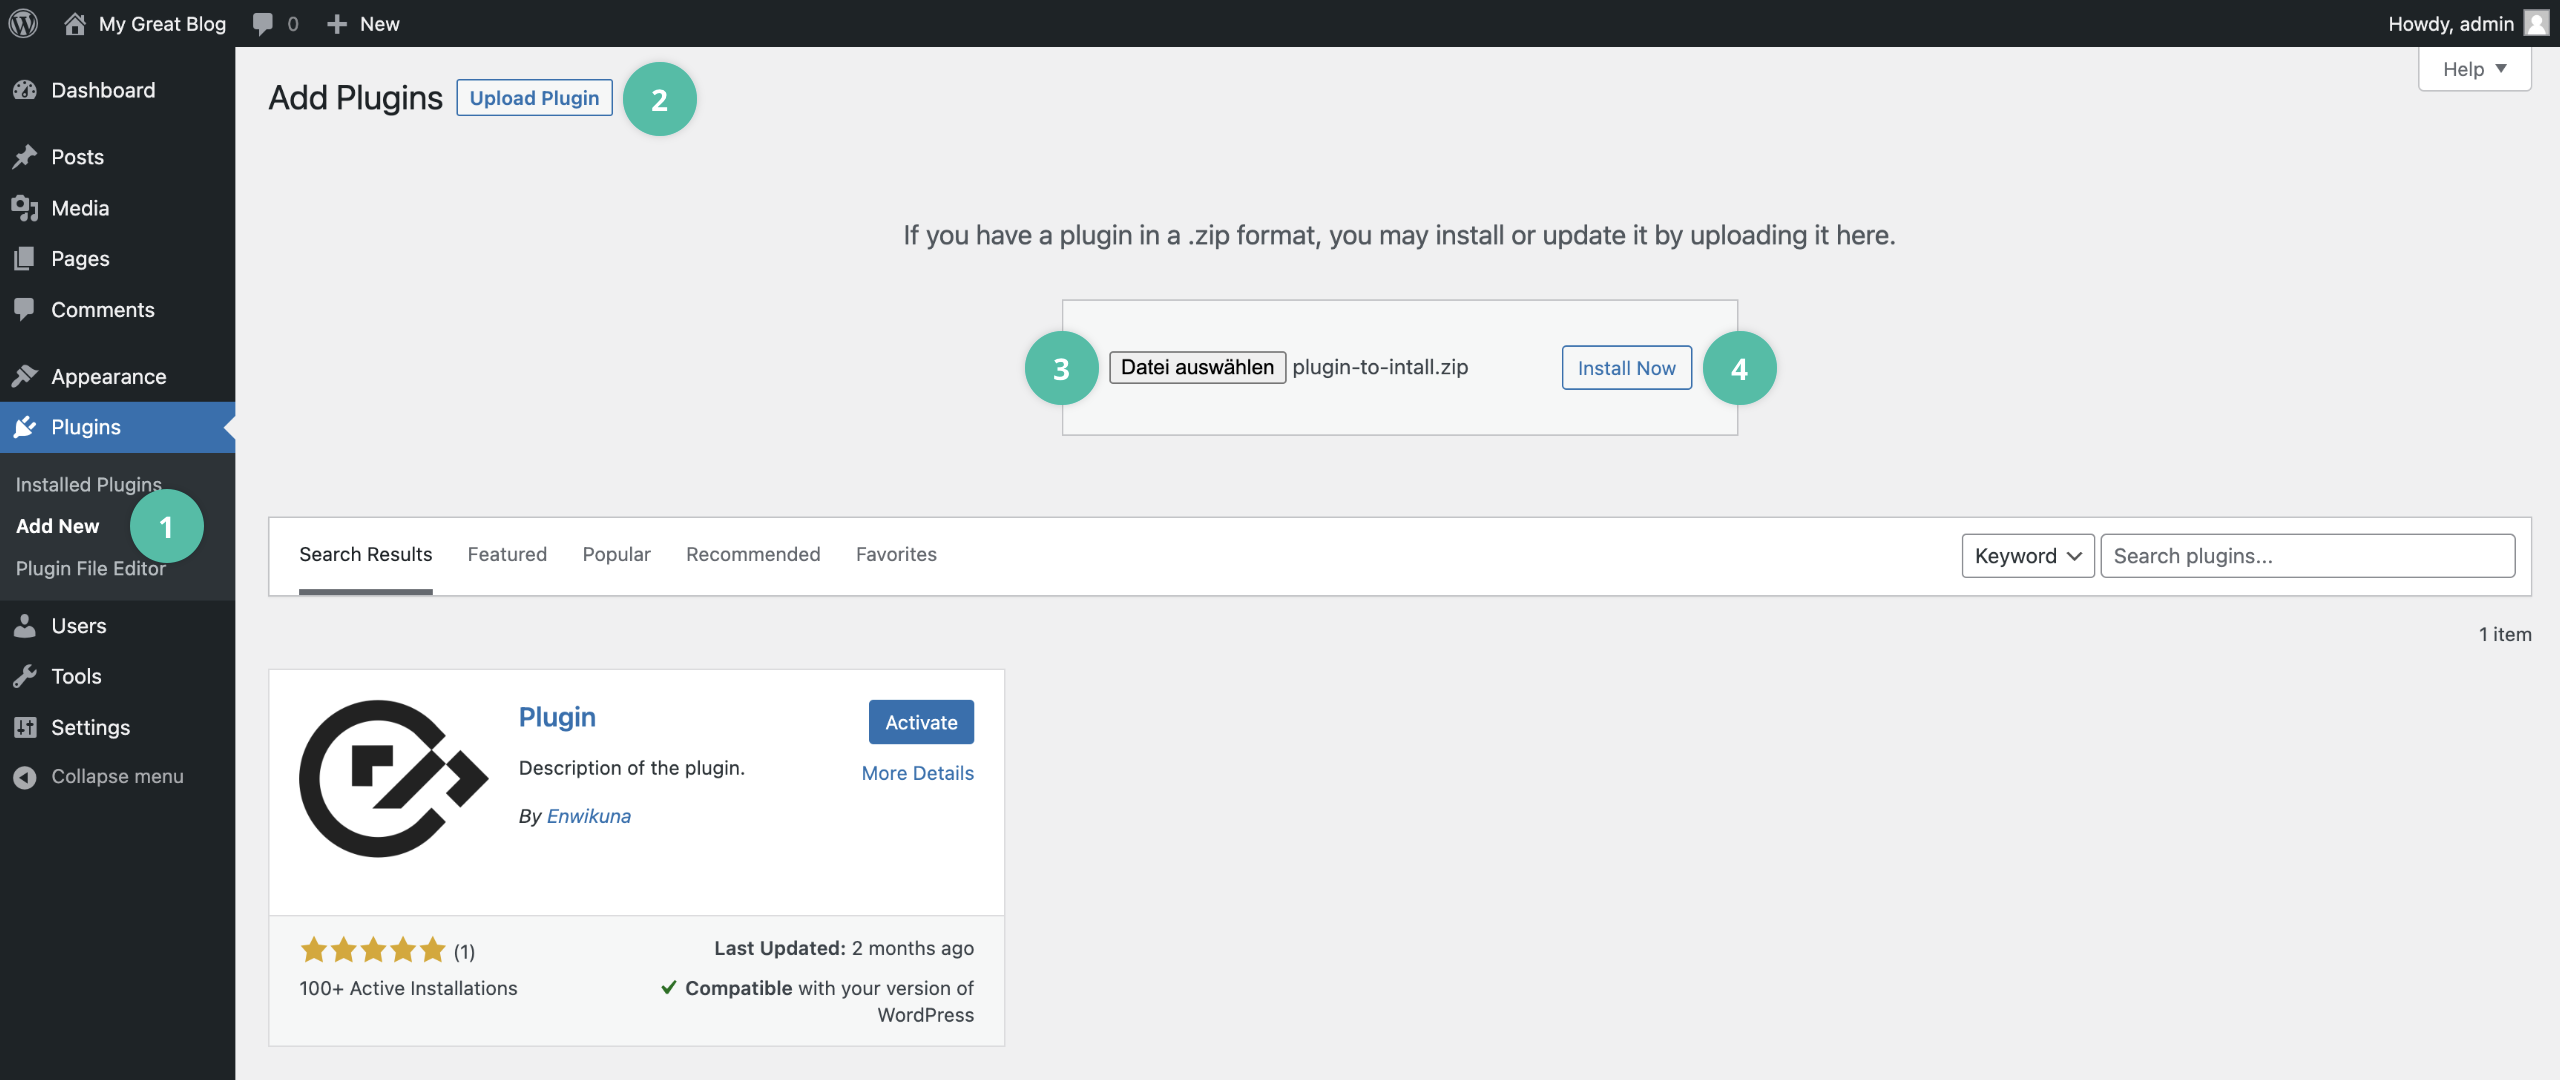
In some cases you will be asked to replace the existing version during the update process. You must confirm this accordingly.
Update via FTP file upload
The last option is to update via the FTP file upload. Also, you will need the latest installation file of Enwikuna Helper.
Step 1: Unzip the enwikuna-helper.zip file you just downloaded.
Step 2: Log in to your server using e.g. FileZilla and open the path wp-content > plugins. Now upload the just unzipped enwikuna-helper folder from your downloads’ folder to the plugins folder on your server and completely overwrite the current files when asked. The plugin is now updated.