Overview
Enwikuna License Manager offers various settings. Through these settings, various actions can be controlled and influenced. Some settings are only active after the purchase & activation of Enwikuna License Manager Pro, because the functionality behind them are only integrated within Enwikuna License Manager Pro.
General
In the general settings you can define general settings, which mainly affect the plugin itself.
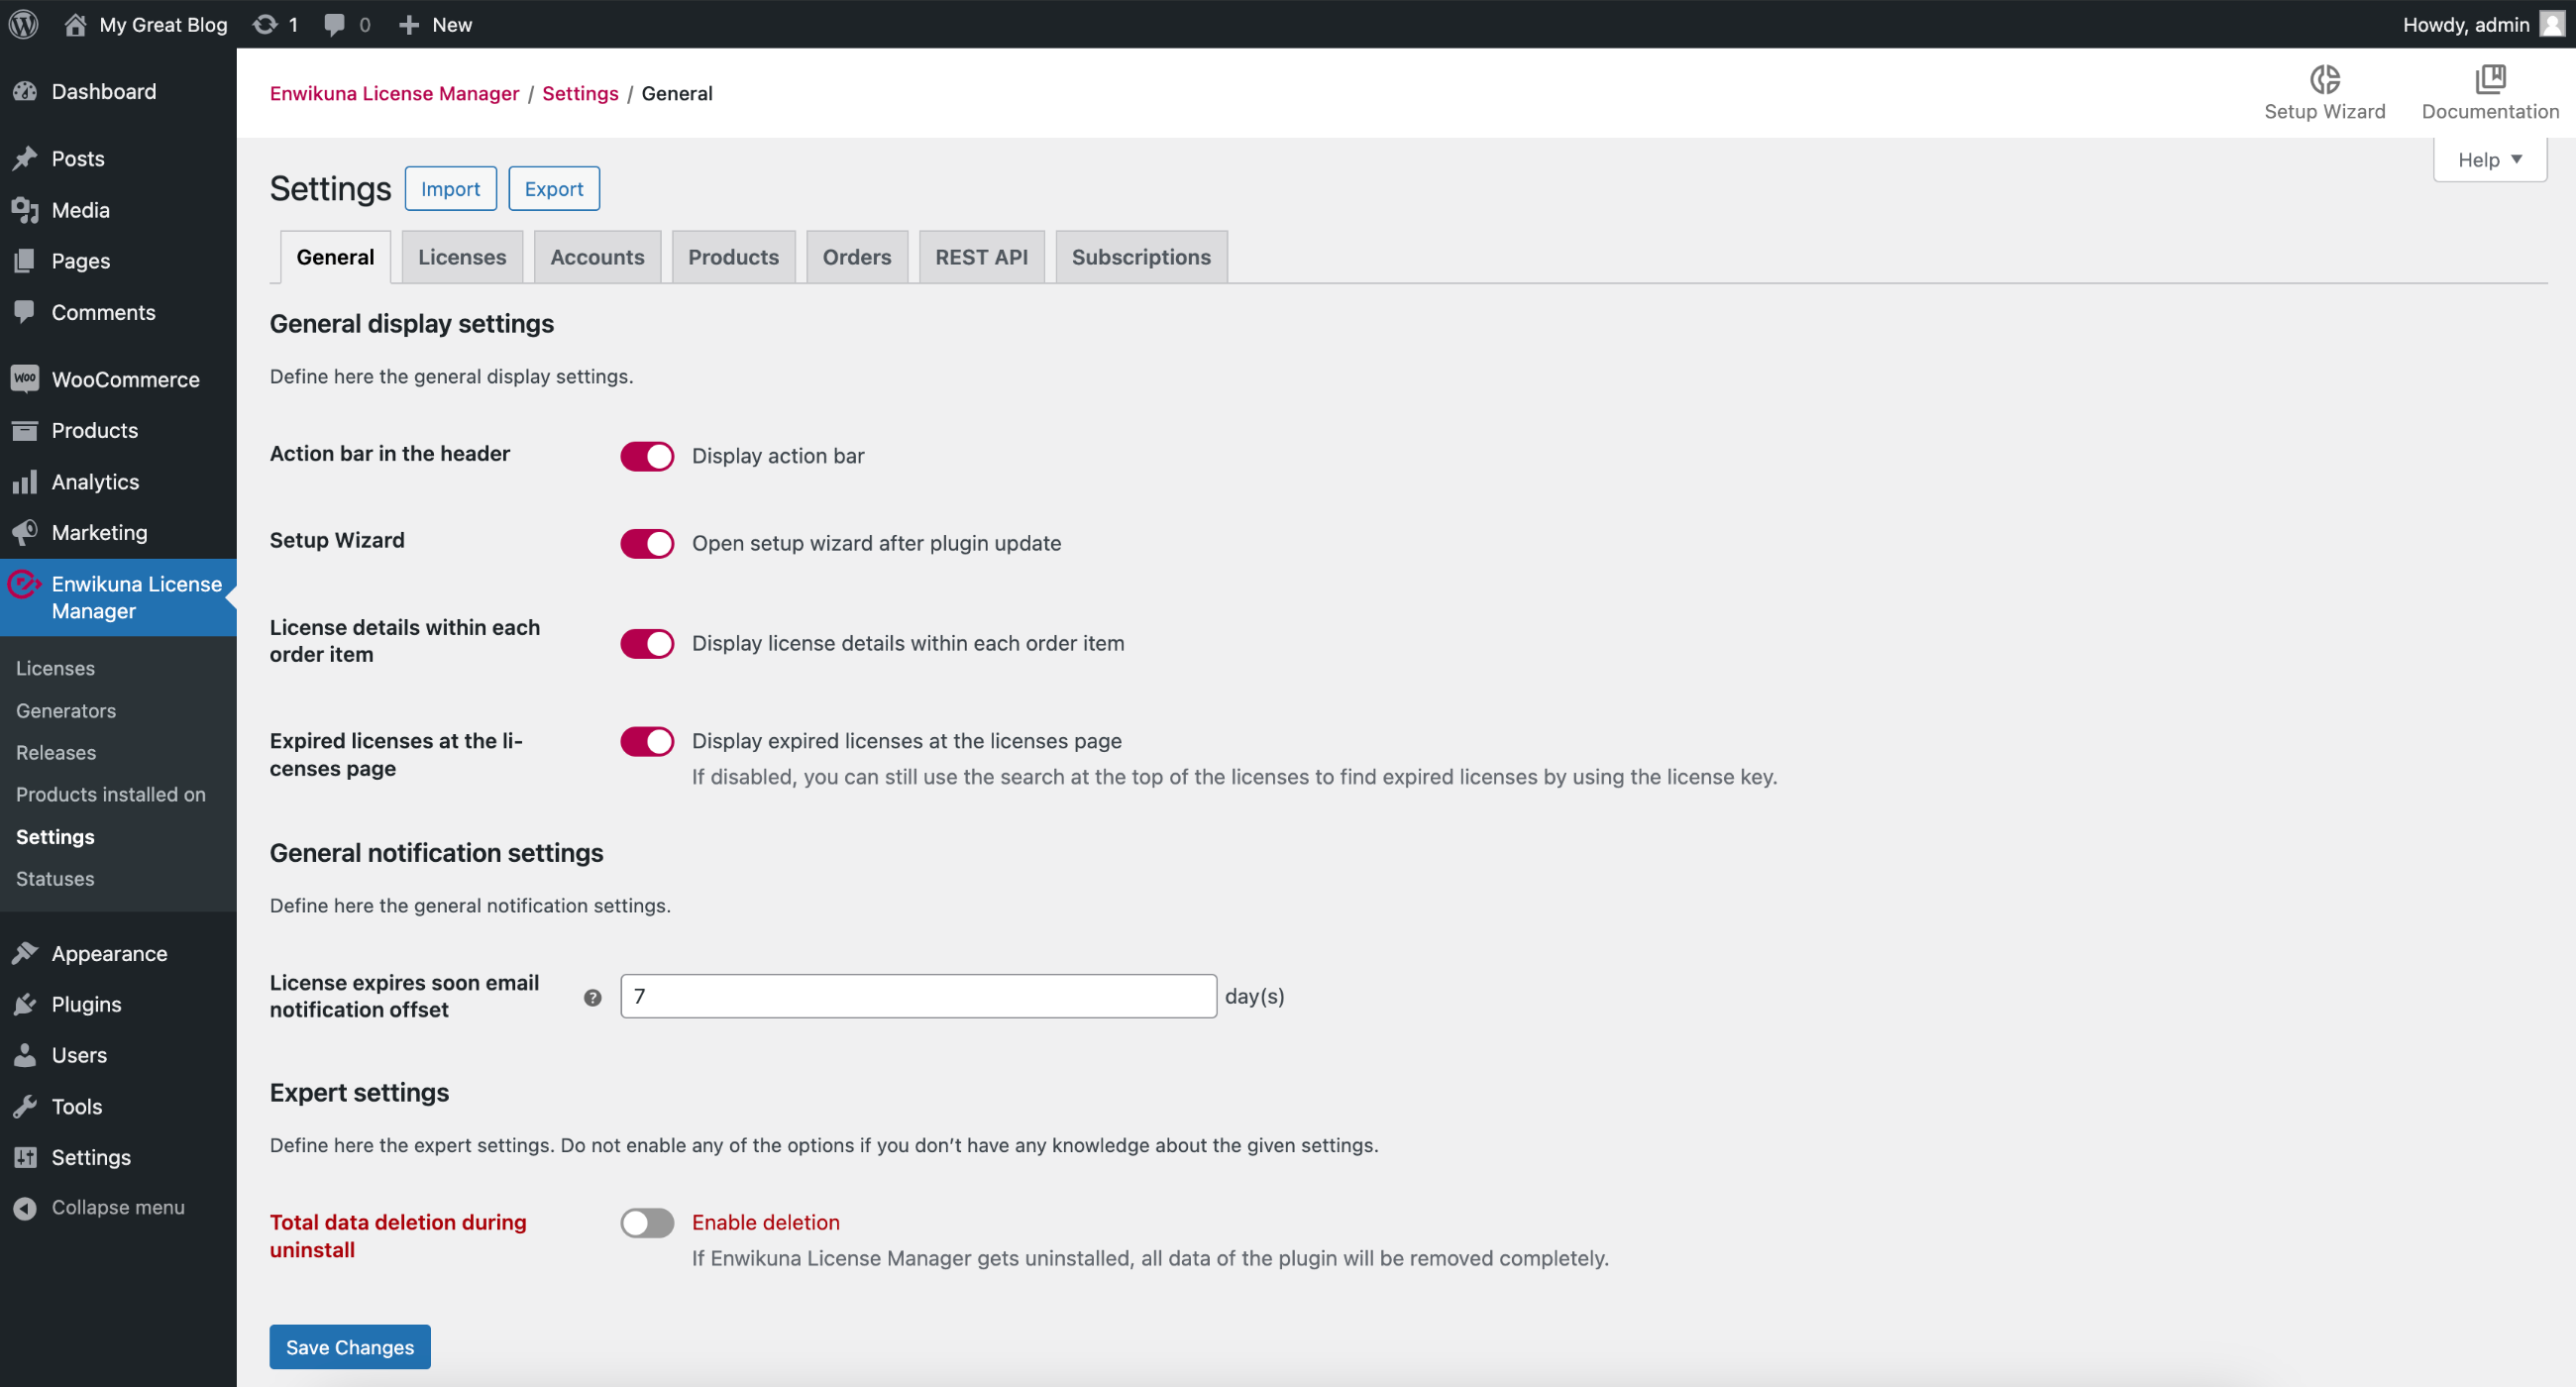
General display settings
Action bar in the header
Here you can define whether the action bar should be displayed in the header at the top right (e.g. Setup Wizard).

Setup Wizard
Here, you can define whether the setup wizard should be displayed after an update of Enwikuna License Manager or Enwikuna License Manager Pro. This is useful, for example, when an update includes an important change that has been built into the setup wizard, as this is very important in the configuration. However, if this bothers you, you can disable this setting and check the settings yourself after each update.
License details within each order item
Here you can define whether you want to display the license details within the respective order item of an order in the admin backend or not.

Expired licenses at the licenses page
Here you can define whether you want to display expired licenses on the licenses page or not. This can be useful, for example, to display only active licenses, unless you care about expired licenses. Don’t worry, your expired licenses are still saved in the database and will not be lost by this setting – they will only be hidden.
General notification settings
License expires soon email notification offset
Here you can set the offset value in days, which will be used for sending the email notification about soon expiring licenses to the customer. For example, if you enter the number 7 here, the notification will be sent to the customer 7 days before the license expires.
You can read here how you can disable email notifications in general.
Expert settings
Total data deletion during uninstall
Activate this setting before uninstalling Enwikuna License Manager or Enwikuna License Manager Pro to completely remove the components of the respective plugin. This includes all folders, files, database tables, settings, roles / permissions and cryptographic keys. Alternatively, you can set a constant within your wp-config.php:
define( 'ELM_REMOVE_ALL_DATA', true );For Enwikuna License Manager Pro:
define( 'ELMP_REMOVE_ALL_DATA', true );This has 1:1 the same effect, but is not as user-friendly. Please note that this step cannot be undone! Gone is gone.
Licenses
Inside the license settings you can define all settings for the licenses. Note, that especially these settings should not be changed during operation.
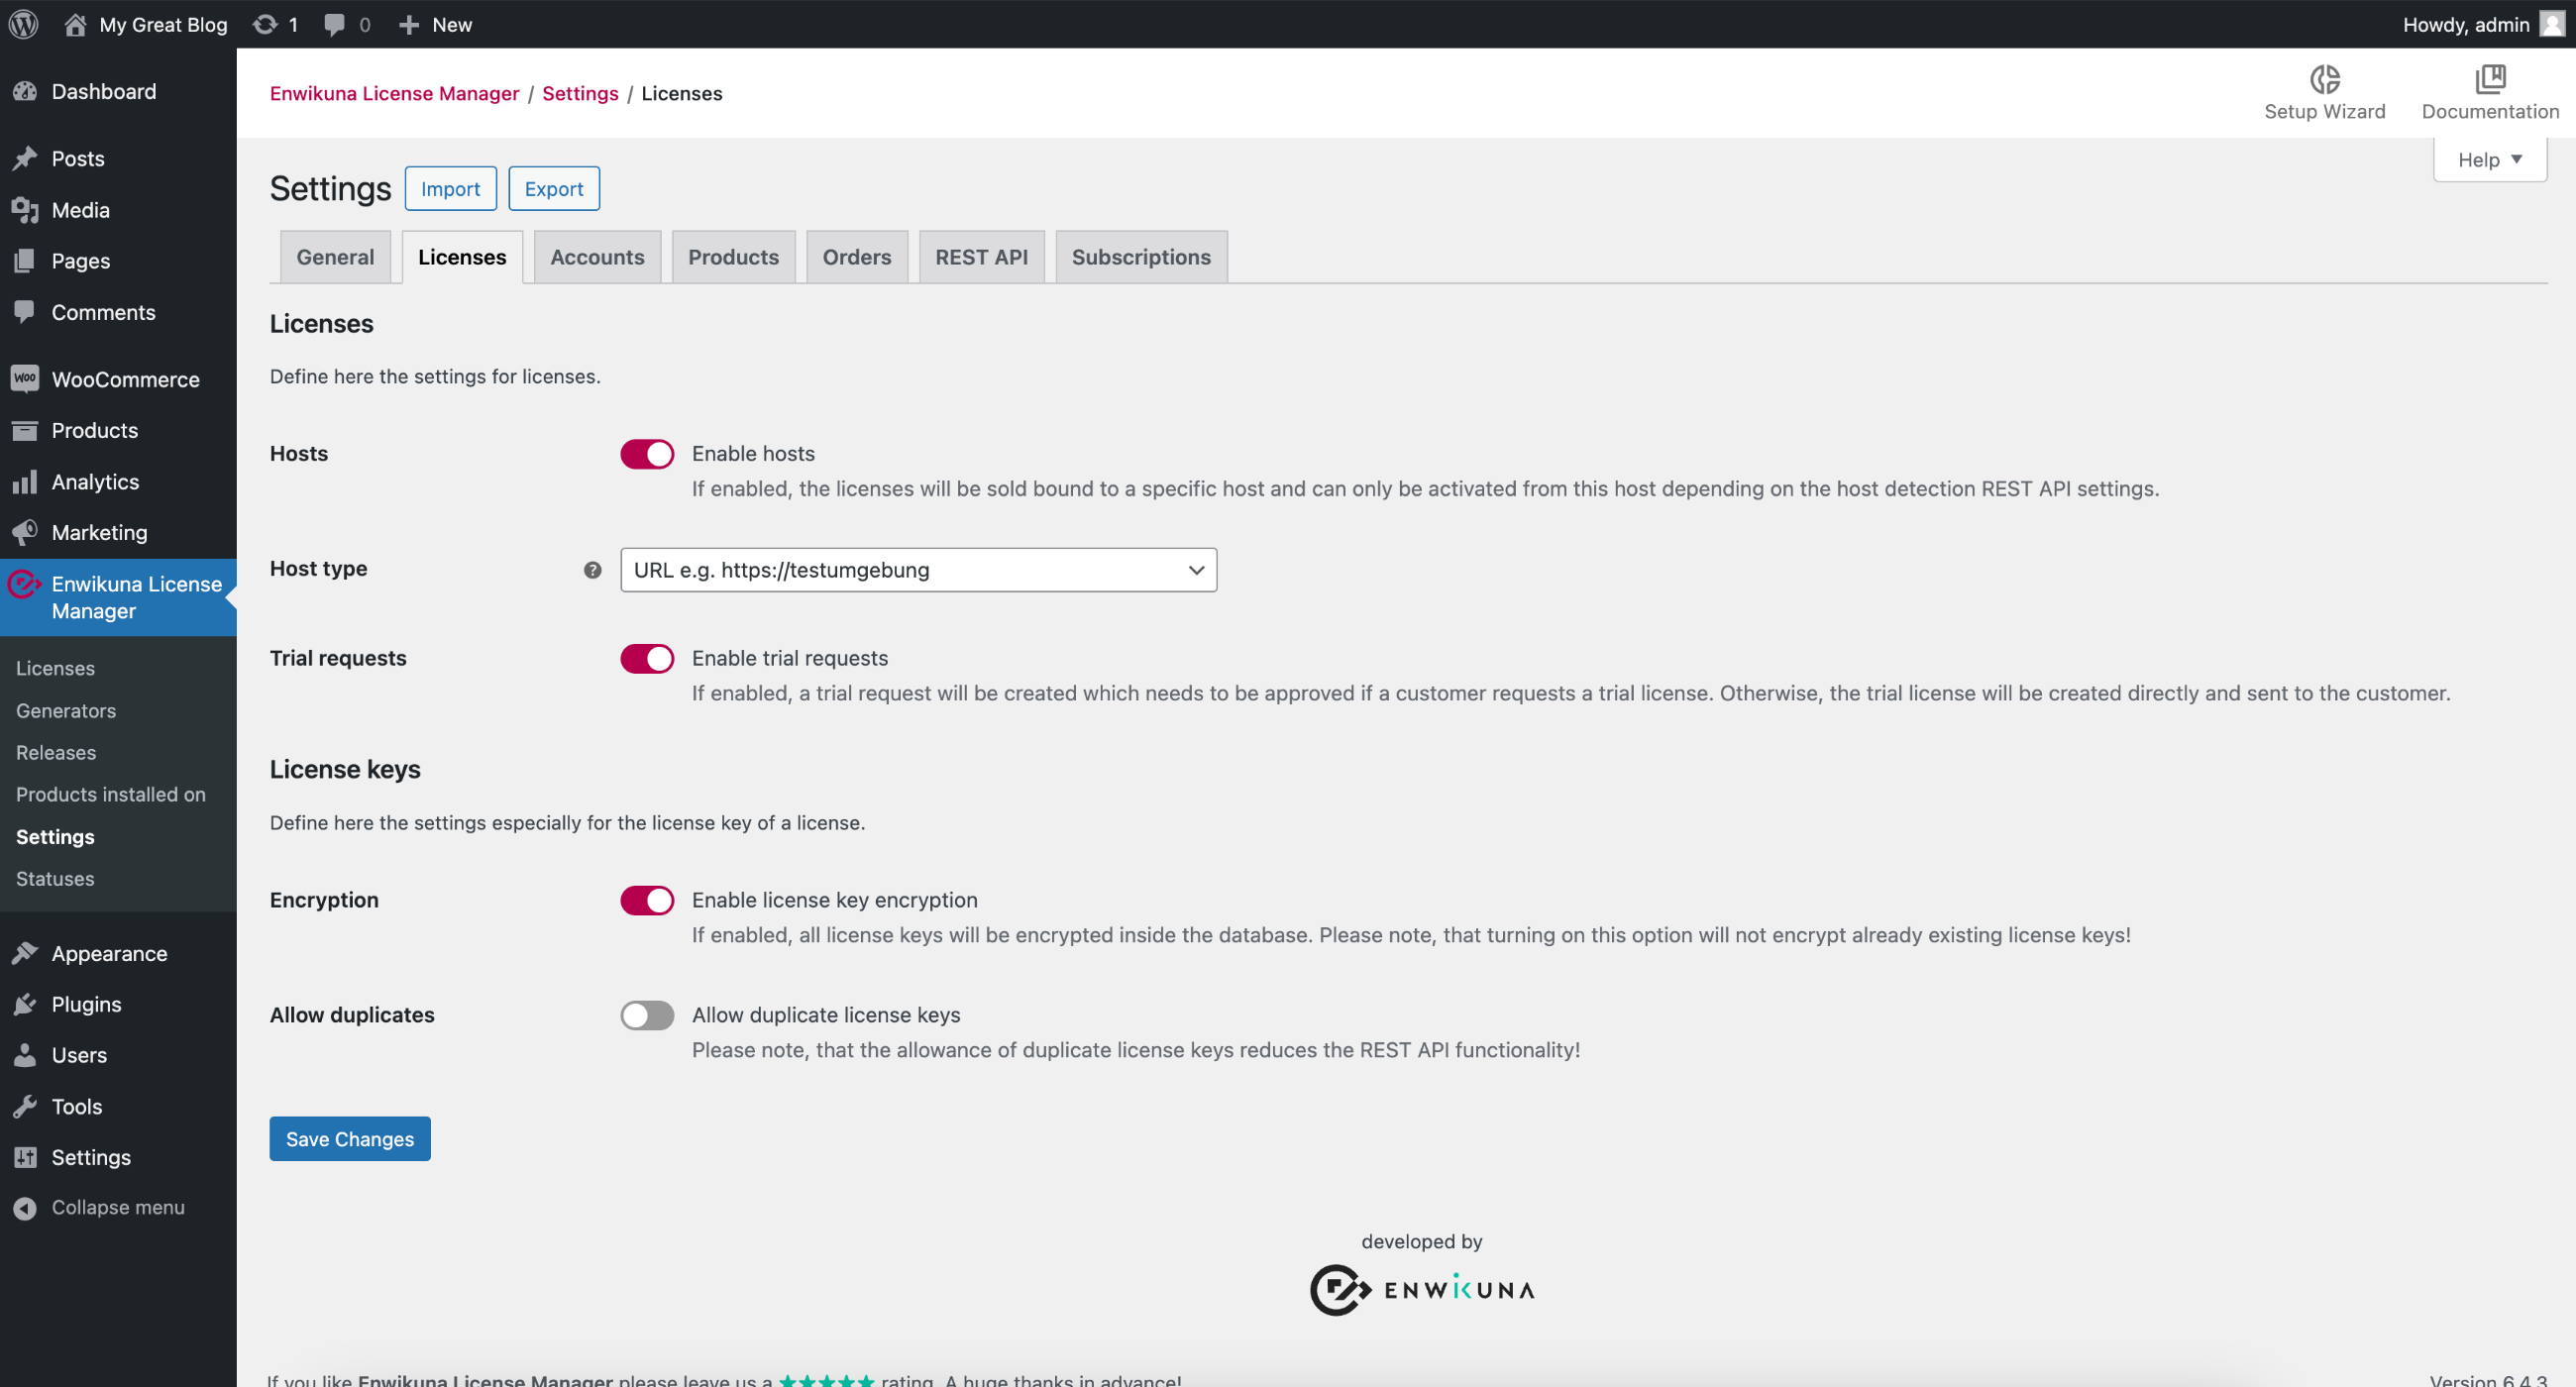
Hosts (Pro)
Here you can define whether you want to bind your licenses to specific hosts. By activating this setting, the following things become active:
- Inside license products in the store, an input field for hosts will be displayed, which must be filled in compulsorily (unless host binding is activated during an activation via the REST API within the REST API settings)
- Customers can see the defined hosts within the license details of a license inside the customer account & inside the order details
- When activating a license via the REST API, a host is required (depending on the REST API setting), which must be provided to check whether the license is allowed to be activated on the system
- When a license is manually renewed (no subscription), the hosts are transferred 1:1 to the new license, as long as the product of the license is a product that is sold from stock
- Inside a license within the customer account, a host selection will be displayed when adding a license activation, where a corresponding host must be selected for the activation (unless host binding is activated during an activation via the REST API within the REST API settings)
- A new column “Host” will be displayed within the activations table of a license in the customer account
- A new column “Hosts” will be displayed within the licenses overview at the dashboard
- A new column “Host” will be displayed within the activations of licenses in the dashboard
- A new column “Host” will be displayed within the trial requests for a trial license in the dashboard (unless host binding is activated during an activation via the REST API within the REST API settings)
- A new “Hosts” field will be displayed within the add & edit window of licenses
- A new “Host” field will be displayed within the add & edit window of license activations
- A new “Hosts” field will be displayed within the generate window of licenses
- Increasing the number of a license product inside the cart will be prevented – decreasing is possible
- When importing / exporting licenses, hosts will be imported / exported
Host type (Pro)
This setting is only relevant if hosts have been activated. In this case, you can specify which type of host you want to use. The most common are URLs of websites. We also use this functionality when it comes to activating Enwikuna License Manager Pro.
However, there may be use cases where the licenses need to be activated on devices or system apps. In this case, it makes sense to bind the activation to the MAC address or UUID of a device, for example.
We are happy to add more types upon request. Feel free to contact us about this!
Trial requests (Pro)
Trial requests extend the process for issuing trial licenses with a request & confirmation process between you and the customer. This means that the customer will not receive a trial license directly, but instead a request will first be created, which you have to approve within the table of trial requests inside the dashboard. Conversely, if trial requests are disabled, the customer receives his trial license directly. Of course, you can also unapprove a request! The idea behind this is that you can better control the allocation of trial licenses. This process naturally requires a certain amount of additional work.
You can find the trial requests within the dashboard on the licenses page!

License key
Encryption (Pro)
Enable this setting if you want your license keys to be encrypted within the database. This prevents your license keys from being stored in plain text within your database. Please note that you need to configure the Enwikuna License Manager Pro Encryptor for this. During configuration, an encryptor key will be stored inside your wp-config.php file, which will be used to encrypt and decrypt the license keys. Do not lose this key, otherwise your license keys will be lost forever!
Please note that a later activation of this setting will not encrypt your already existing license keys. These will remain unencrypted inside the database.
Allow duplicates
Activate this setting to allow license key duplicates inside the database. This makes only sense in very few use cases and also restricts the availability of some REST API routes as they are based on unique license keys. If duplicates do exist, some functions may no longer work 100 %, which is why we have decided to restrict functionality here in order to continue to ensure data integrity.
Distributors (Pro)
In the distributor settings, you can define all settings for distributors & distributor codes.
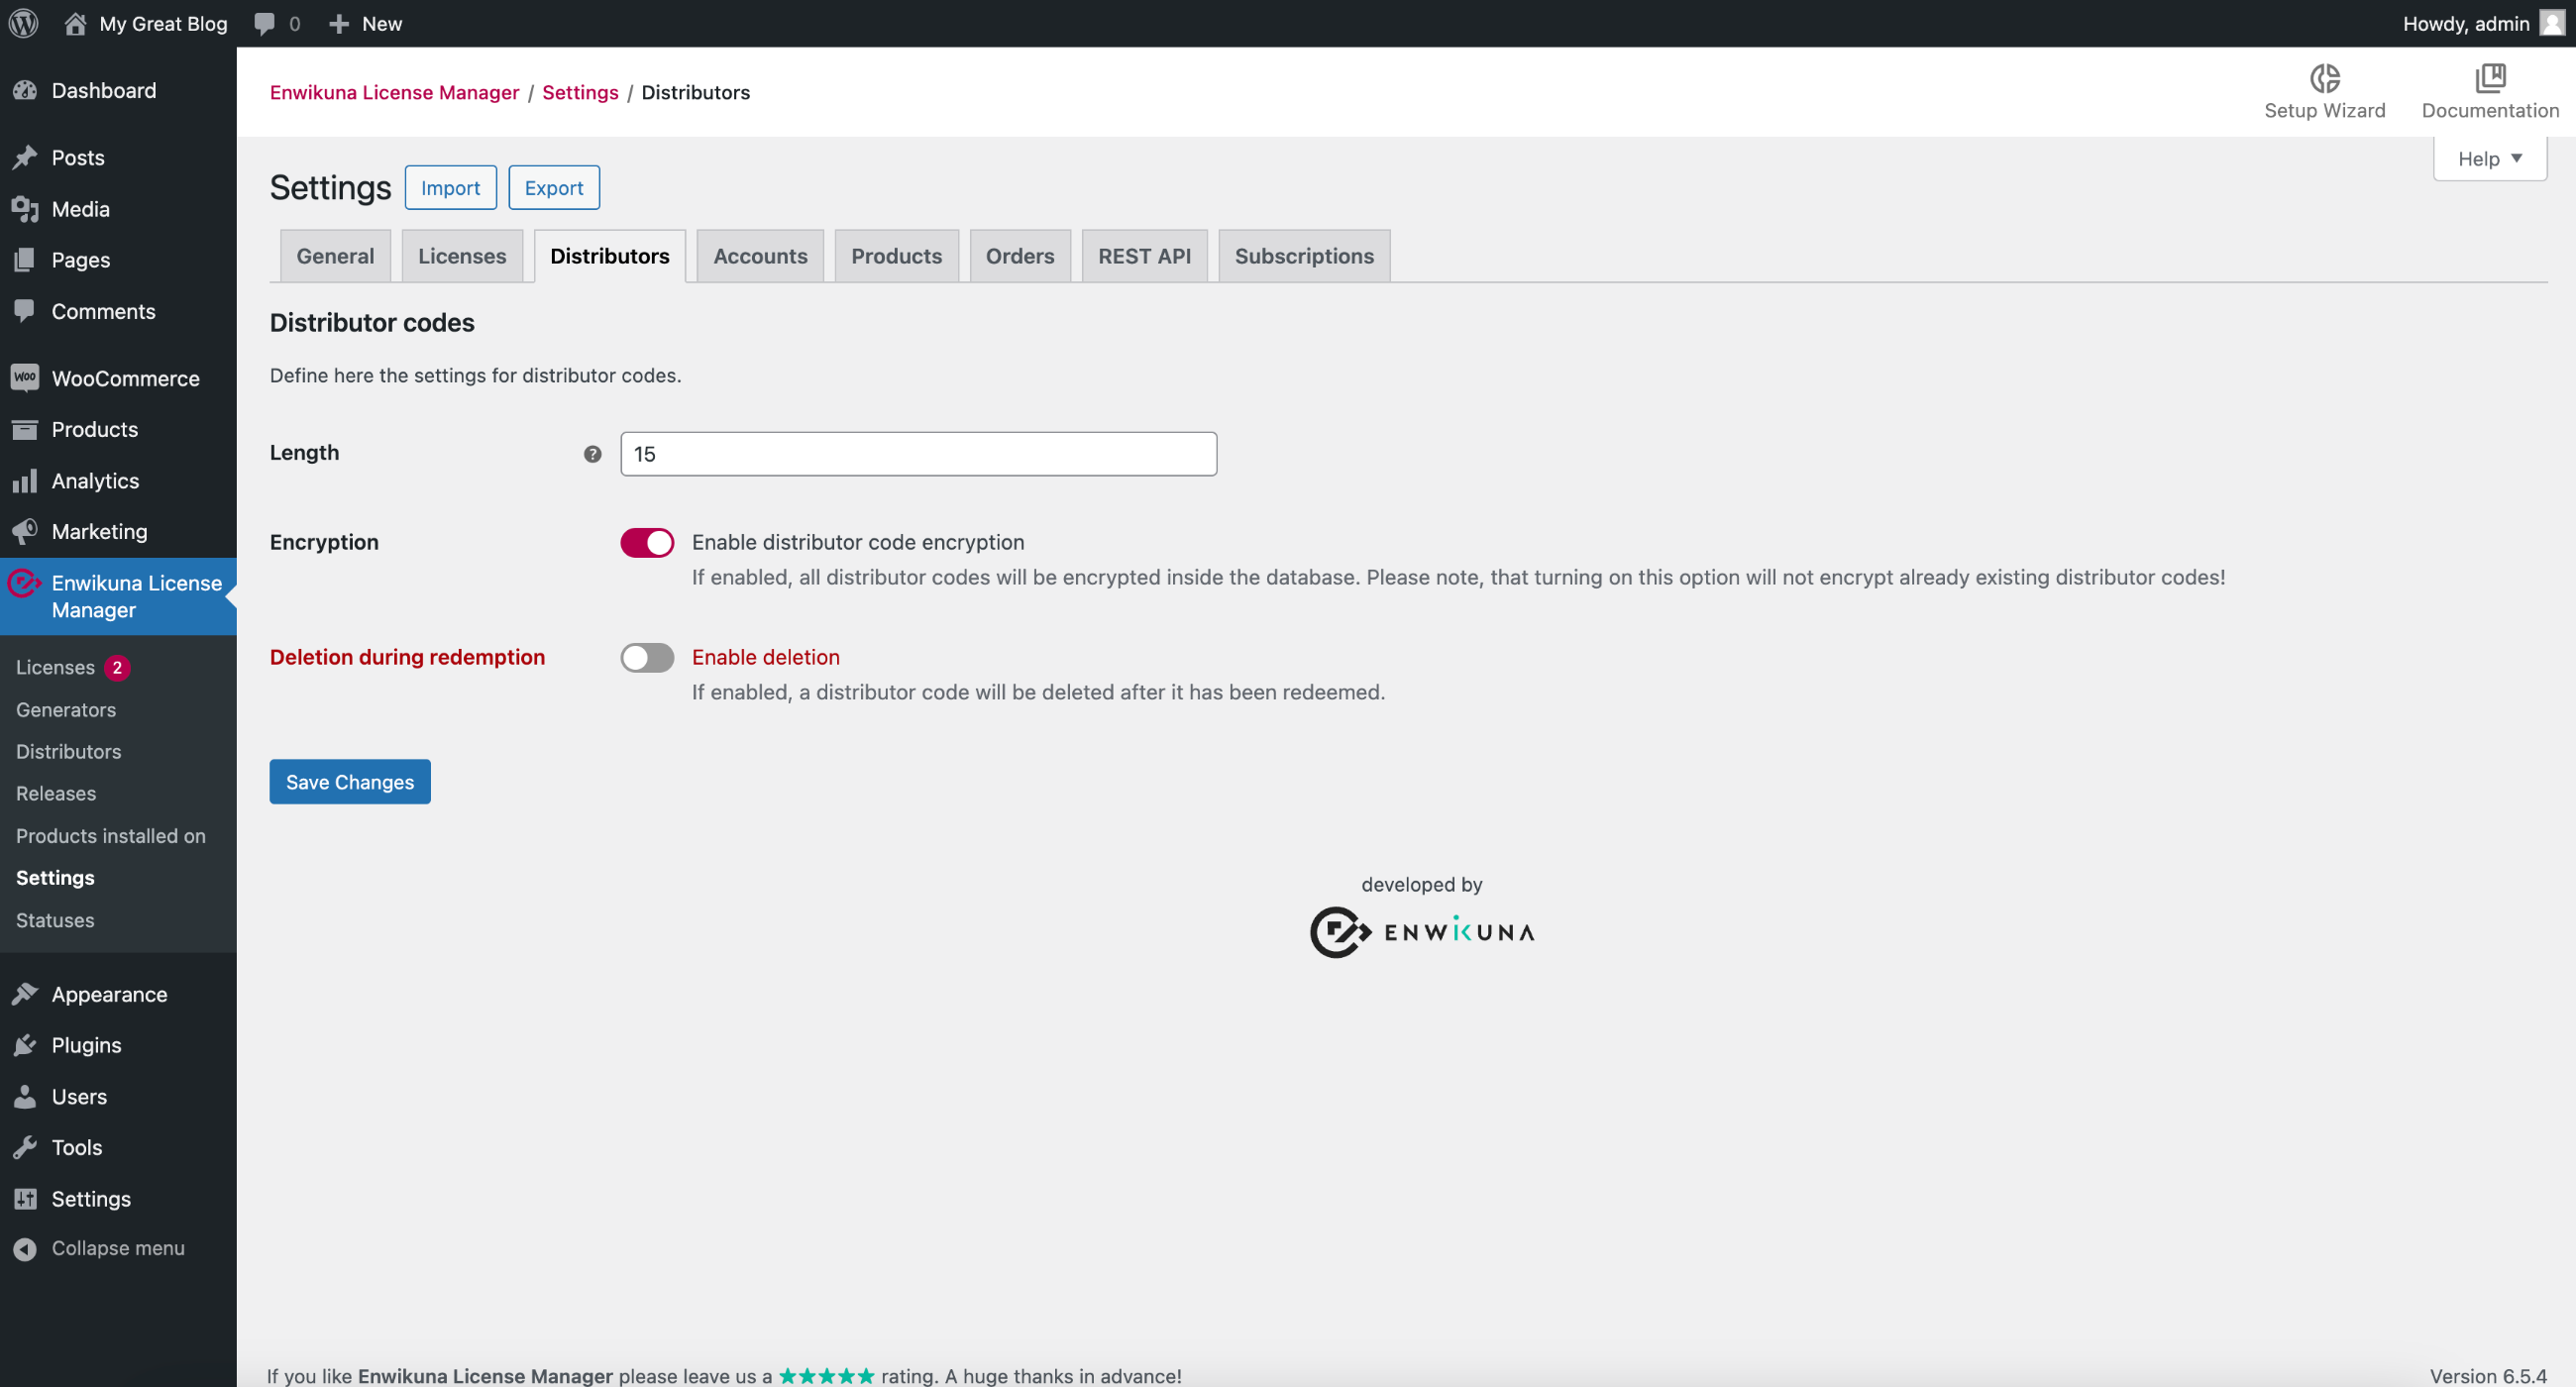
Distributor codes
Length
Here you can define the length of the code to be generated.
Encryption
Enable this setting if you want your codes to be encrypted in the database. This prevents the codes from being stored in plain text within your database. Please note that you need to configure the Enwikuna License Manager Pro Encryptor for this. During configuration, an encryptor key will be stored inside your wp-config.php file, which will be used to encrypt and decrypt the codes. Do not lose this key, otherwise your codes will be lost forever!
Please note that a later activation of this setting will not encrypt your already existing codes. These will remain unencrypted inside the database.
Deletion during redemption
Activate this setting if you want to delete a distributor code immediately after it has been redeemed.
Accounts
Within the account settings you can define all the settings related to accounts.
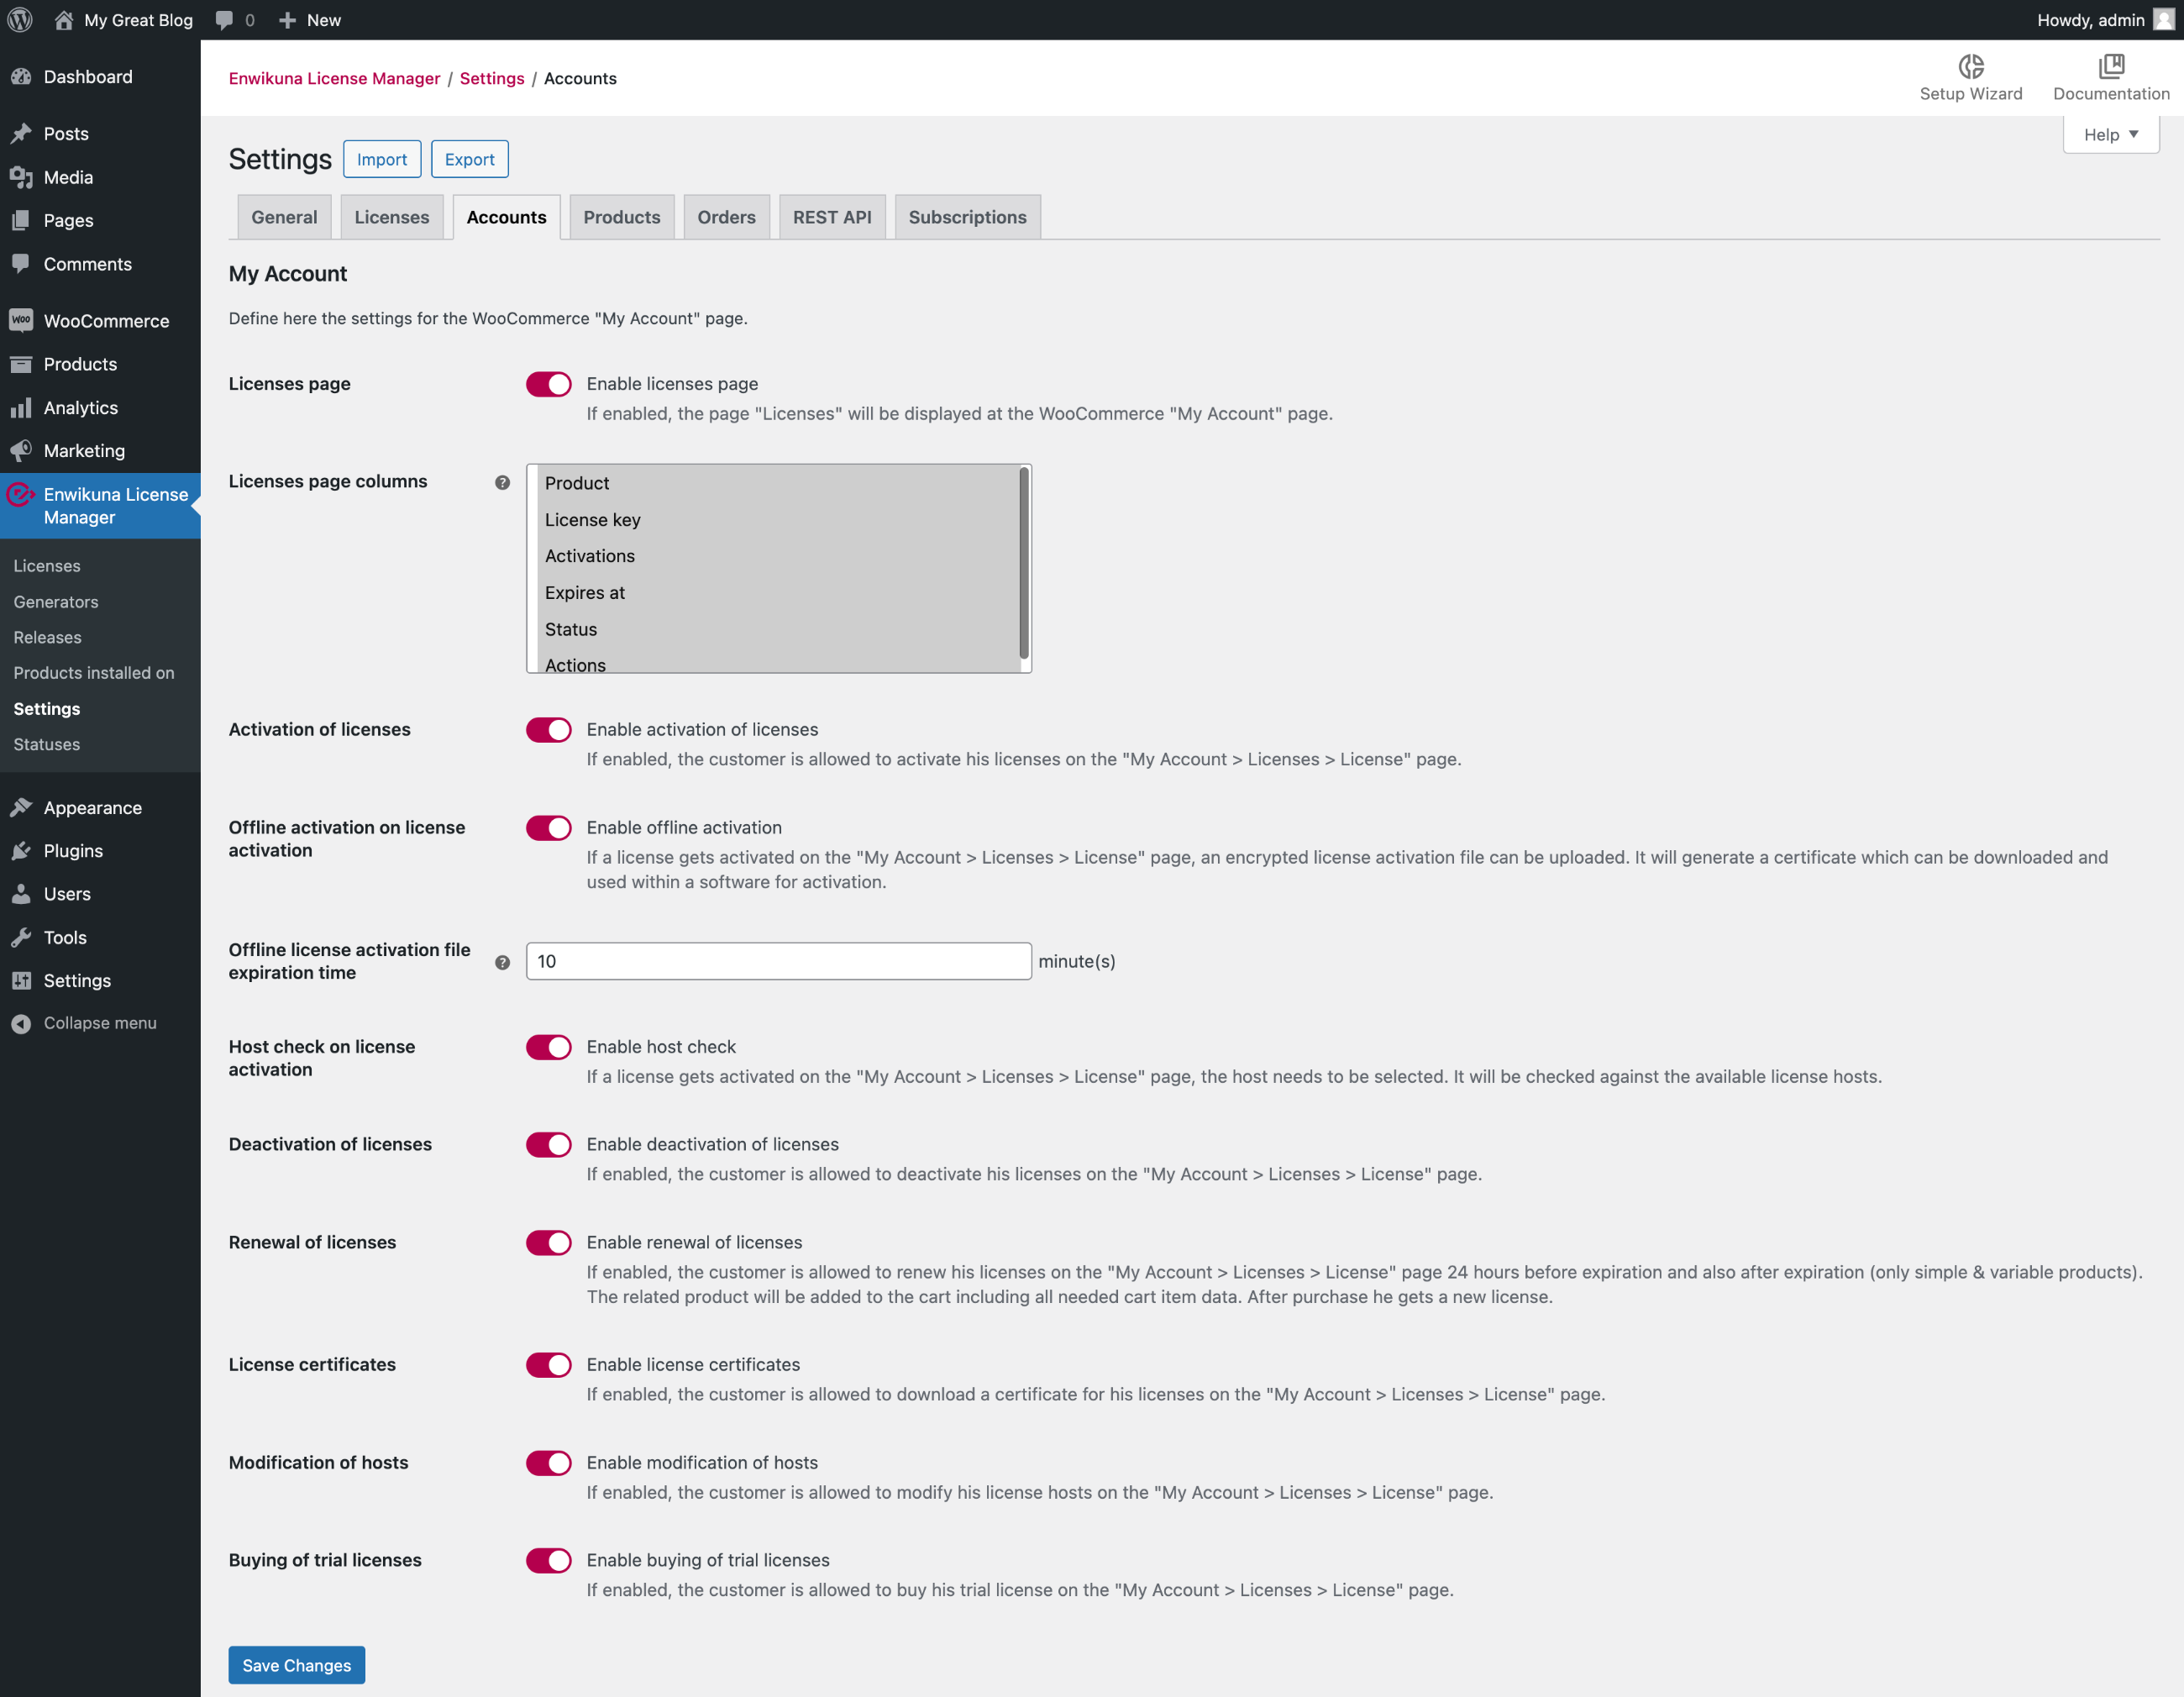
My Account
Licenses page
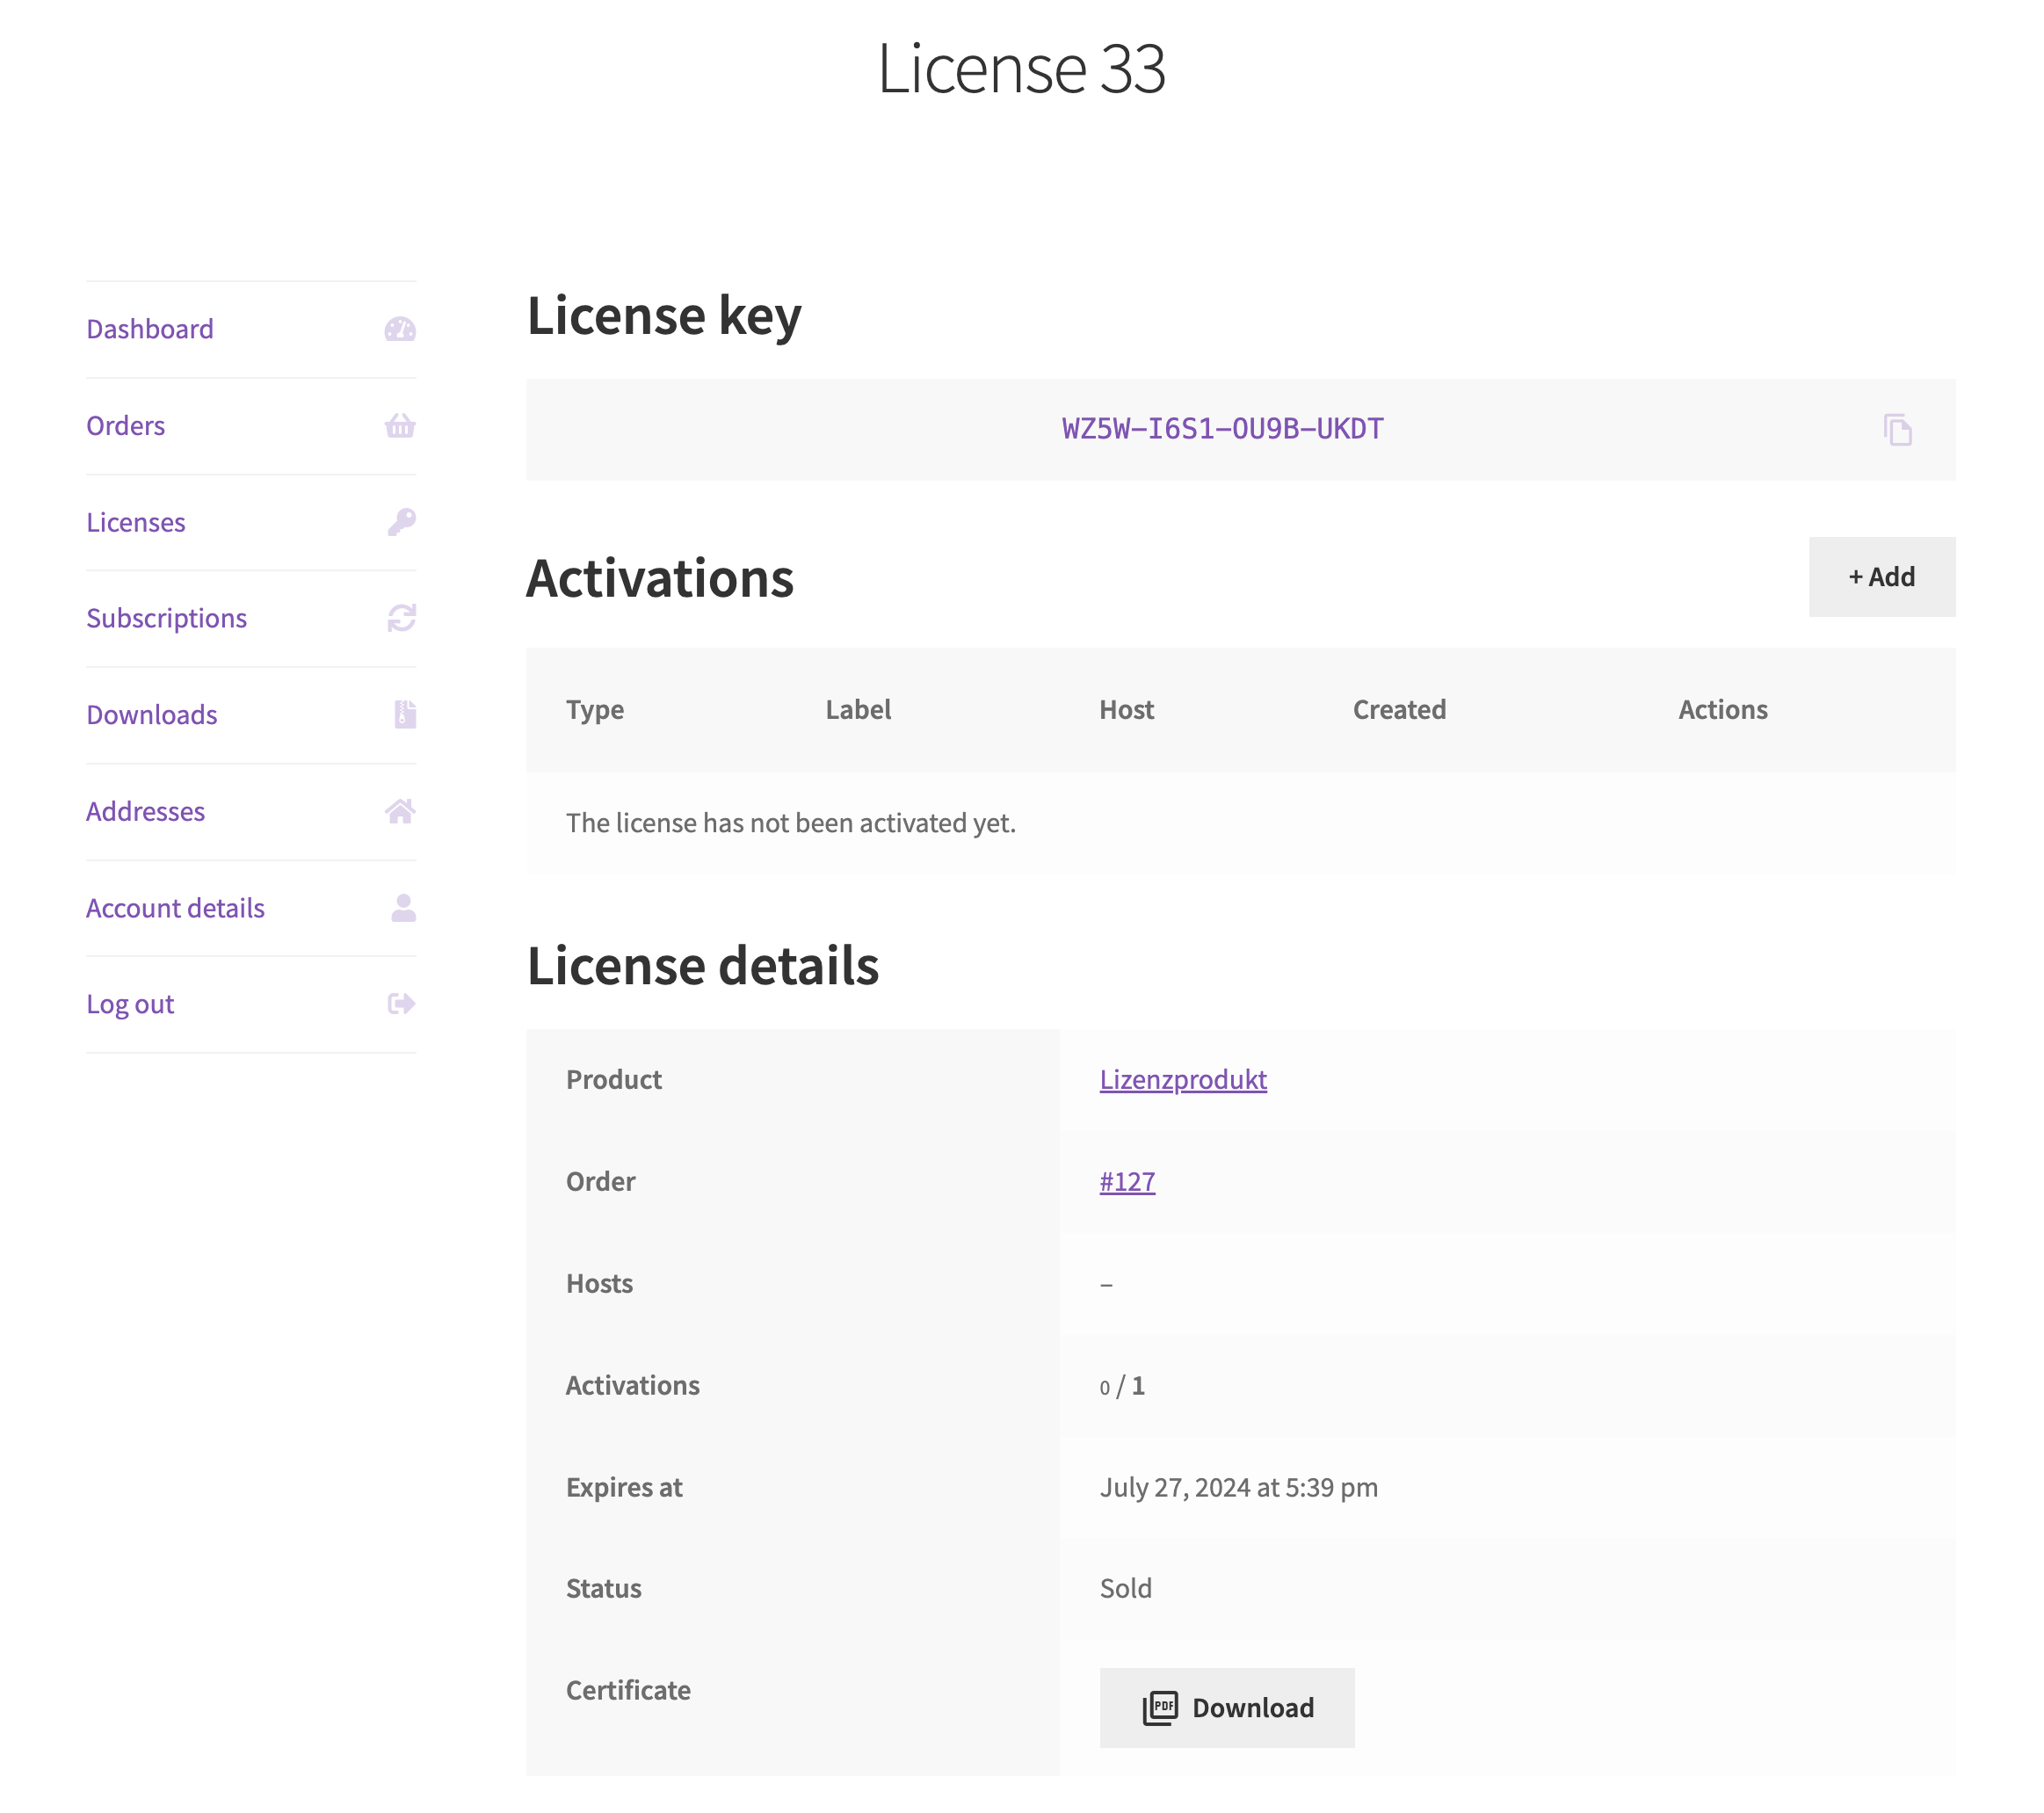
Here you can activate or deactivate the licenses page in the WooCommerce customer account. If the page is deactivated, the customer can only view his licenses within the order. Please note that this also creates limitations in the usability of licenses from the customer’s point of view.
Licenses page columns
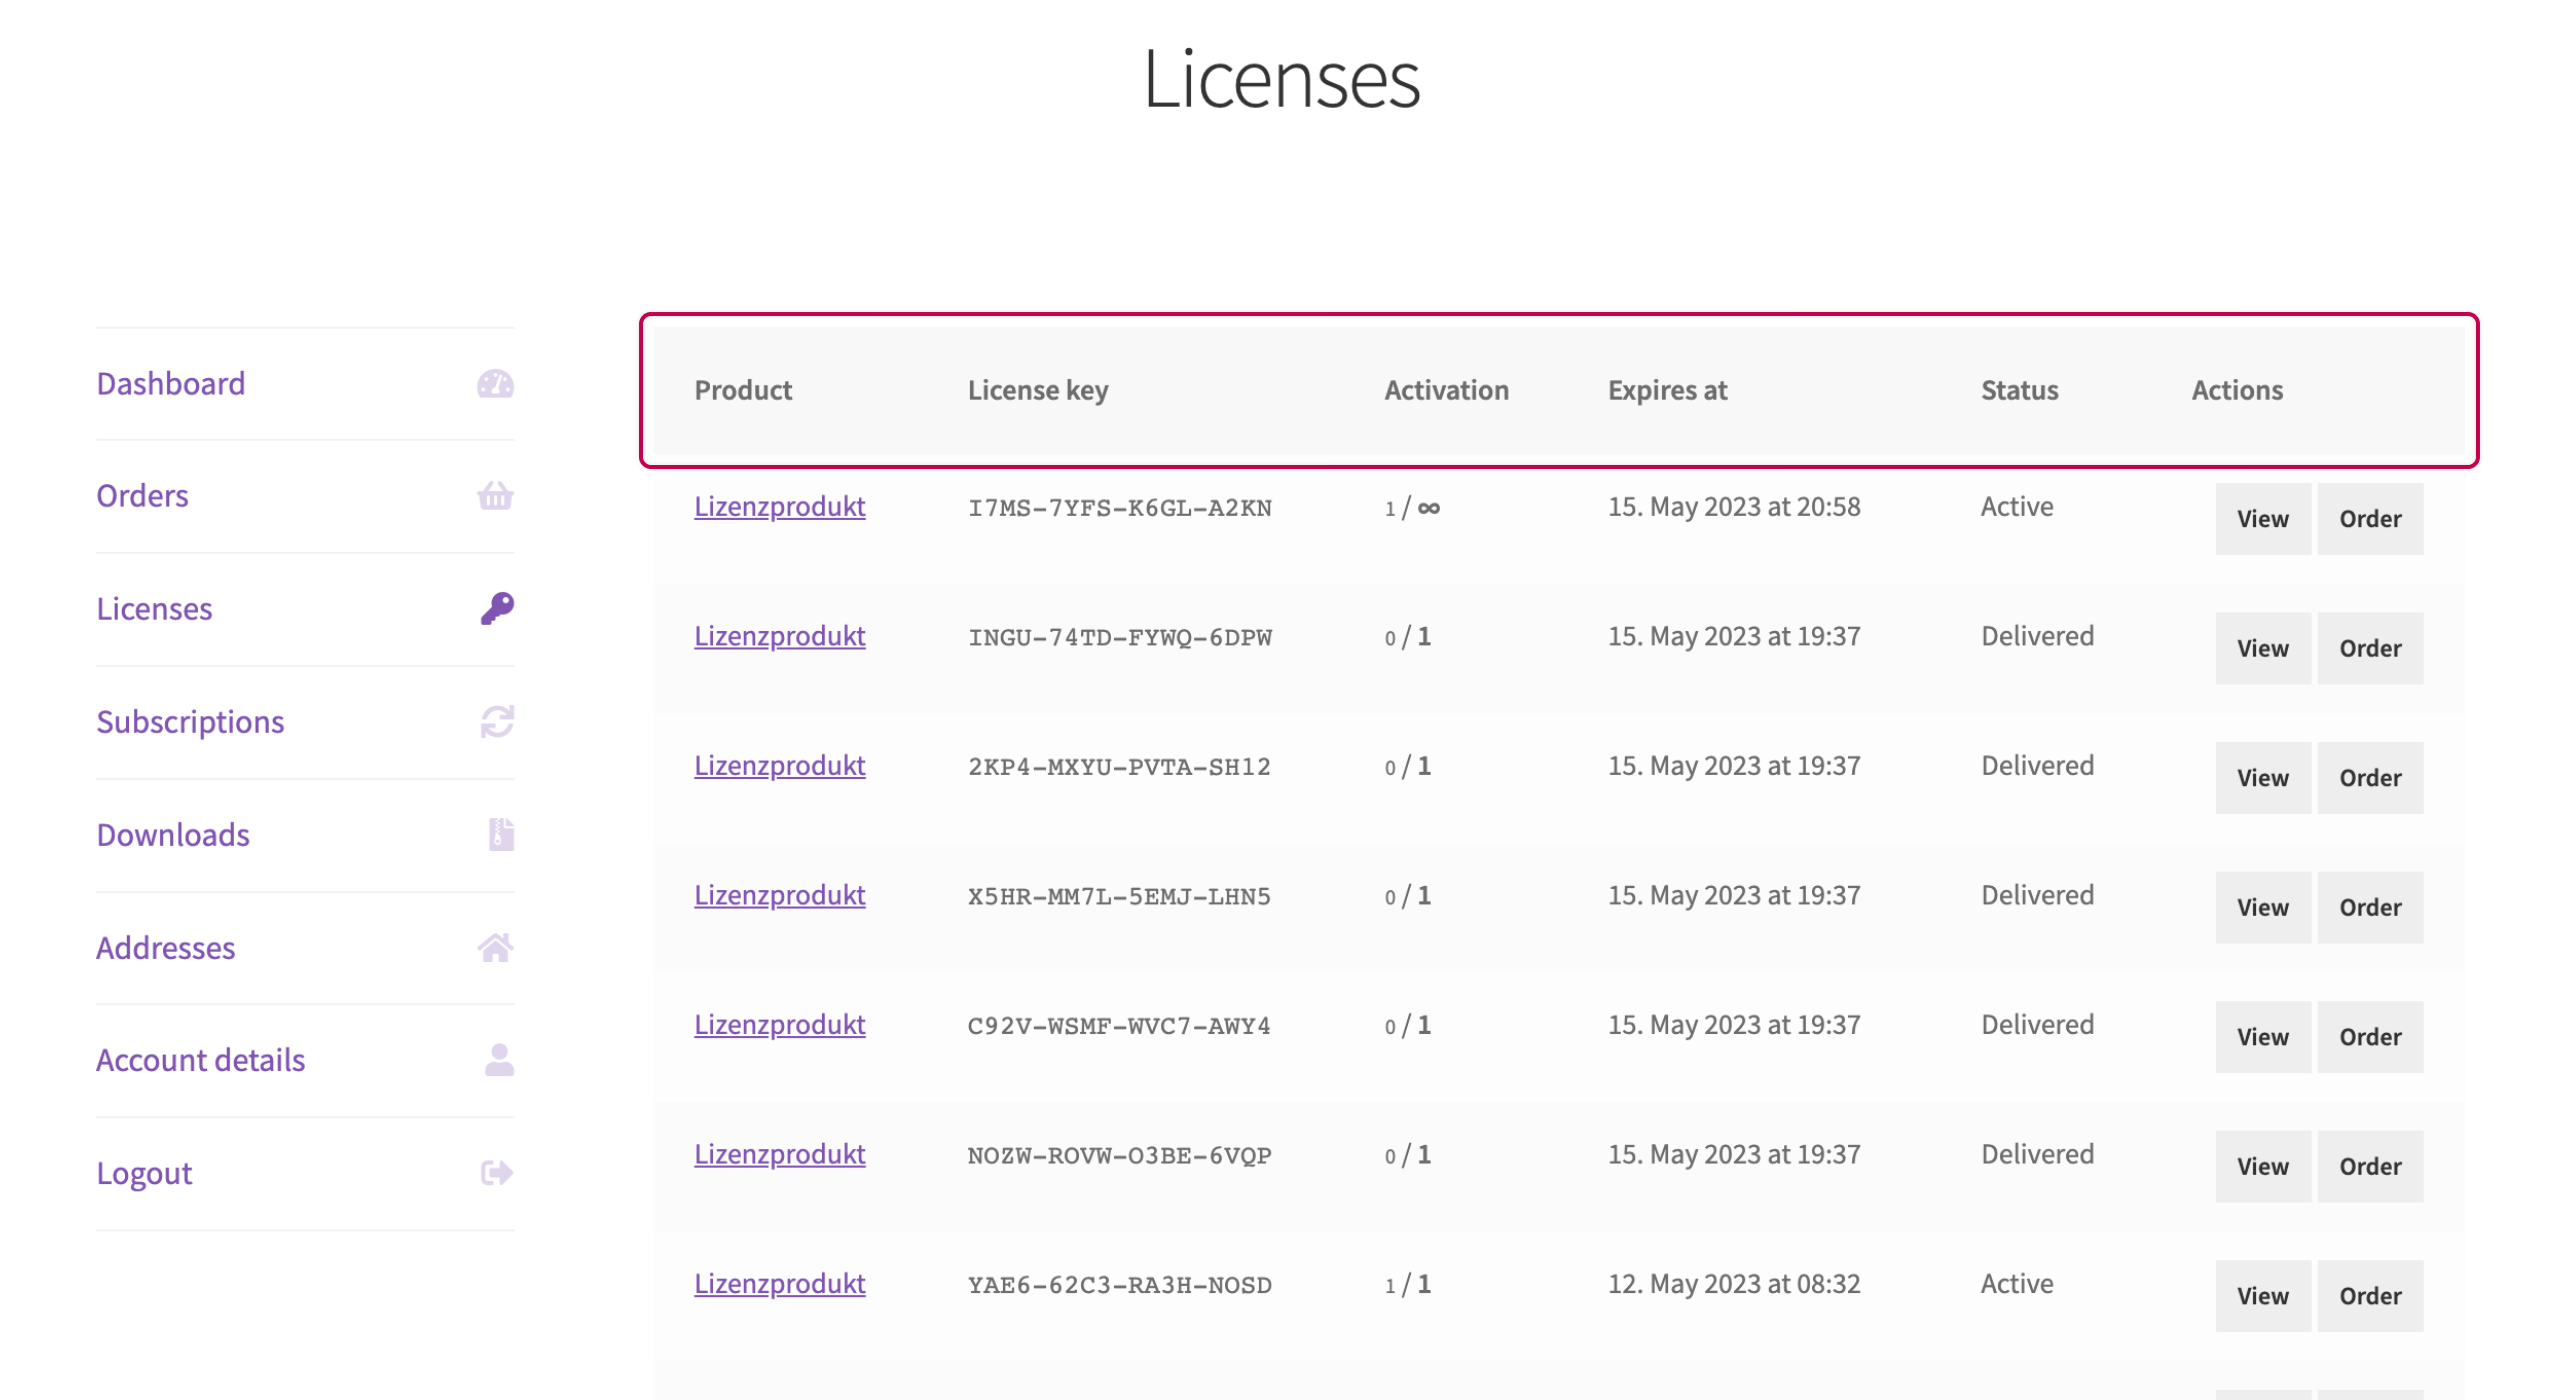
This setting is only relevant if the licenses page has been activated. In this case, you can define which columns the customer can and cannot see on the licenses page in the WooCommerce customer account.
Redemption of distributor codes (Pro)
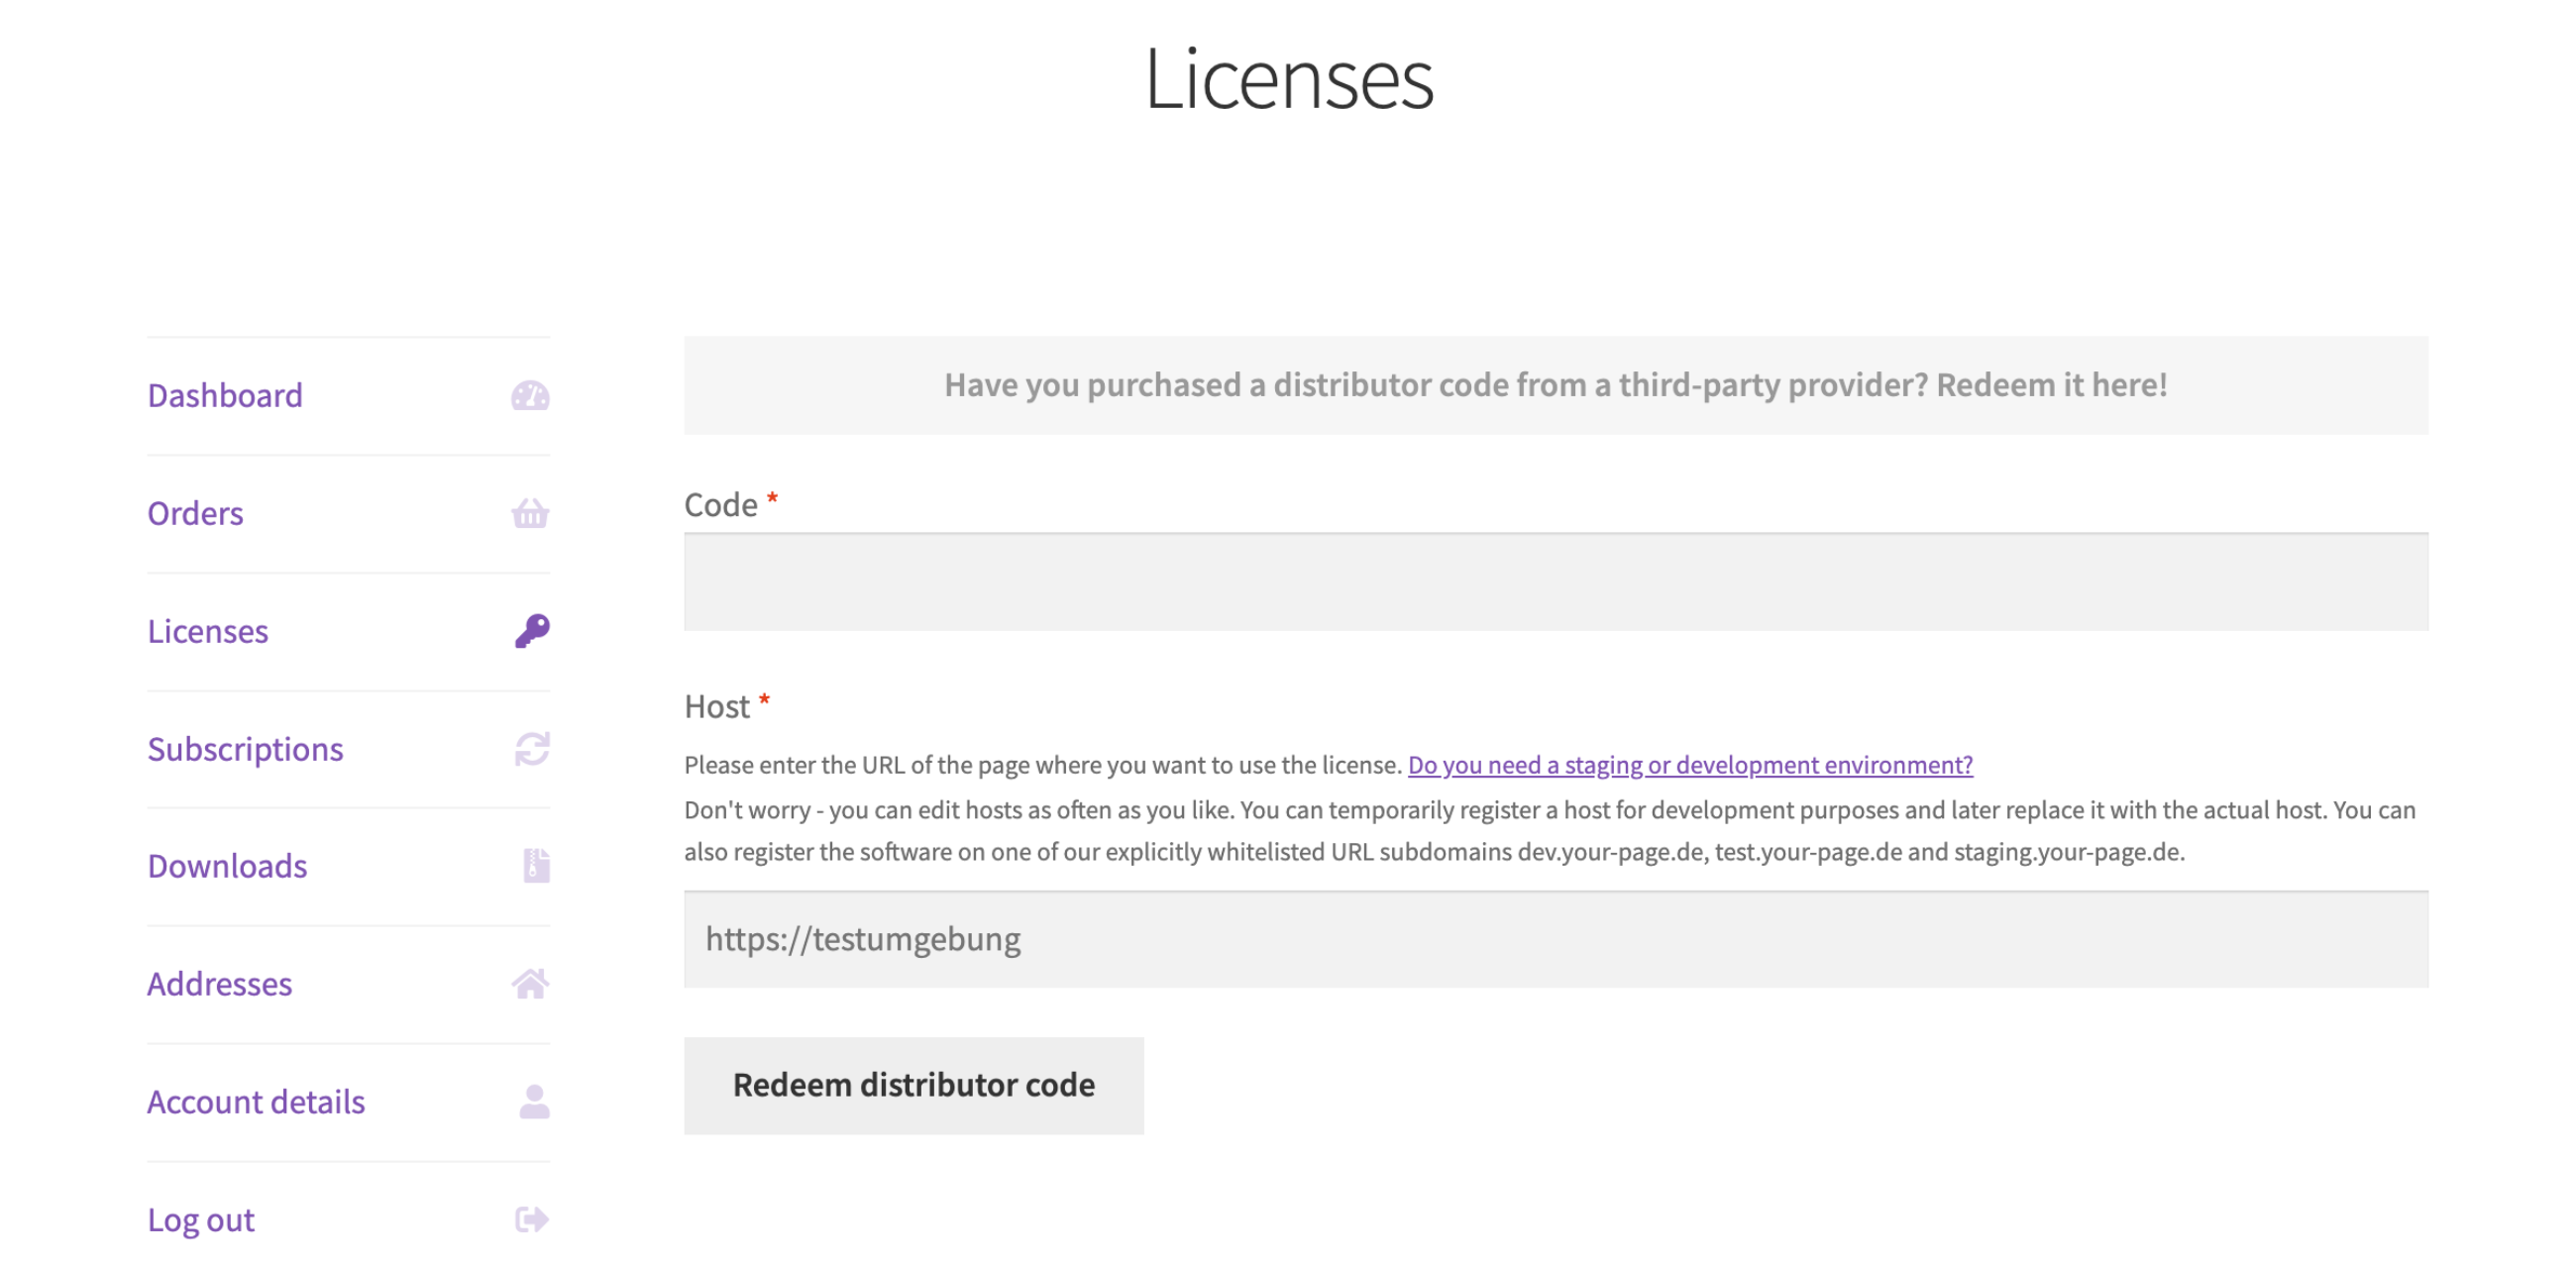
This setting can only be activated if the licenses page has been activated. By activating this setting, you can allow the customer to redeem distributor codes on the license page inside the customer account. This will display a button that the customer can use to redeem a distributor code. As soon as the customer clicks on the button, a form opens where he can redeem a distributor code for a license.
Activation of licenses
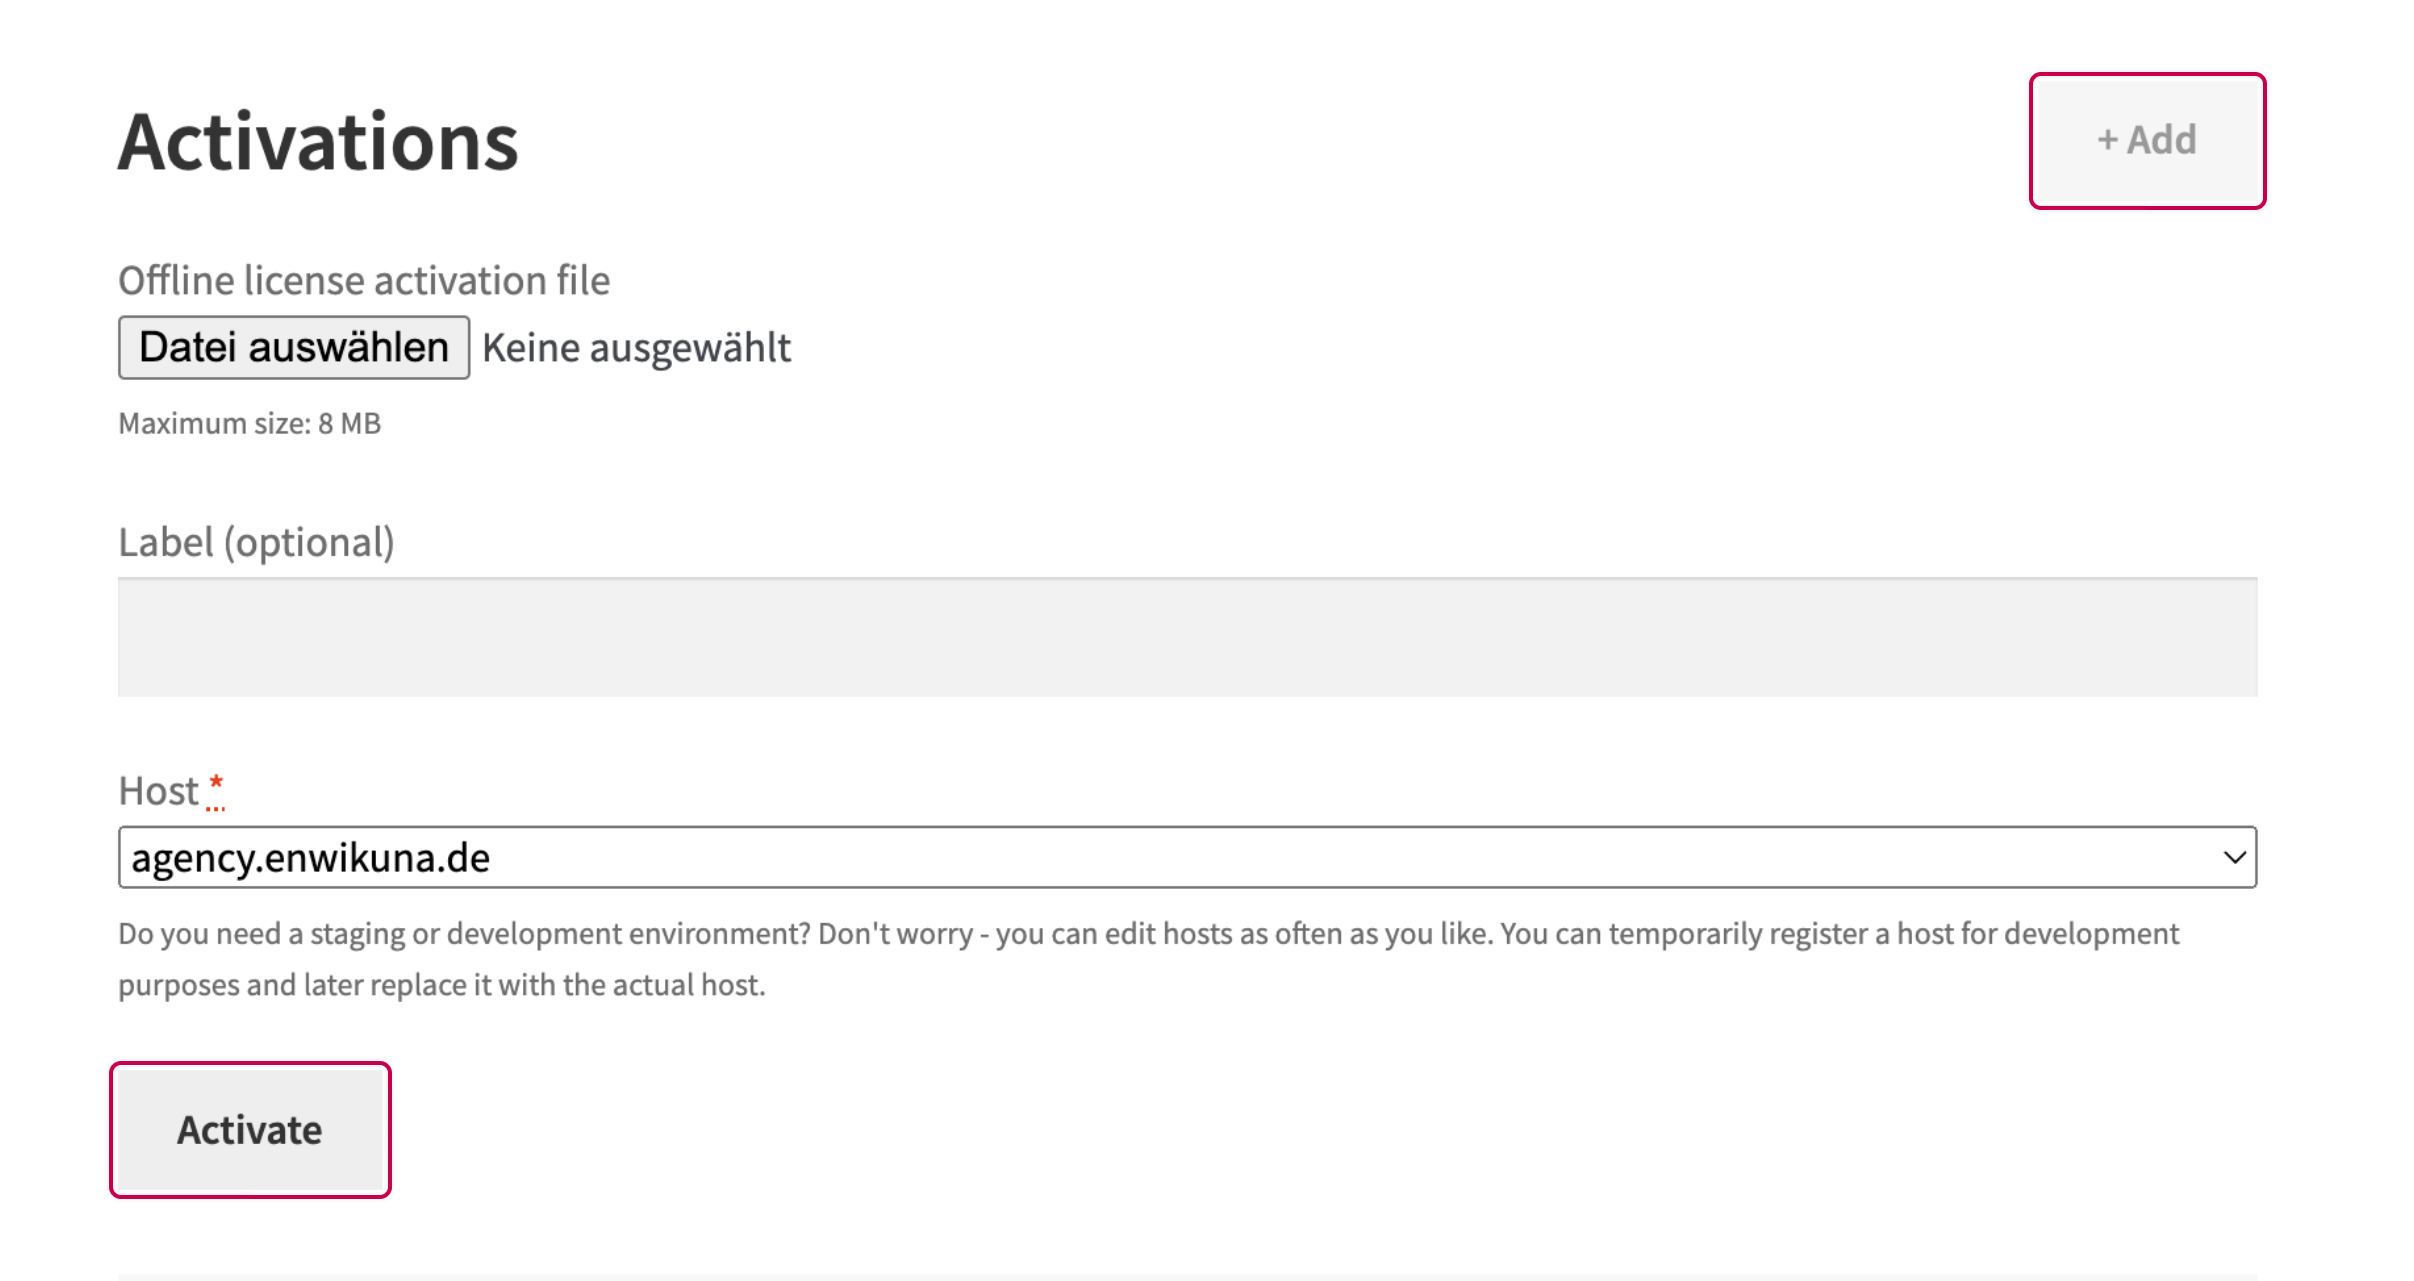
This setting can only be activated if the licenses page has been activated. By activating this setting, you can allow customers to activate licenses directly from the customer account. This will display a button within the license where a customer can add a new activation. As soon as a customer clicks on the button, a form opens where he can create a new activation. We recommend that you deactivate this setting when connecting a software to the REST API.
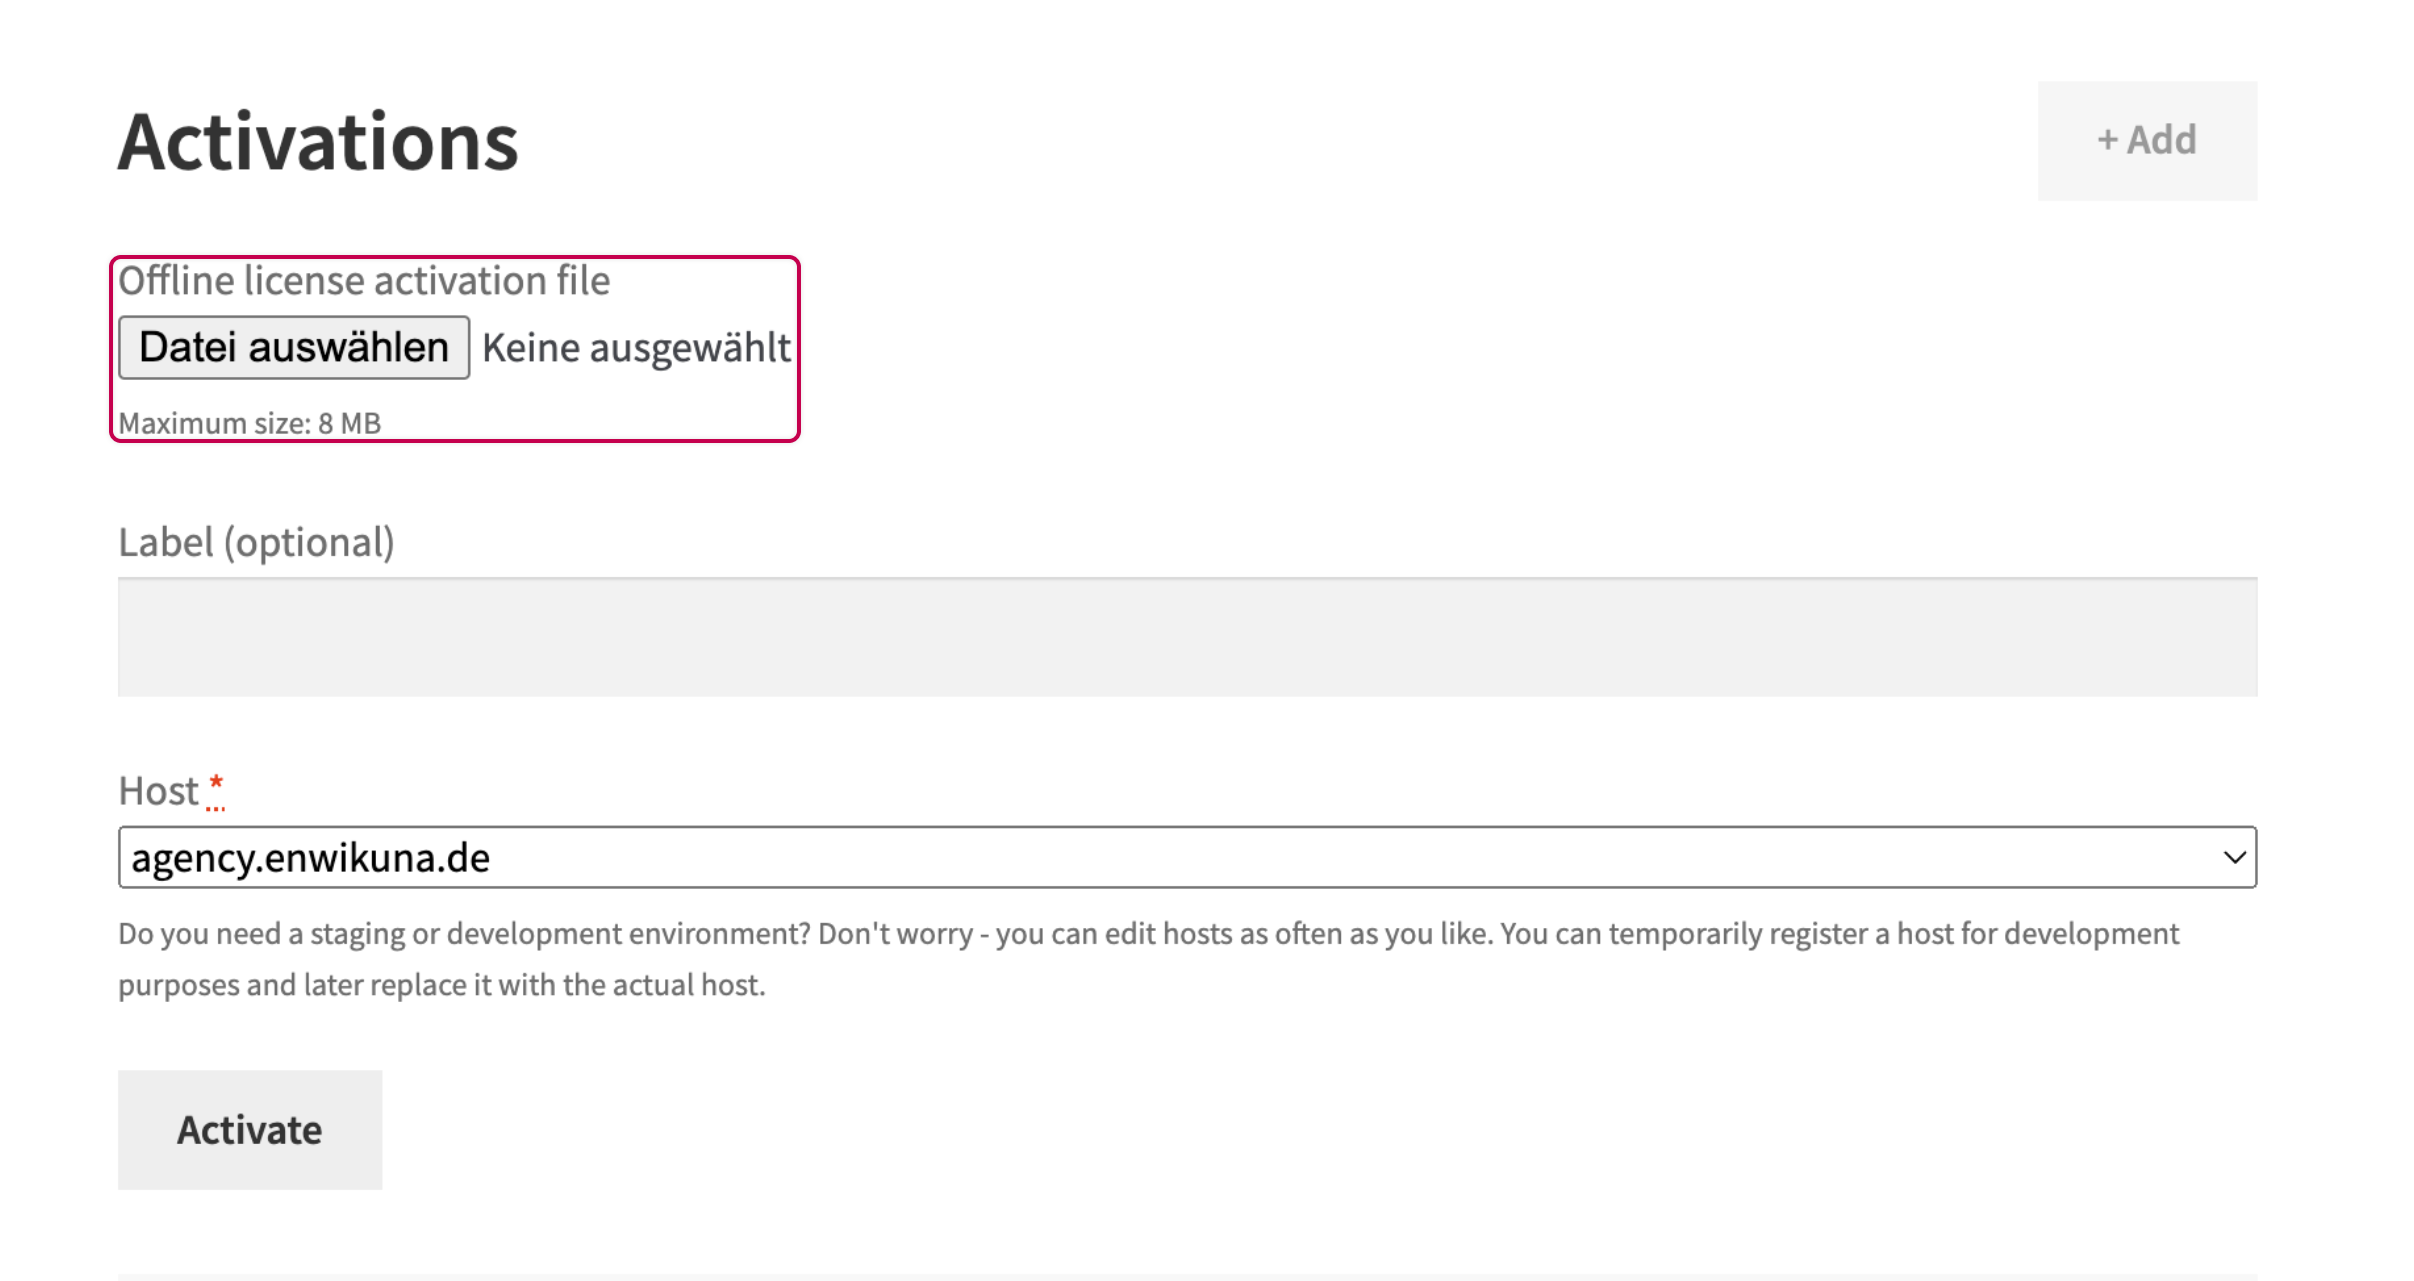
Offline activation on license activation (Pro)
This setting can only be activated if the activation of licenses has been activated. By activating this setting, a file selection will become active in the form for activating a license, where an offline license activation file can be selected. If the host check on license activation setting is active, the host selection is also hidden, because the host check is carried out by checking the host from the file in the event of offline activation.
Offline license activation file expiration time (Pro)
This setting is only relevant if the offline activation on license activation has been activated. In this case, you can define how long an offline license activation file is allowed to be valid after creation. The default setting is 10 minutes. The check will be performed during activation and rejected accordingly if the time between creation and activation is greater than the default.

Host check on license activation (Pro)
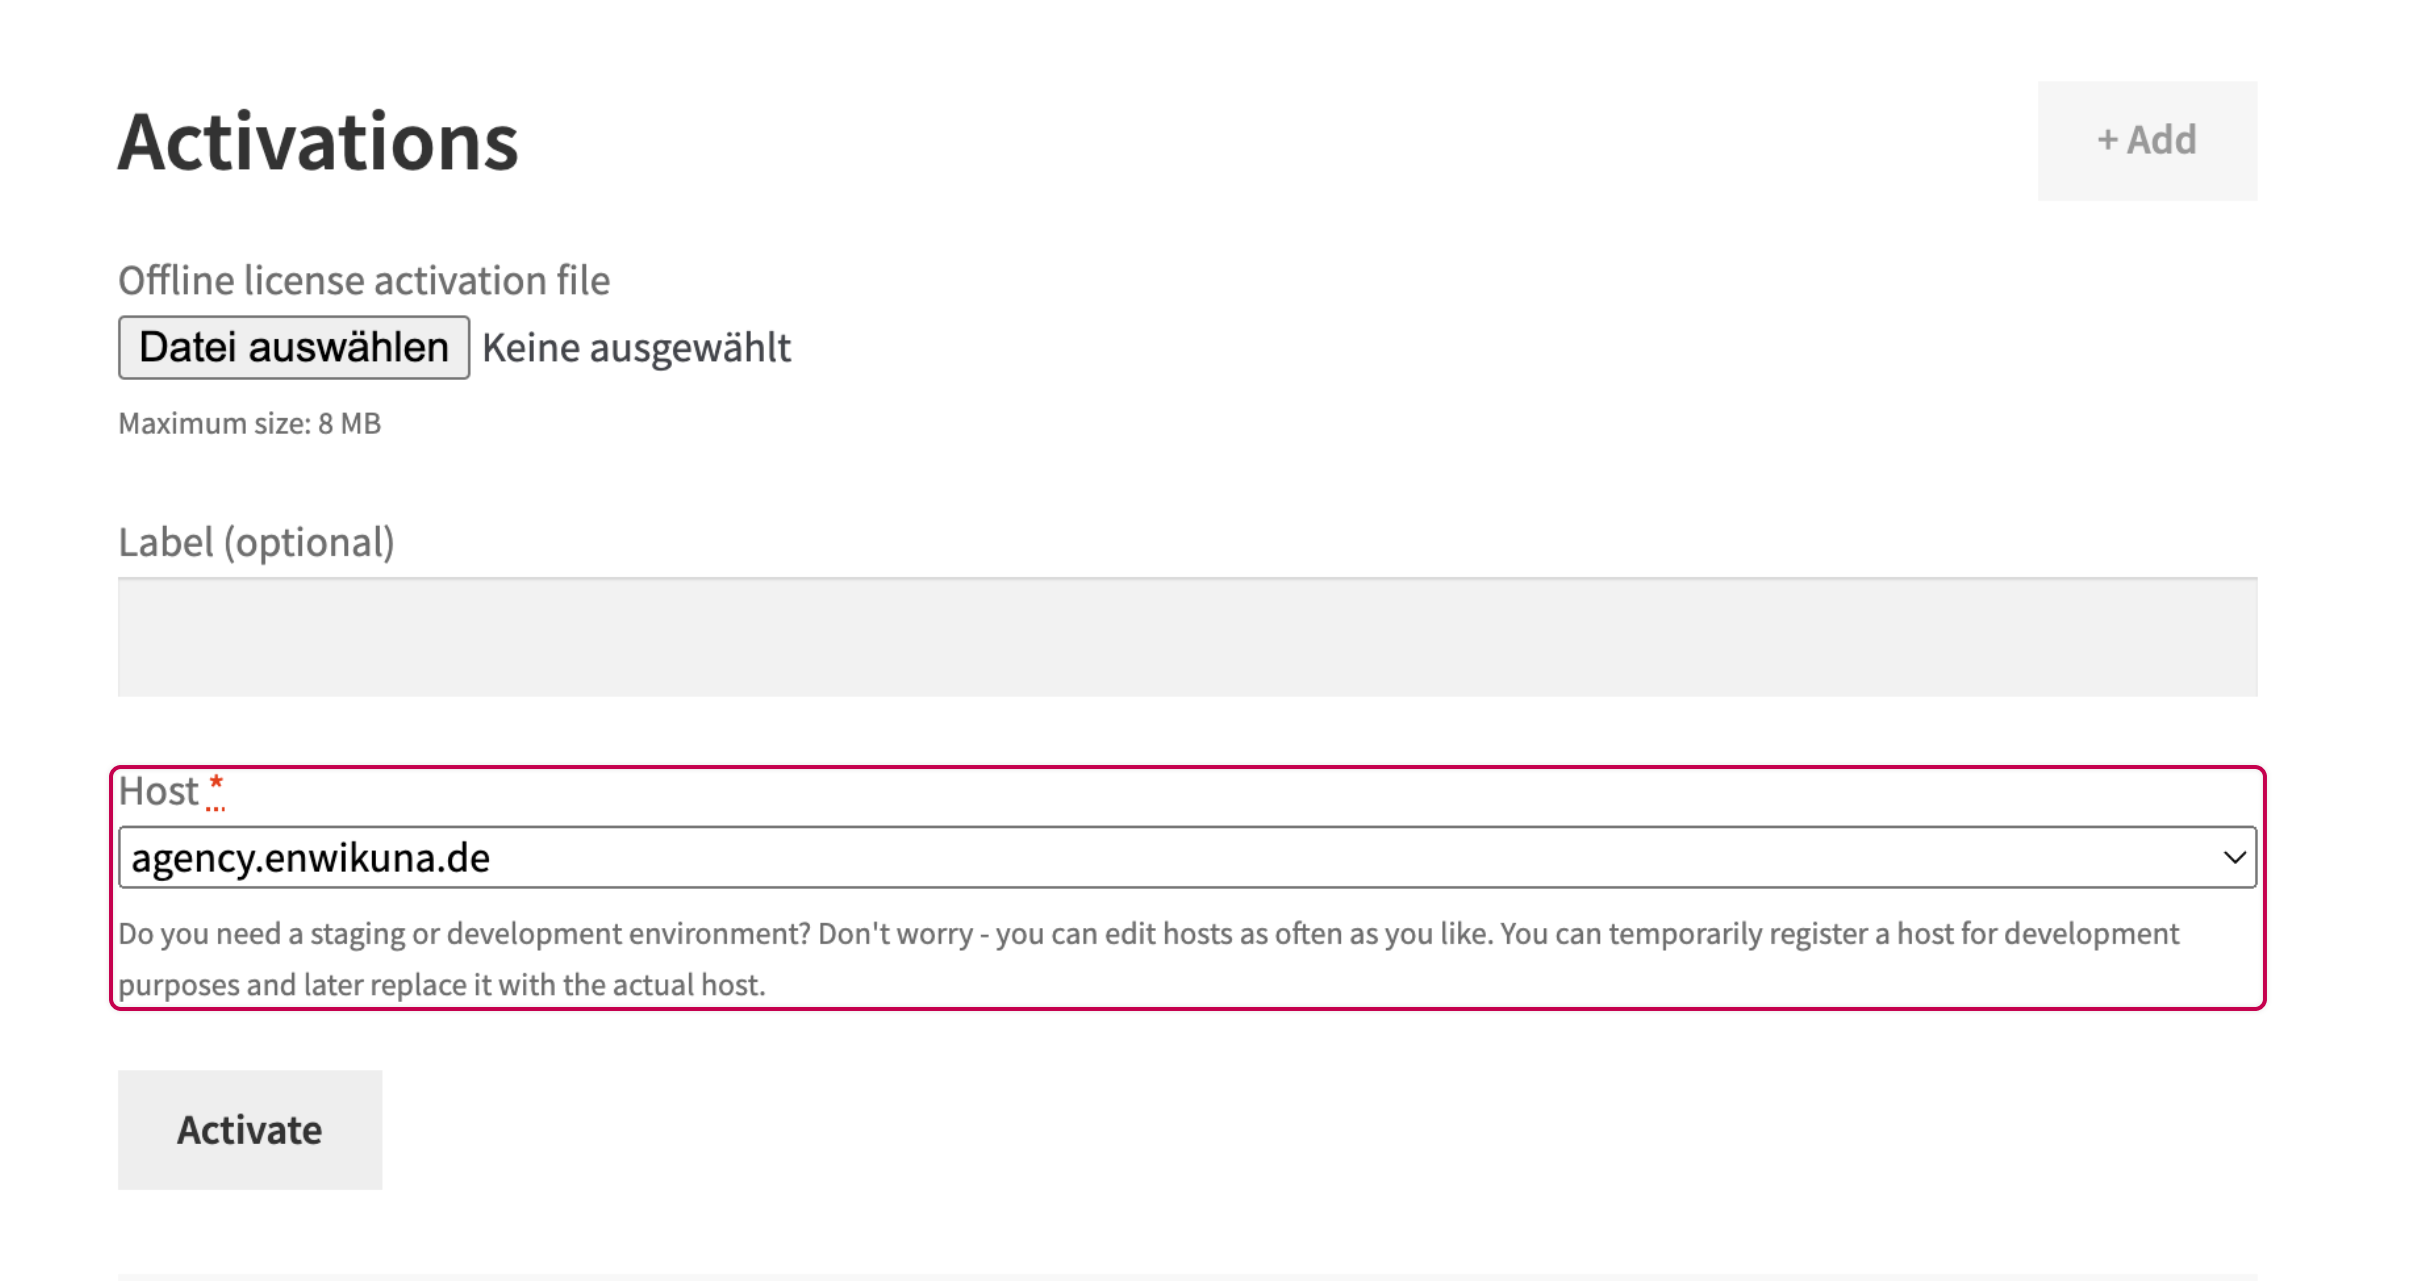
This setting can only be activated if hosts and the activation of licenses have been activated. By activating this setting, a selection with all available hosts will be displayed in the form for activating a license, from which a corresponding host must be selected.
Deactivation of licenses
This setting can only be activated if the licenses page has been activated. By activating this setting, you can allow customers to deactivate licenses directly from the customer account. This activates a button next to each activation inside the table of all activations, which can be used to deactivate the respective activation. We recommend that you deactivate this setting when connecting a software to the REST API.

Renewal of licenses
This setting can only be activated if the licenses page has been activated. By activating this setting, you can specify whether the customer is allowed to renew his license 24 hours before expiration within the customer account. This works exclusively for simple & variable products. Subscriptions from Woo Subscriptions will be renewed automatically.
Important: The renewal of licenses only works if the corresponding product is in stock and purchasable! For licenses that have been sold from stock, there will be no renewal in the sense of an extension of the expiration time. Instead, the respective product that the customer has purchased, including all license details, will automatically be placed into the cart and the customer will be forwarded directly to the checkout (assuming it is still purchasable). After successful purchase, he can replace his old license with the new one and therefore has extended the rights to use the software.
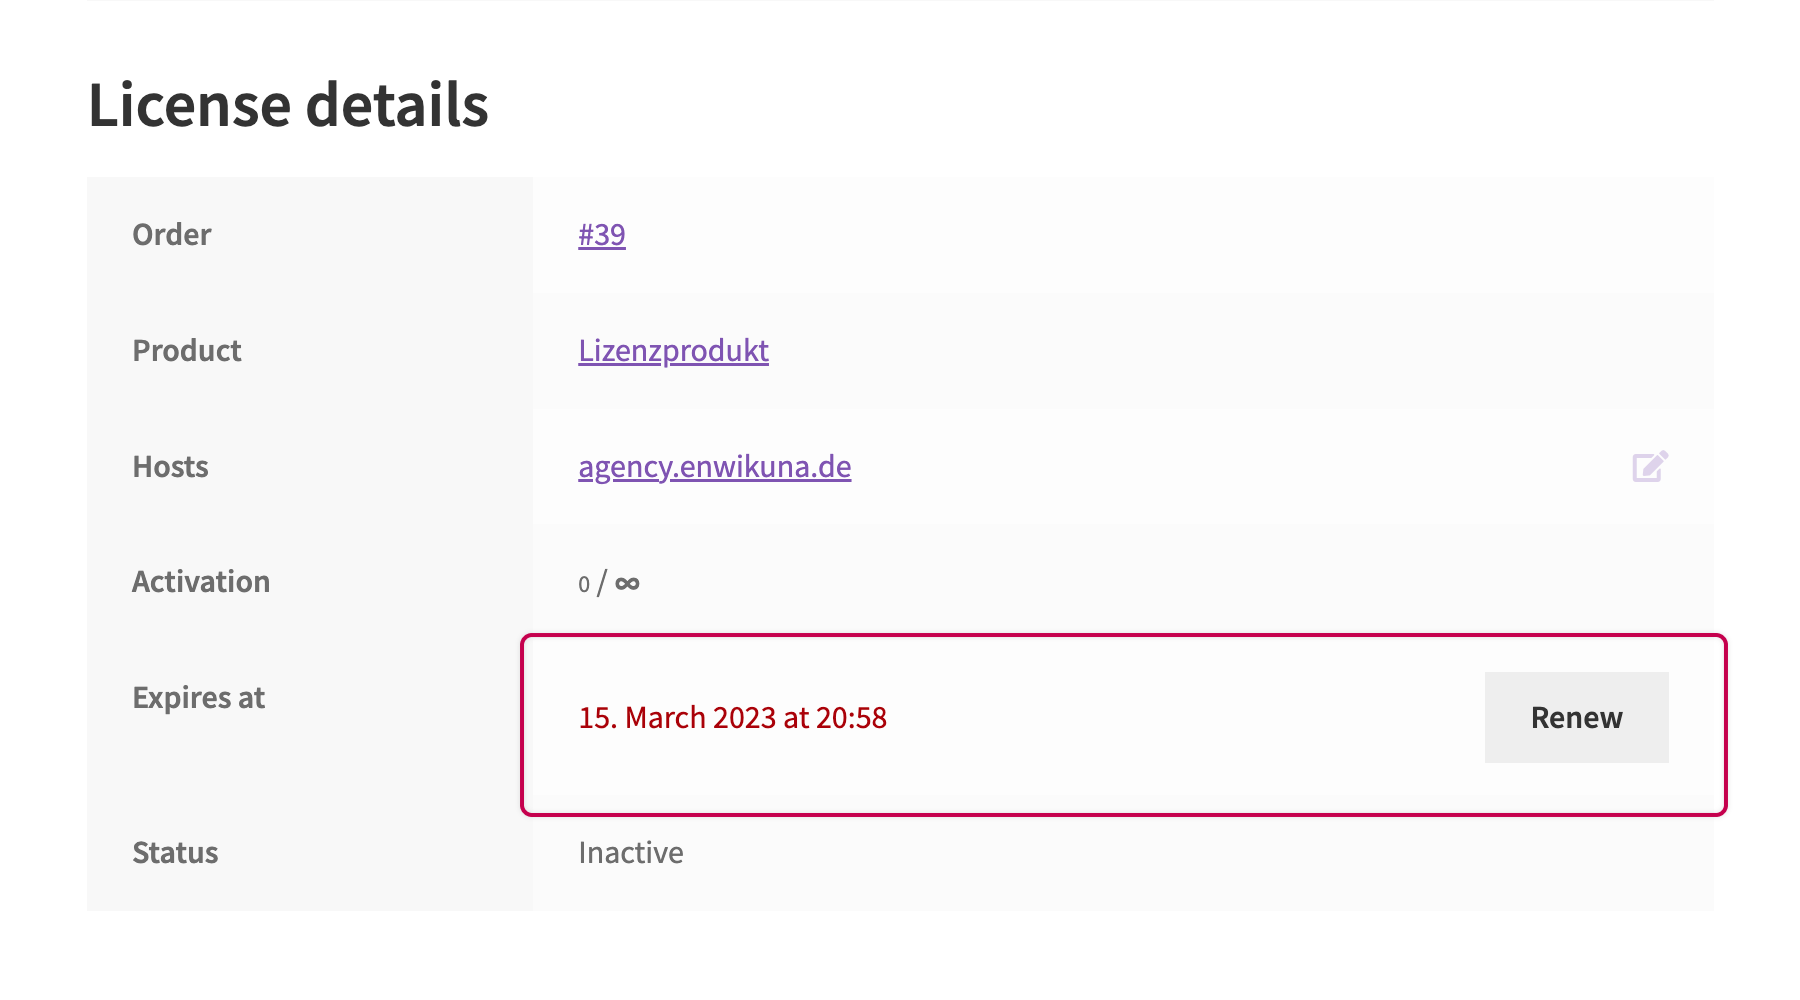
Enabling this setting will also add another text to the email notifications, which will instruct the customer how to renew his license.
License certificates
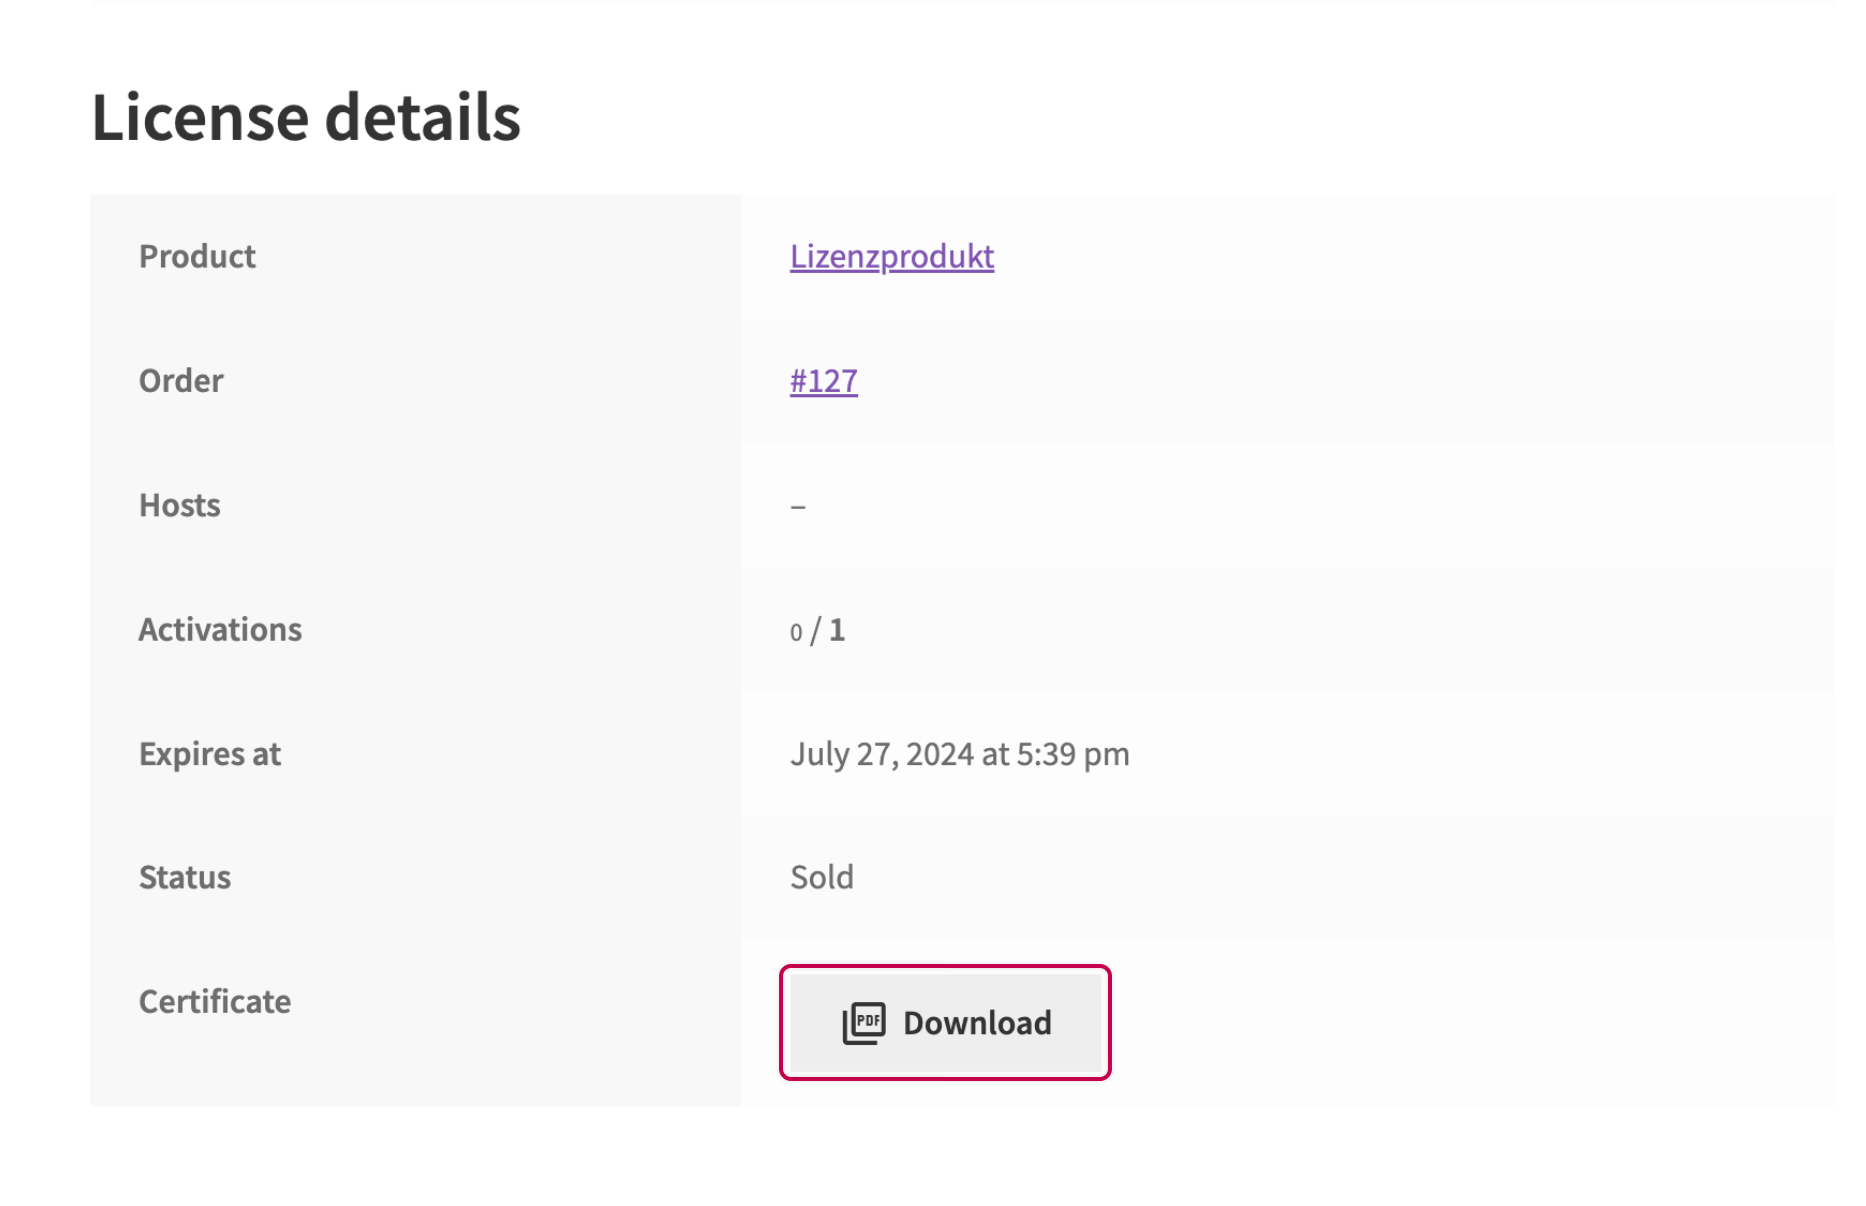
This setting can only be activated if the licenses page has been activated. By activating this setting, you can specify whether the customer is allowed to download a certificate for their license within the customer account. The certificate also contains a QR code that can be scanned to validate whether the license is still valid at the time of scanning. The license can only be checked by an Administrator or an Enwikuna License Manager Manager (user role). In addition, the person carrying out the check must be logged into their customer account on the website.
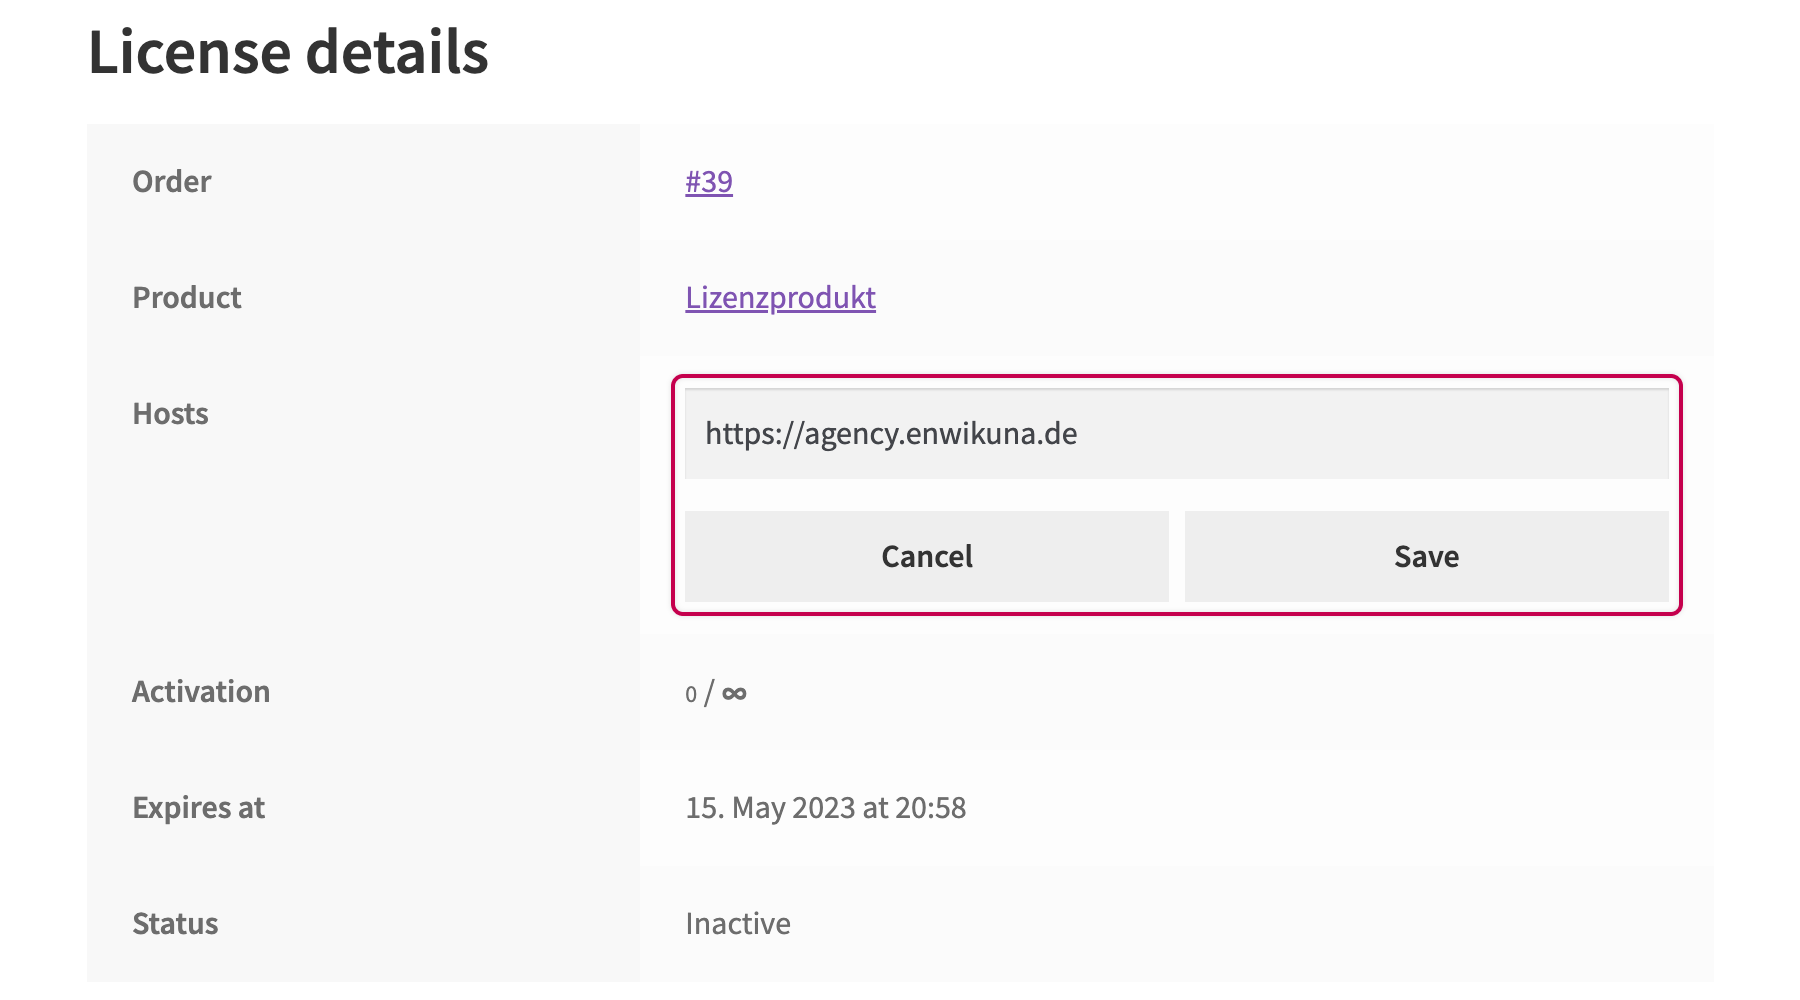
Modification of hosts (Pro)
This setting can only be activated if hosts and the licenses page have been activated. By activating this setting, you can specify whether or not the customer can change the defined hosts in a license directly within the customer account. It is important to know that the customer cannot change the amount of hosts. He must always fill in the same number of hosts that he has purchased at any given time. Please note that changing the hosts is also only possible if the customer has not yet activated the license. After activation, he must first deactivate the license again to be able to adjust the hosts.
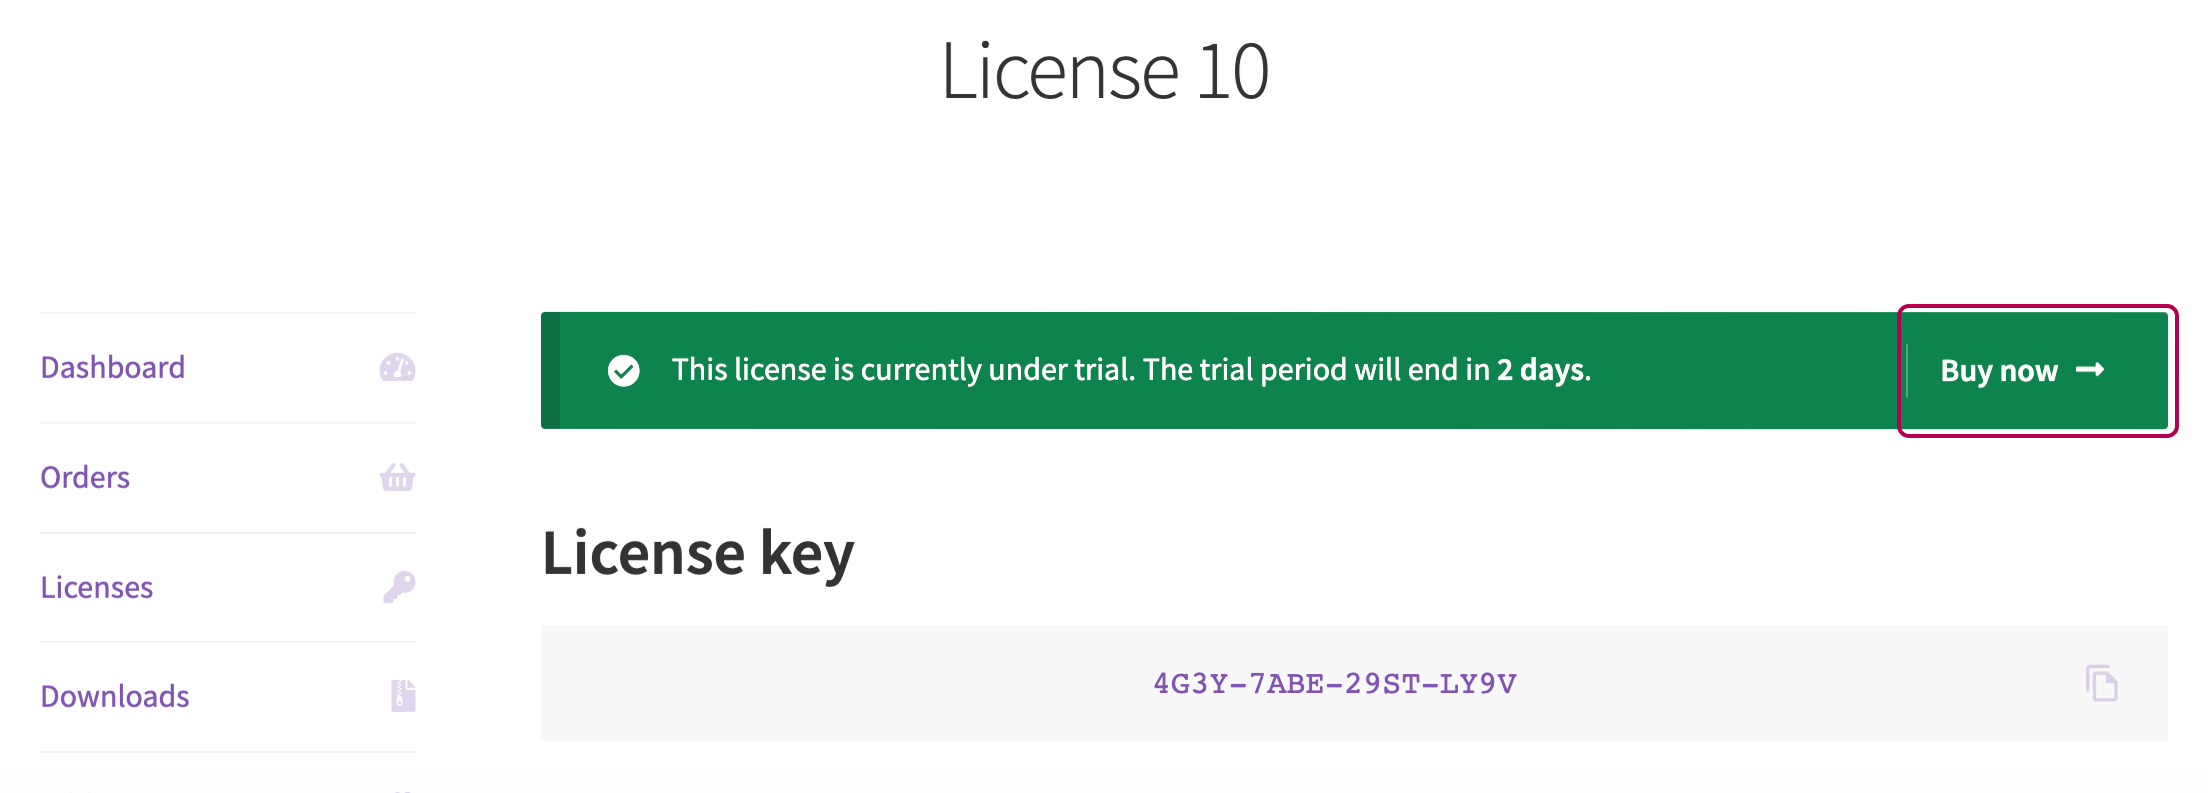
Buying of trial licenses (Pro)
This setting can only be activated if the licenses page has been activated. By activating this setting, you can determine whether or not the customer is allowed to purchase a trial license directly from the customer account. This will change the type of the license to a regular license and reset the expiration date accordingly. This also has the consequence that no other license can be bought during the purchase. Moreover, no new license will be generated during the purchase process.
Important: The purchase of trial licenses only works if the corresponding product is in stock and purchasable as well as a generator is configured within the license settings, or the sale of licenses for this product runs via a generator and not via stock.
Products
Within the product settings you can define the settings for products.
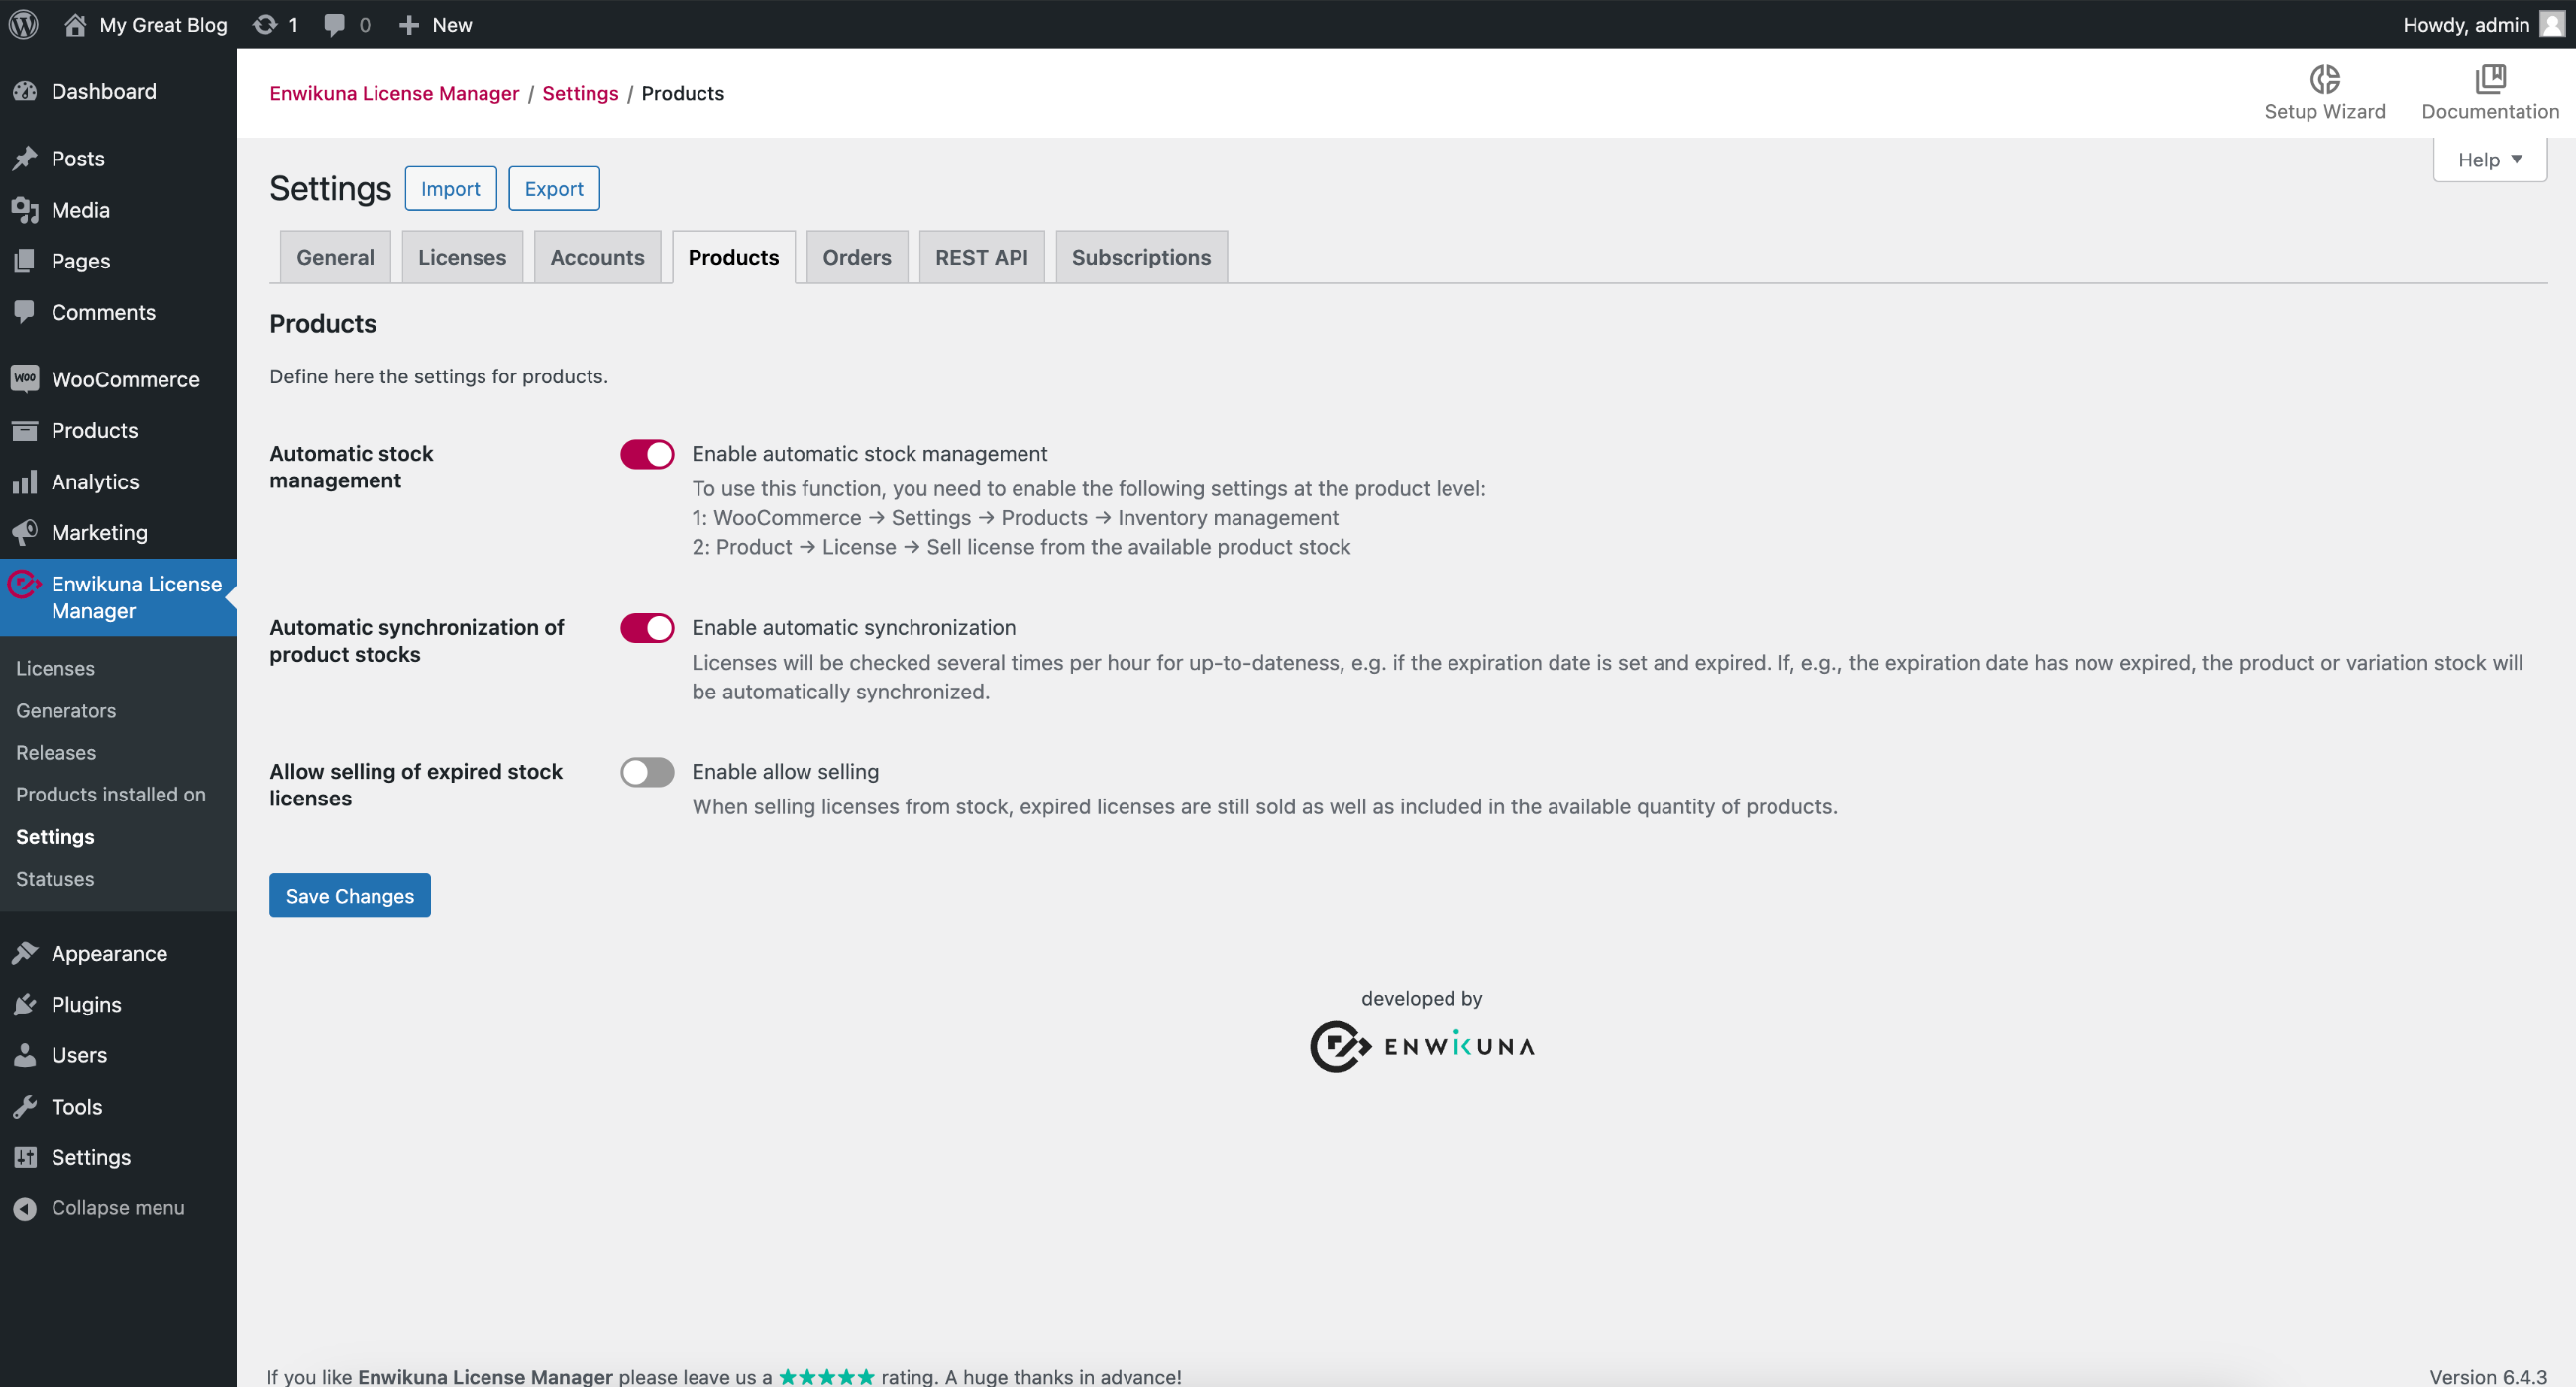
Automatic stock management
Activate this setting if you want to sell licenses from an available stock. You can find more instructions on how to use this on the settings page itself. It is also important to mention that this setting has no effect on the sale through generators. You can run both systems in parallel. This setting only activates additional functions, which, for example, adjusts the stock of a product as soon as you add a license for sale. Furthermore, it is important that this license has the status “In stock”, so that it will be counted as stock.
Automatic synchronization of product stocks
This setting can only be activated if automatic stock management has been activated. By activating this setting, you can determine whether or not your stock levels for products for which you sell licenses from stock should be synchronized several times an hour with the available licenses in stock. This is important because errors in the ordering process can cause your stock to no longer match the available licenses in the stock. Here it is also decisive whether available licenses in the stock, which have expired, may be sold or not. Basically, however, your stock is regulated by adding & deleting licenses.
Allow selling of expired stock licenses
This setting can only be activated if automatic stock management has been activated. By activating this setting, you can specify that expired licenses that are still available for sale in the stock can be sold. If you enable this setting and you have existing licenses in stock that have expired, they will not be immediately included in the available stock. In this case, you have to wait until they are included during the next automatic synchronization, or you perform a manual synchronization for a product. You can find out more here.
Orders
Within the settings for orders you can define all settings for orders.
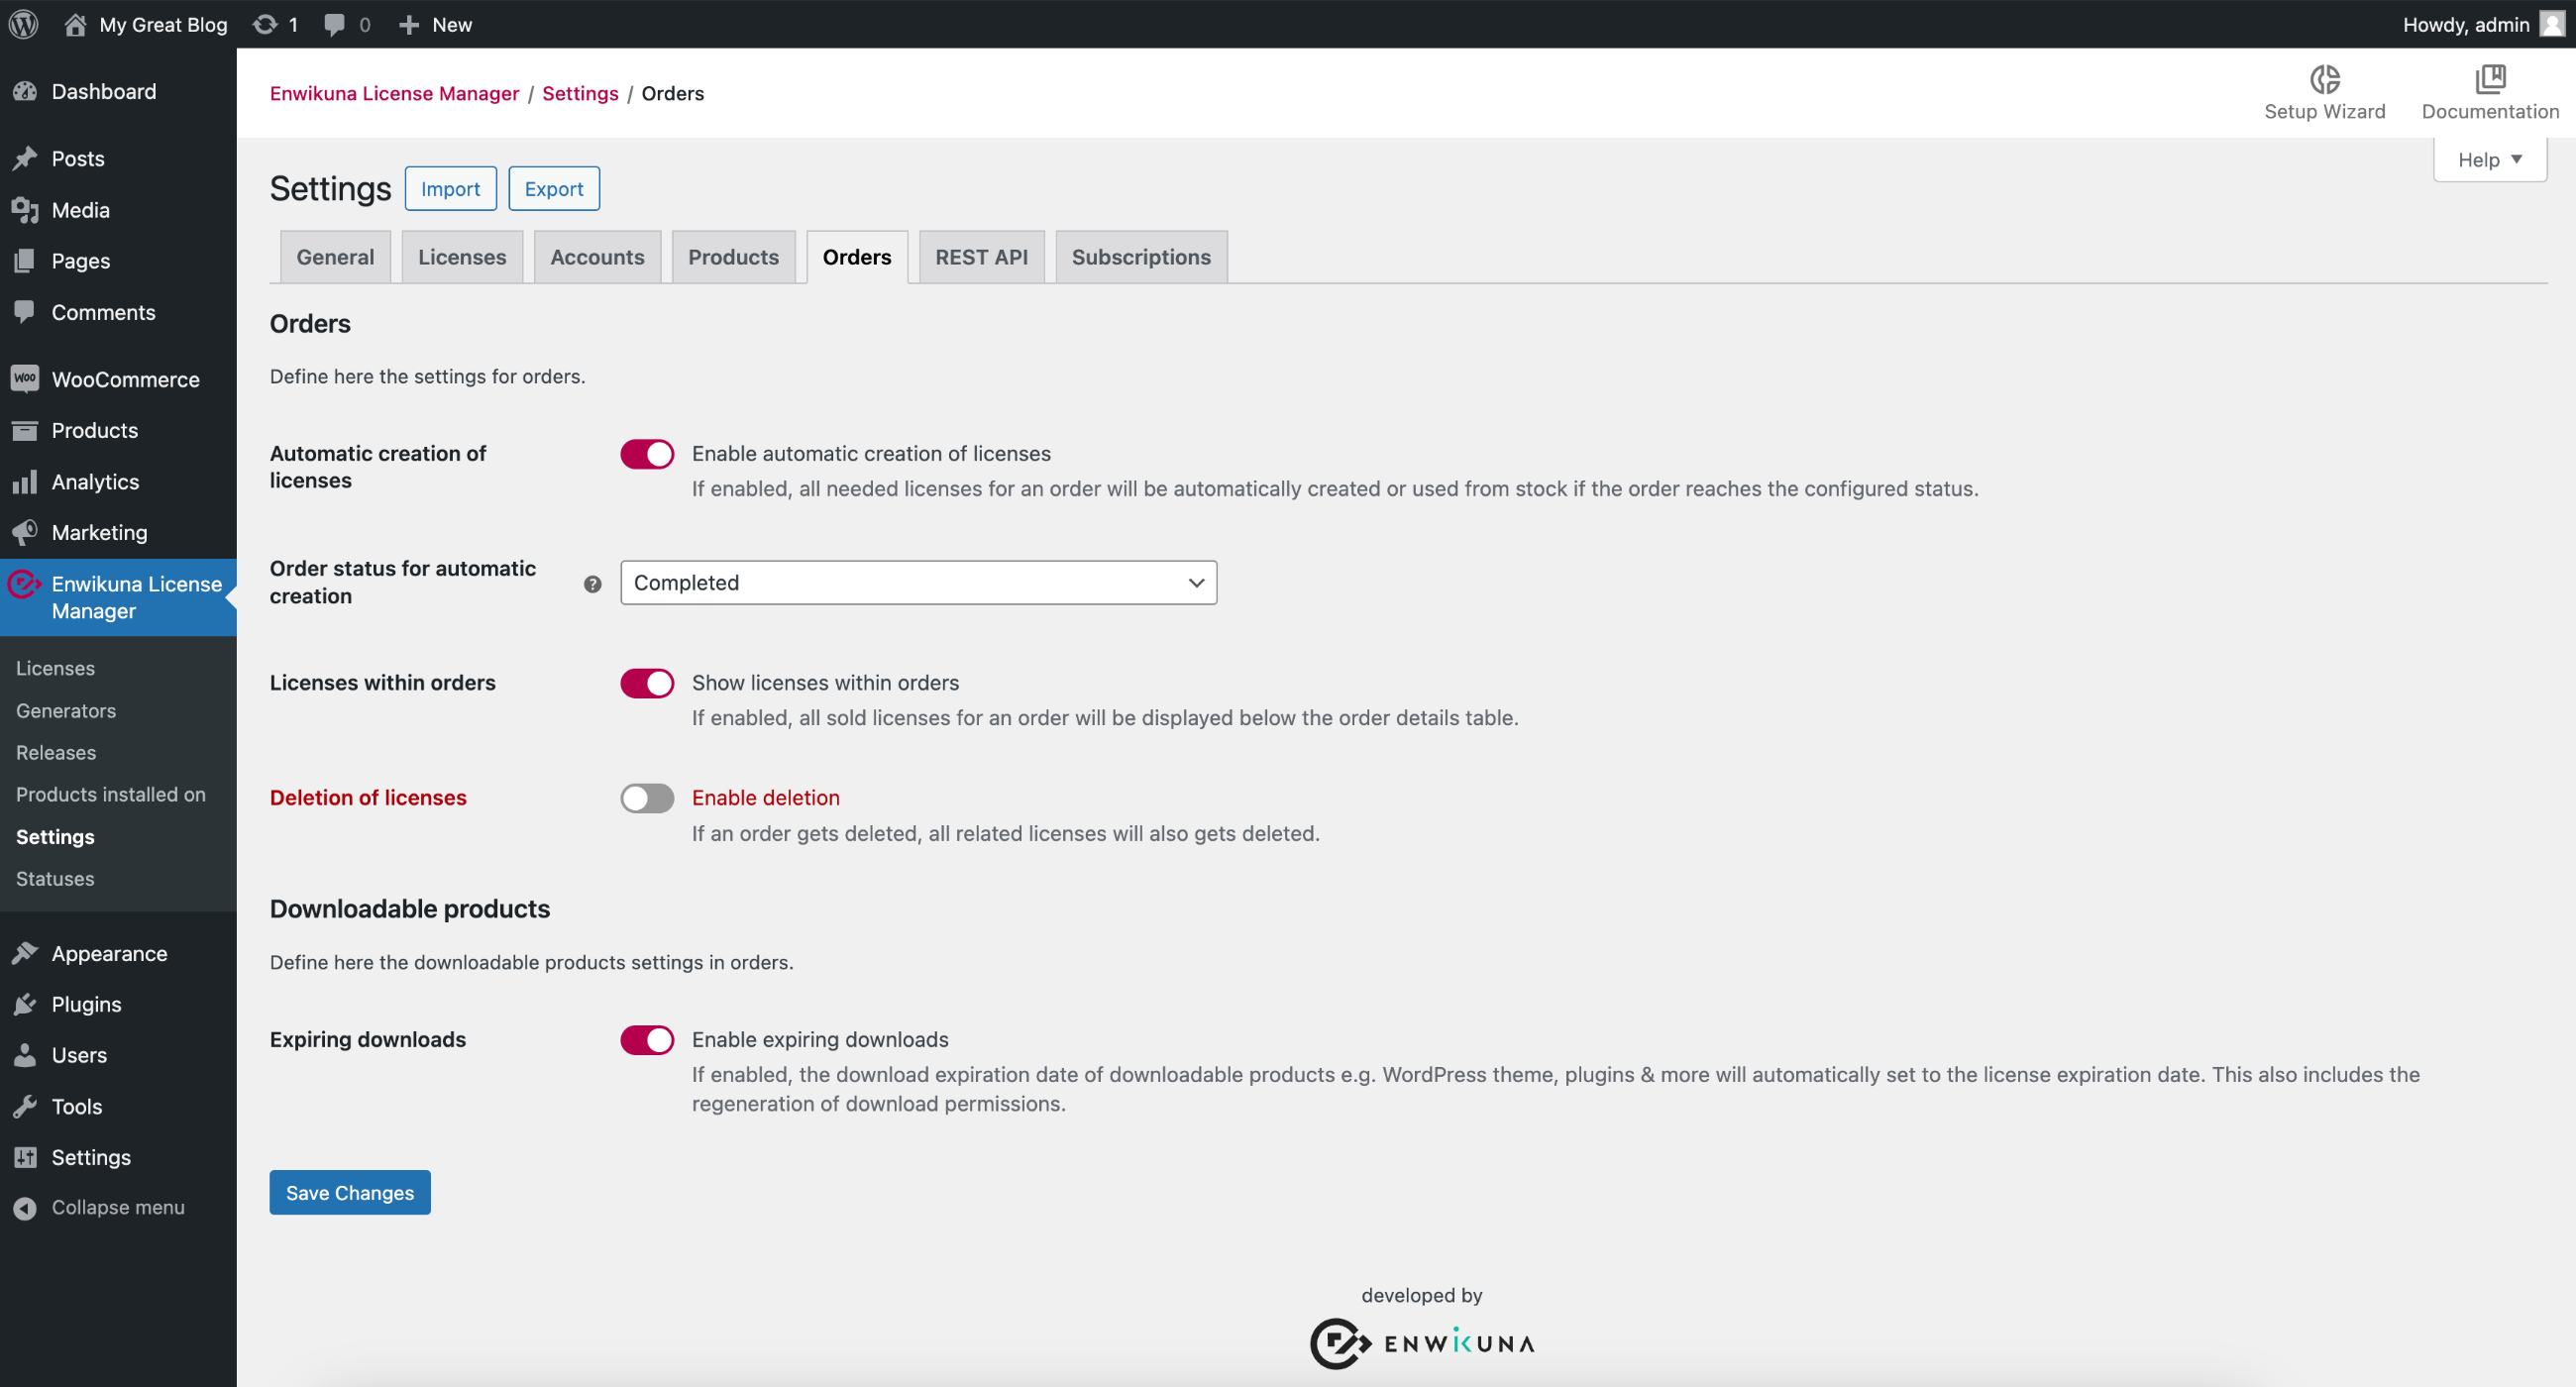
Automatic creation of licenses
Here you can define whether licenses should be automatically created and sent to the customer as soon as the order reaches a certain status. If you don’t want this, you must either create the license manually and assign it to the order, or alternatively click a button inside the order itself to create the licenses for an order.

Please note that automatic creation including delivery is only possible if the order has not been manually processed before. This is very important in order not to interrupt the automatic process.
Order status for automatic creation
This setting is only relevant if the automatic creation of licenses has been activated. If you wish, you can define the status that an order must reach in order to ensure the automatic creation including shipping to the customer.
Trial license lookup (Pro)
Activate this setting if you want the system to check whether the customer already has a trial license for the purchased product when purchasing a product. If this is the case, the trial license will be upgraded and assigned to the order. This ensures that the customer does not receive a new license. However, this is more of a fallback, as the customer normally receives an email before a trial license expires, which describes exactly how to purchase the trial license from the customer account. This requires, however, that you have activated the buying of trial licenses setting inside the account settings. If you have deactivated this setting, however, this option is a useful alternative.
Increase allowed license activations
You should only activate this setting if you really know what you are doing. This setting changes the entire ordering process! If a customer now purchases a product with a quantity > 1, a separate license is normally created for each quantity ordered. However, if you have activated this setting, the behavior will change completely. Instead of creating multiple licenses for an order item / product, only one license will be created. Subsequently, however, the allowed number of activations will be overwritten (normally specified by the generator) and replaced by the ordered quantity of products. This means: If a customer orders your product 5 times, a license will be created which can be activated 5 times.
Licenses within orders
Activate this setting if you want to show the customer his licenses after creation within his order. A table will then be displayed, containing all licenses for an order. This affects all order pages within the browser including all order emails that are sent to the customer.
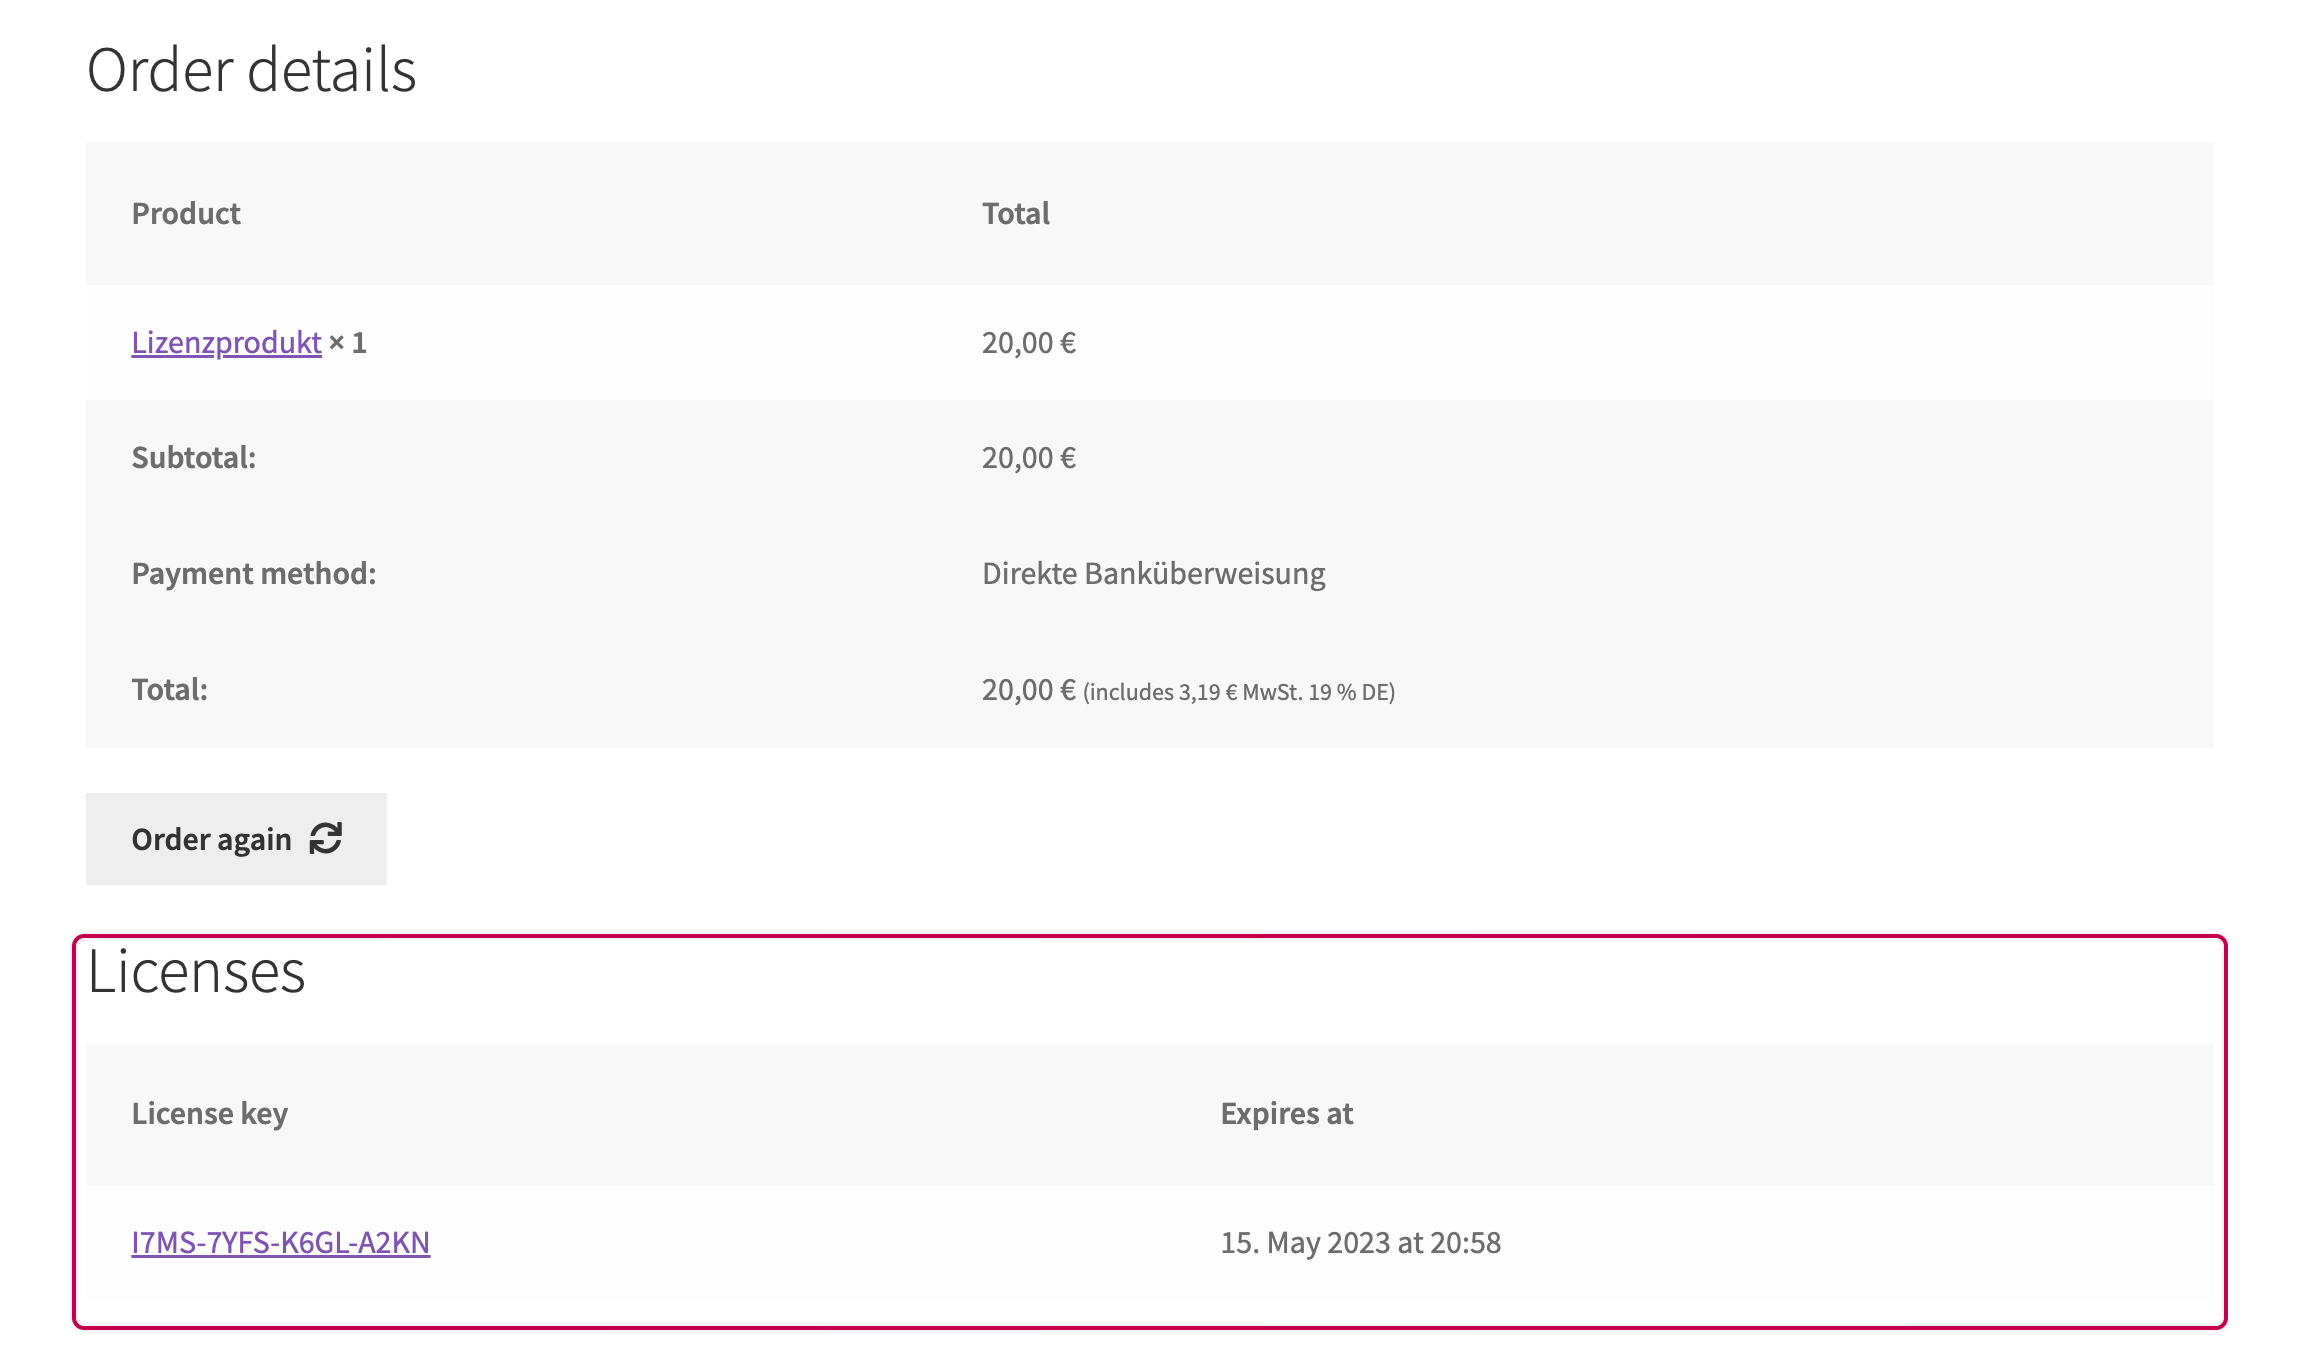
If the licenses have not been created yet, the customer will see the following text instead:
“Your licenses will be delivered shortly. It can take up from a few minutes to 24 hours depending on the payment and our process. Thank you for your patience.”
Depending on whether it is an order, subscription or renewal, this text will be modified accordingly:
“You can find your renewed licenses within your related subscriptions.”
“Your licenses will be renewed shortly. It can take up from a few minutes to 24 hours depending on the payment and our process. Thank you for your patience.”
Deletion of licenses
Activate this setting if you also want to delete all licenses assigned to an order when deleting the order.
Downloadable products
Expiring downloads
Activate this setting if you want to set the expiration date of related downloads to the expiration date of the license in combination with the product. This has the effect that a download expires together with a license. A download is no longer possible for the customer after the permission has expired.

This also applies to the renewal of download permissions.
REST API (Pro)
Within the REST API settings, you can define all settings of the REST API. Please note that these settings are only available with Enwikuna License Manager Pro.
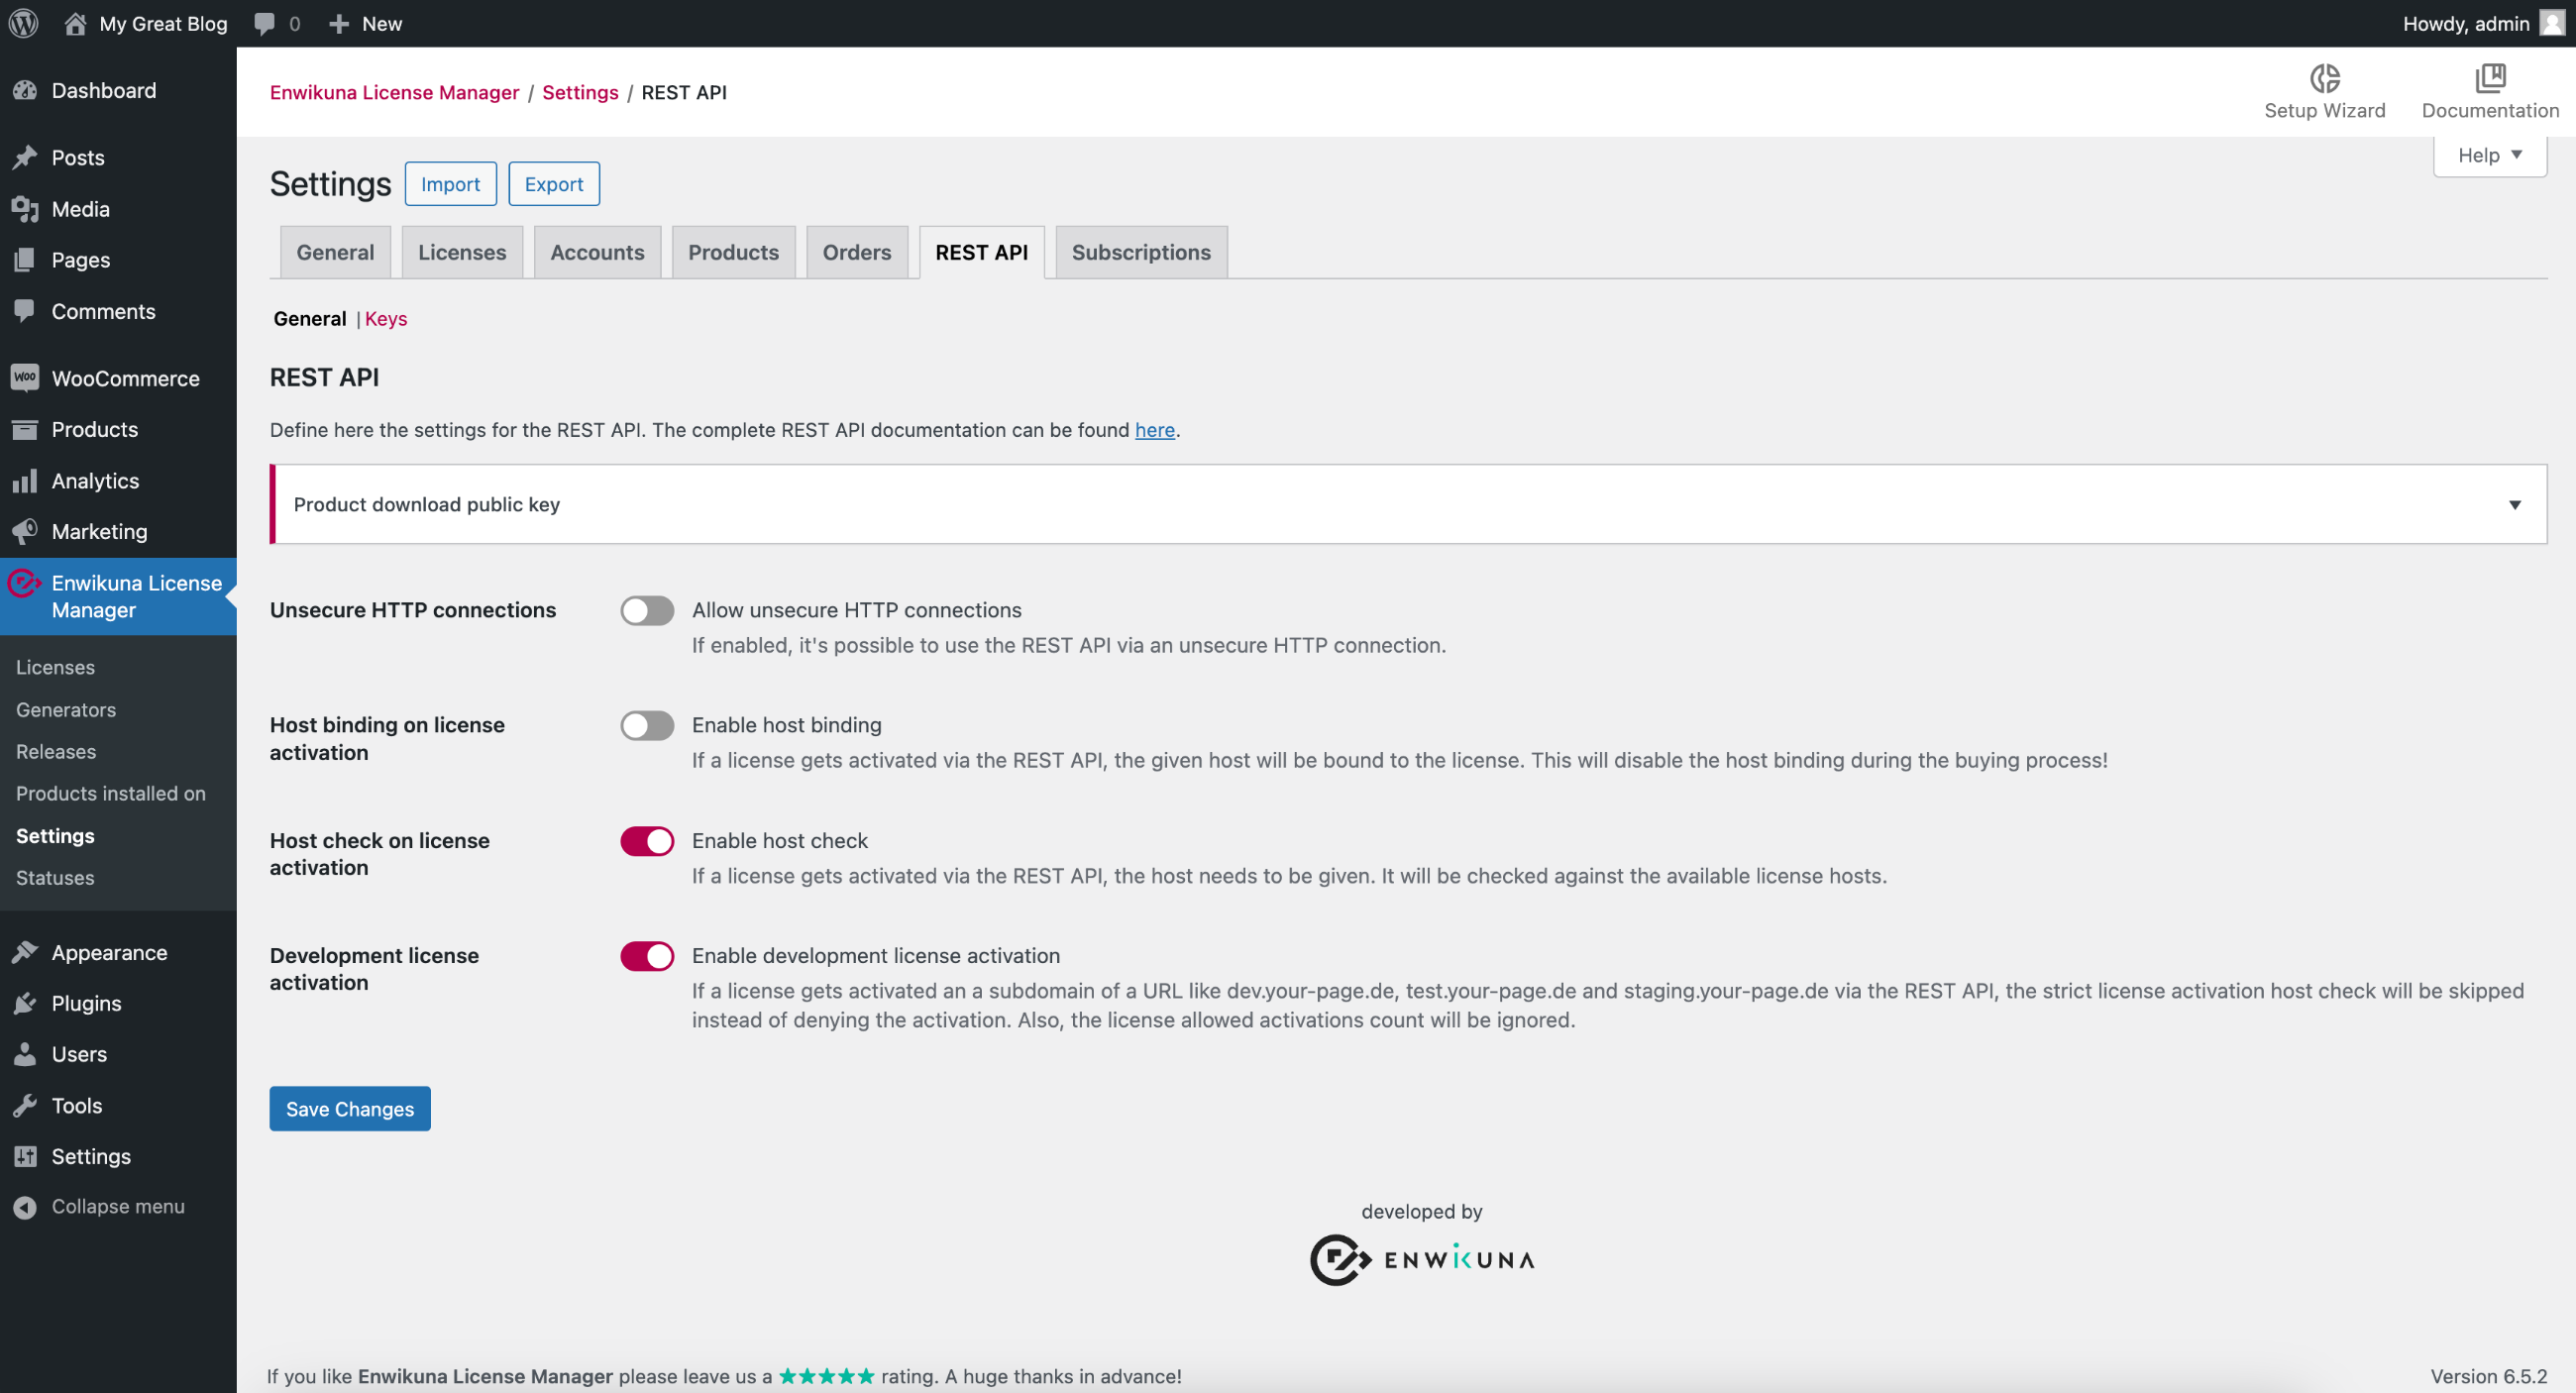
Product download public key
The public key can be used to verify the latest product file, which can be downloaded using the REST API. To verify the file, the current signature of the latest product file must also be downloaded via the REST API. Click here to find out how to check the file on the basis of an example.
Unsecure HTTP connections
Activate this setting if you want to allow unsecure connections to the REST API. We generally do not recommend this, since the transmitted data can contain extremely sensitive content, which can be intercepted when using unsecured connections.
Host binding on license activation
This setting can only be activated if hosts have been activated. By activating this setting, you can specify whether, instead of the customer entering hosts on the product page, you only want to bind the hosts to a license upon initial activation via the REST API.
Host check on license activation
This setting can only be activated if hosts have been activated. By activating this setting, you make the hosts field mandatory when activating a license via the REST API. If a host is not included within the list of hosts for a license, the activation will be rejected.
Development license activation
This setting can only be activated if hosts have been activated. By activating this setting, you can allow a license to be activated and deactivated via the REST API on subdomains such as dev.deine-seite.de, test.deine-seite.de and staging.deine-seite.de of URLs as often as you like (only works with the host type URL). In the event of such an activation, no real activation is created, but a positive response is sent directly via the REST API. The hosts are indeed checked, but only to a very limited extent.
Keys
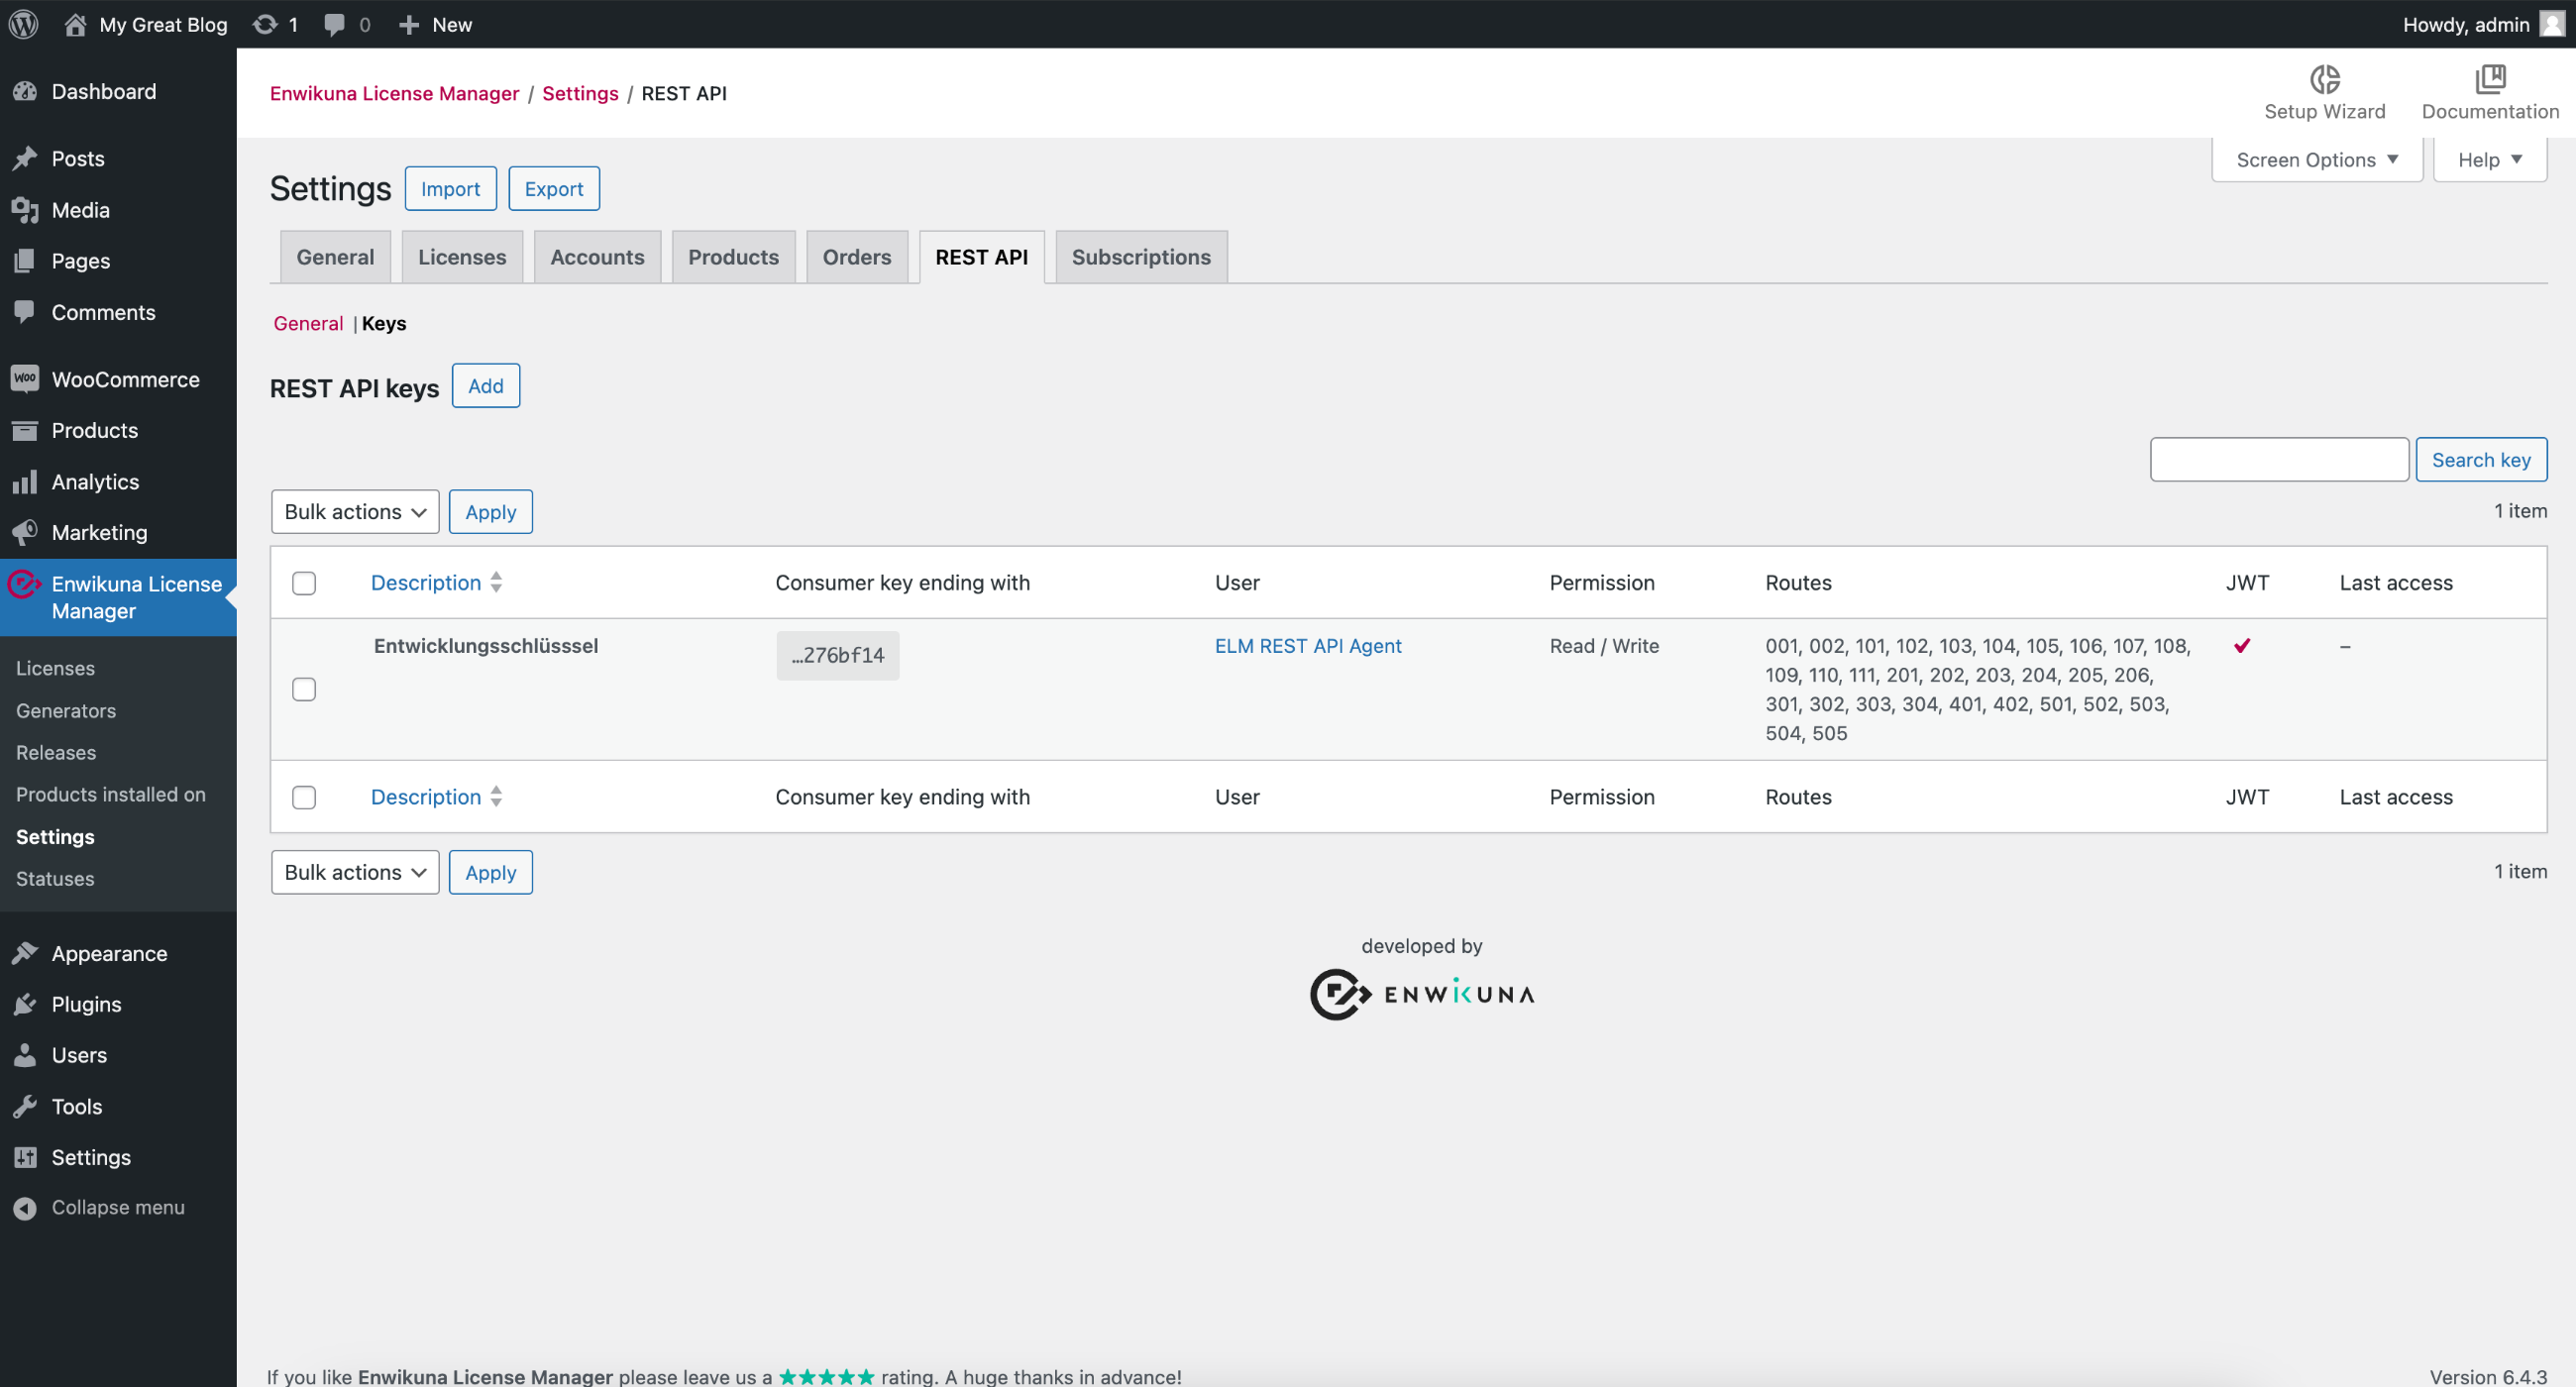
To be able to connect to the REST API, you need a REST API key, which you can add within the settings. After adding a key, however, you won’t be able to view it in its entirety, so it’s important to write down all the details about the key as soon as it is created.
Afterwards, you can revoke, view or edit a key at any time.
Let’s move on to the settings of a key. During creation and editing you can specify several things.
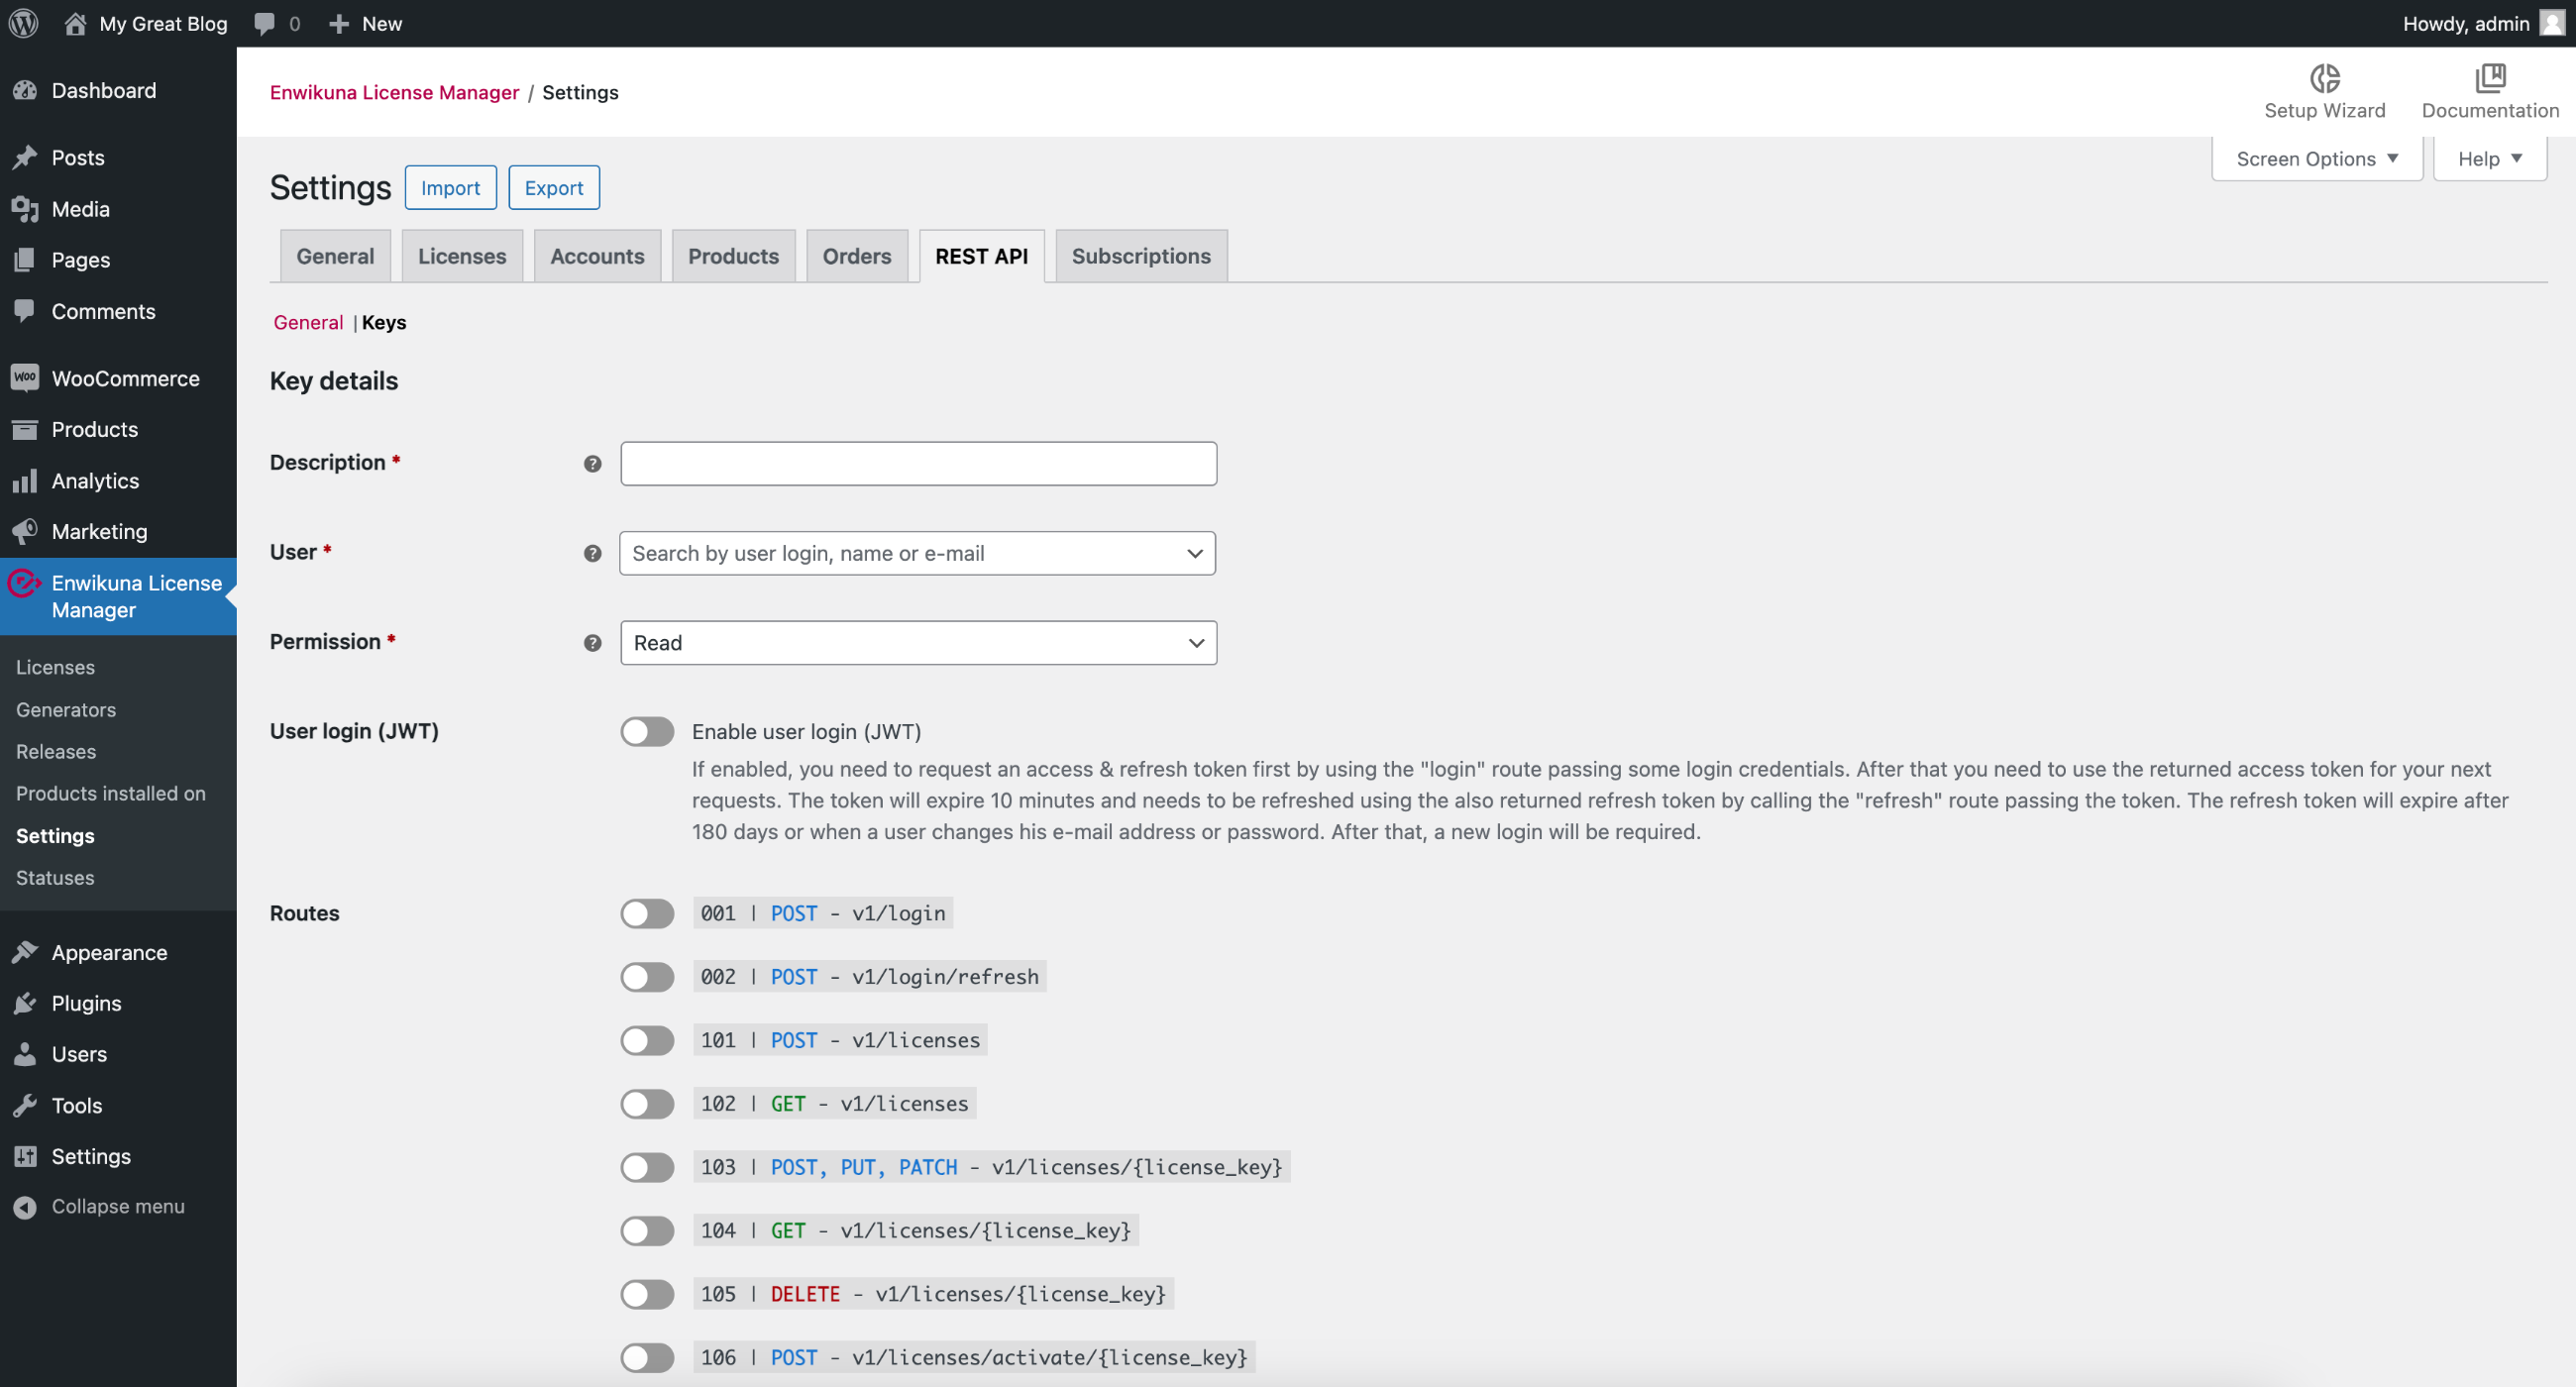
Basically, it is important that the key is assigned to a user. The reason for this is that WordPress is based on a roles & permissions system, which in turn is based on users. We therefore recommend that you create a user with the role “Enwikuna License Manager REST API Agent”. This role includes all important permissions to operate within WordPress.
Next, you need to specify whether the key has read, write, or read & write permissions. This may seem unnecessary, but it has important security reasons (need-to-know principle). Always specify only as much as needed here.
In addition to the existing security, you can now specify whether an additional user login is required when using the key. This is interesting, for example, if you want to use a key for user interaction with the REST API. For important routes in particular, such as retrieving user data, the user must always log in beforehand if this setting is activated and explicitly prevents a user from retrieving data from other users by hacking.
Lastly, you can specify which routes a key is allowed to request. This way you can create different keys for different routes & actions, which in turn have different rights.
Subscriptions (Pro)
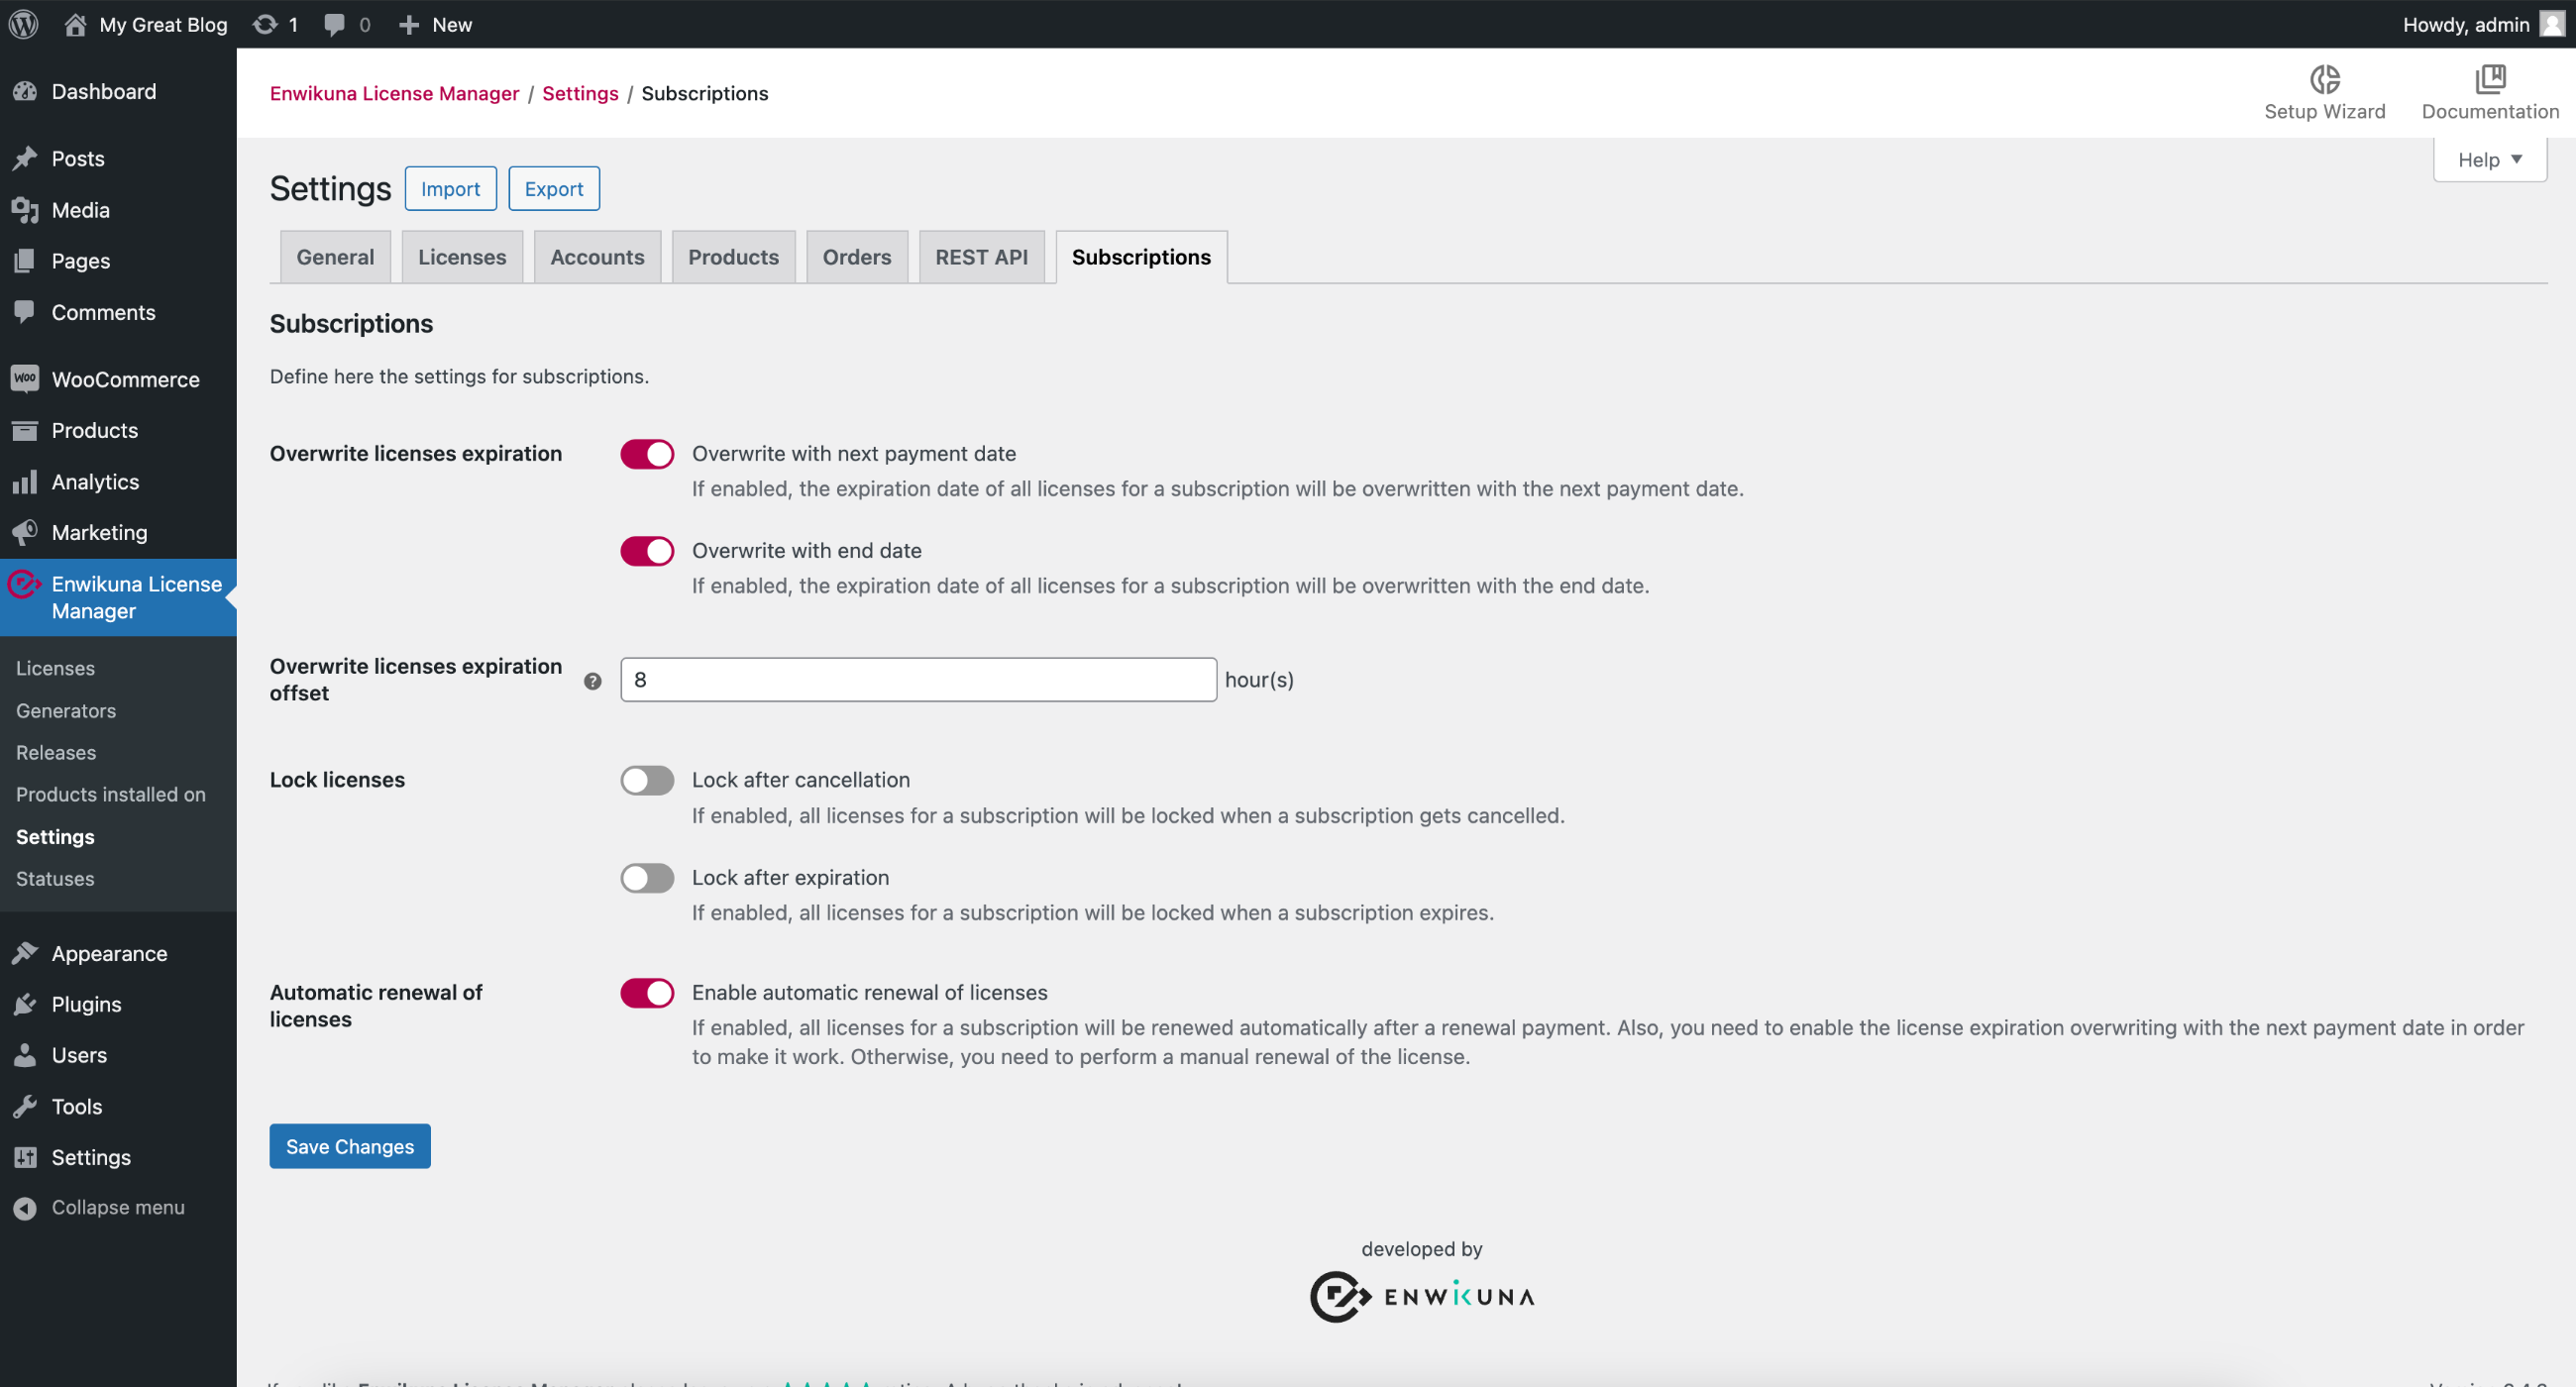
Within the settings for subscriptions you can define all important settings for subscriptions. Please note that these settings are only available with Enwikuna License Manager Pro. Also, Woo Subscriptions must be installed and activated.
Overwrite licenses expiration
In this setting, you can make two choices. First, you can override the expiration date of a license with the next payment date of the subscription, and secondly with the end date. Here you have to decide what makes sense for you. However, we generally recommend both, because when a subscription is being cancelled, the license should also expire. When a subscription gets renewed, there will also be a new payment date. In this case, the expiration date of the license should also be set to the new payment date.
Overwrite licenses expiration offset
This setting is only relevant if overwrite license expiration has been activated. Here you can define how many hours should be added to the new expiration date of a license when renewing a subscription. We recommend doing this because a subscription sometimes takes a few hours to update or if, for example, the payment method has expired. This will then prevent the customer from not being able to use his license and suffering a failure on his end, which can sometimes cause financial damages.
Lock licenses
Here you can define if licenses should be locked after a cancellation or expiration of a subscription.
Automatic renewal of licenses
Activate this setting if you want to renew the licenses belonging to a subscription automatically when the subscription gets renewed. For this, it is important that you allow the overwriting of the expiration date of a license with the payment date of a subscription. Otherwise you will need to renew the license manually. The license will be renewed as long as the subscription is renewed.
Import settings
If you want to apply your settings from another system using Enwikuna License Manager, you can import them. To do so, click the Import button under Enwikuna License Manager > Settings.

This opens the Importer, which is responsible for importing settings. Now select a CSV or TXT file containing settings.
You can also perform an advanced import by opening the advanced options. You can alternatively specify a path to a CSV or TXT file on your server instead of selecting the file locally. You can also change the delimiter if you want to use a different delimiter. By default, a , is used as a delimiter.
Finally, start the import process by clicking the corresponding button.
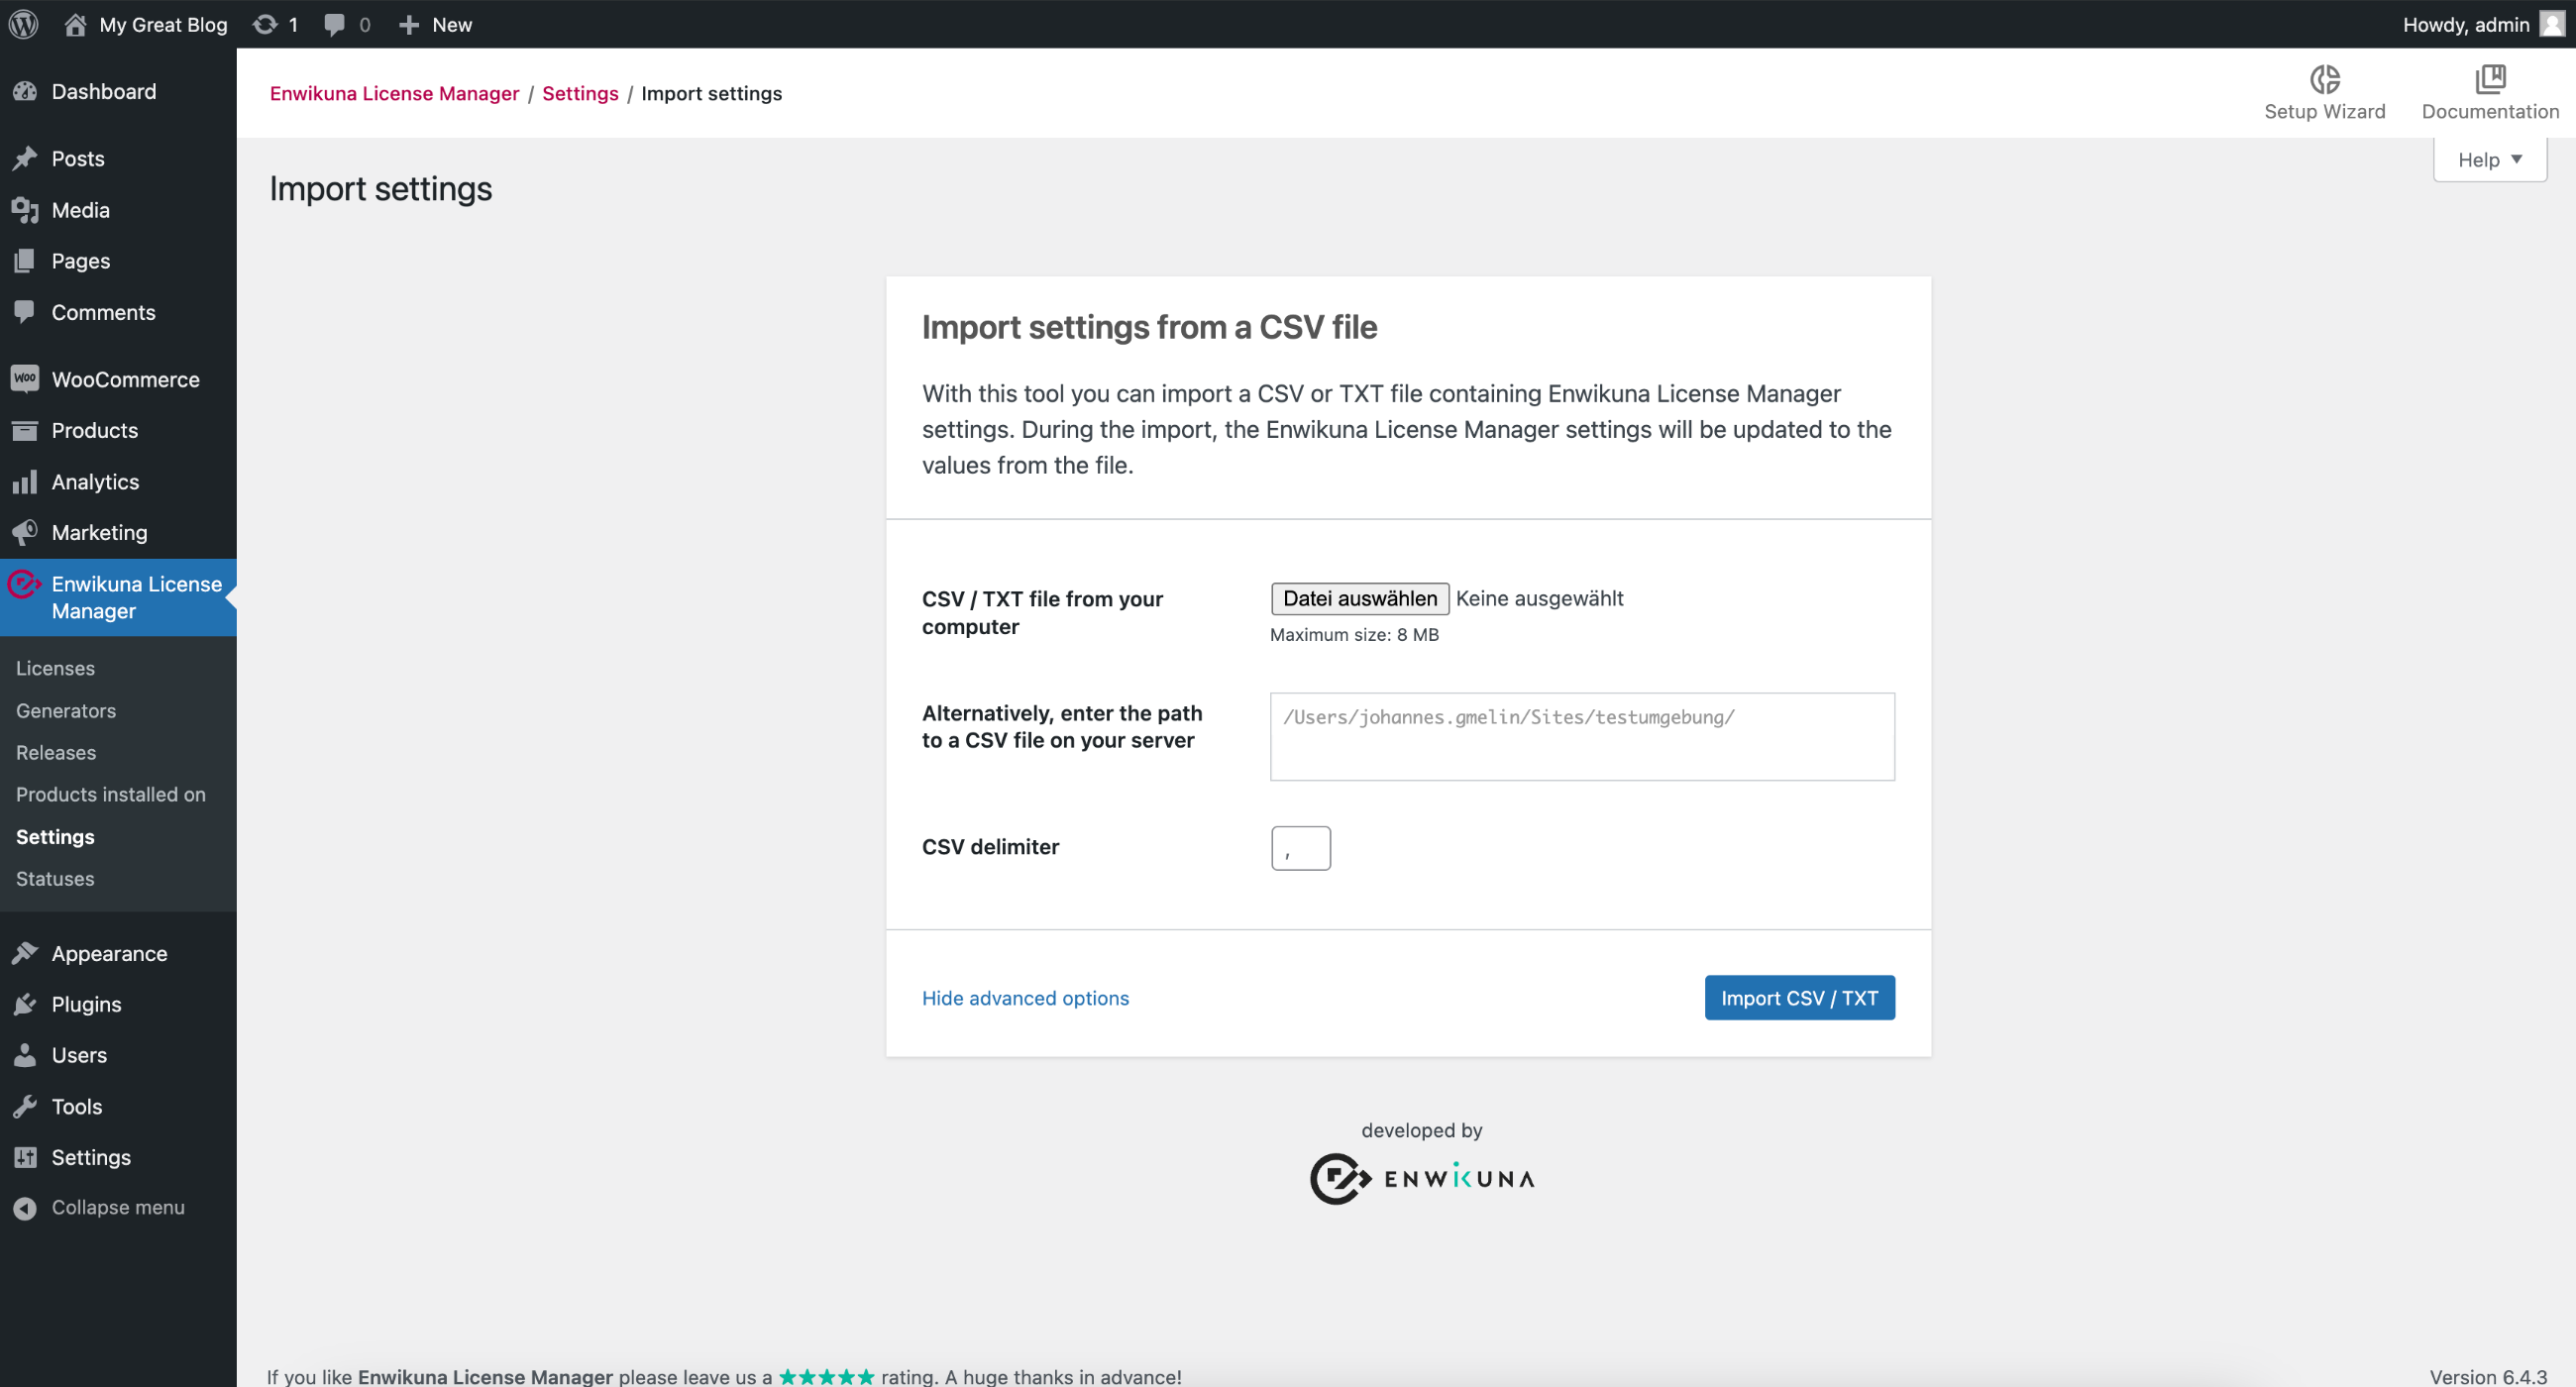
You will find a sample-data folder inside the Enwikuna License Manager plugin folder. In this folder we have placed a sample file for you to view.
Export settings
If you want to transfer your settings from one system with Enwikuna License Manager to another, you can export them. To do this, click the Export button under Enwikuna License Manager > Settings.

Afterwards the exporter opens, which is responsible for the export of the settings. Now select the data you want to export. By default, all settings will be exported.
Now, start the export by clicking on the corresponding button.
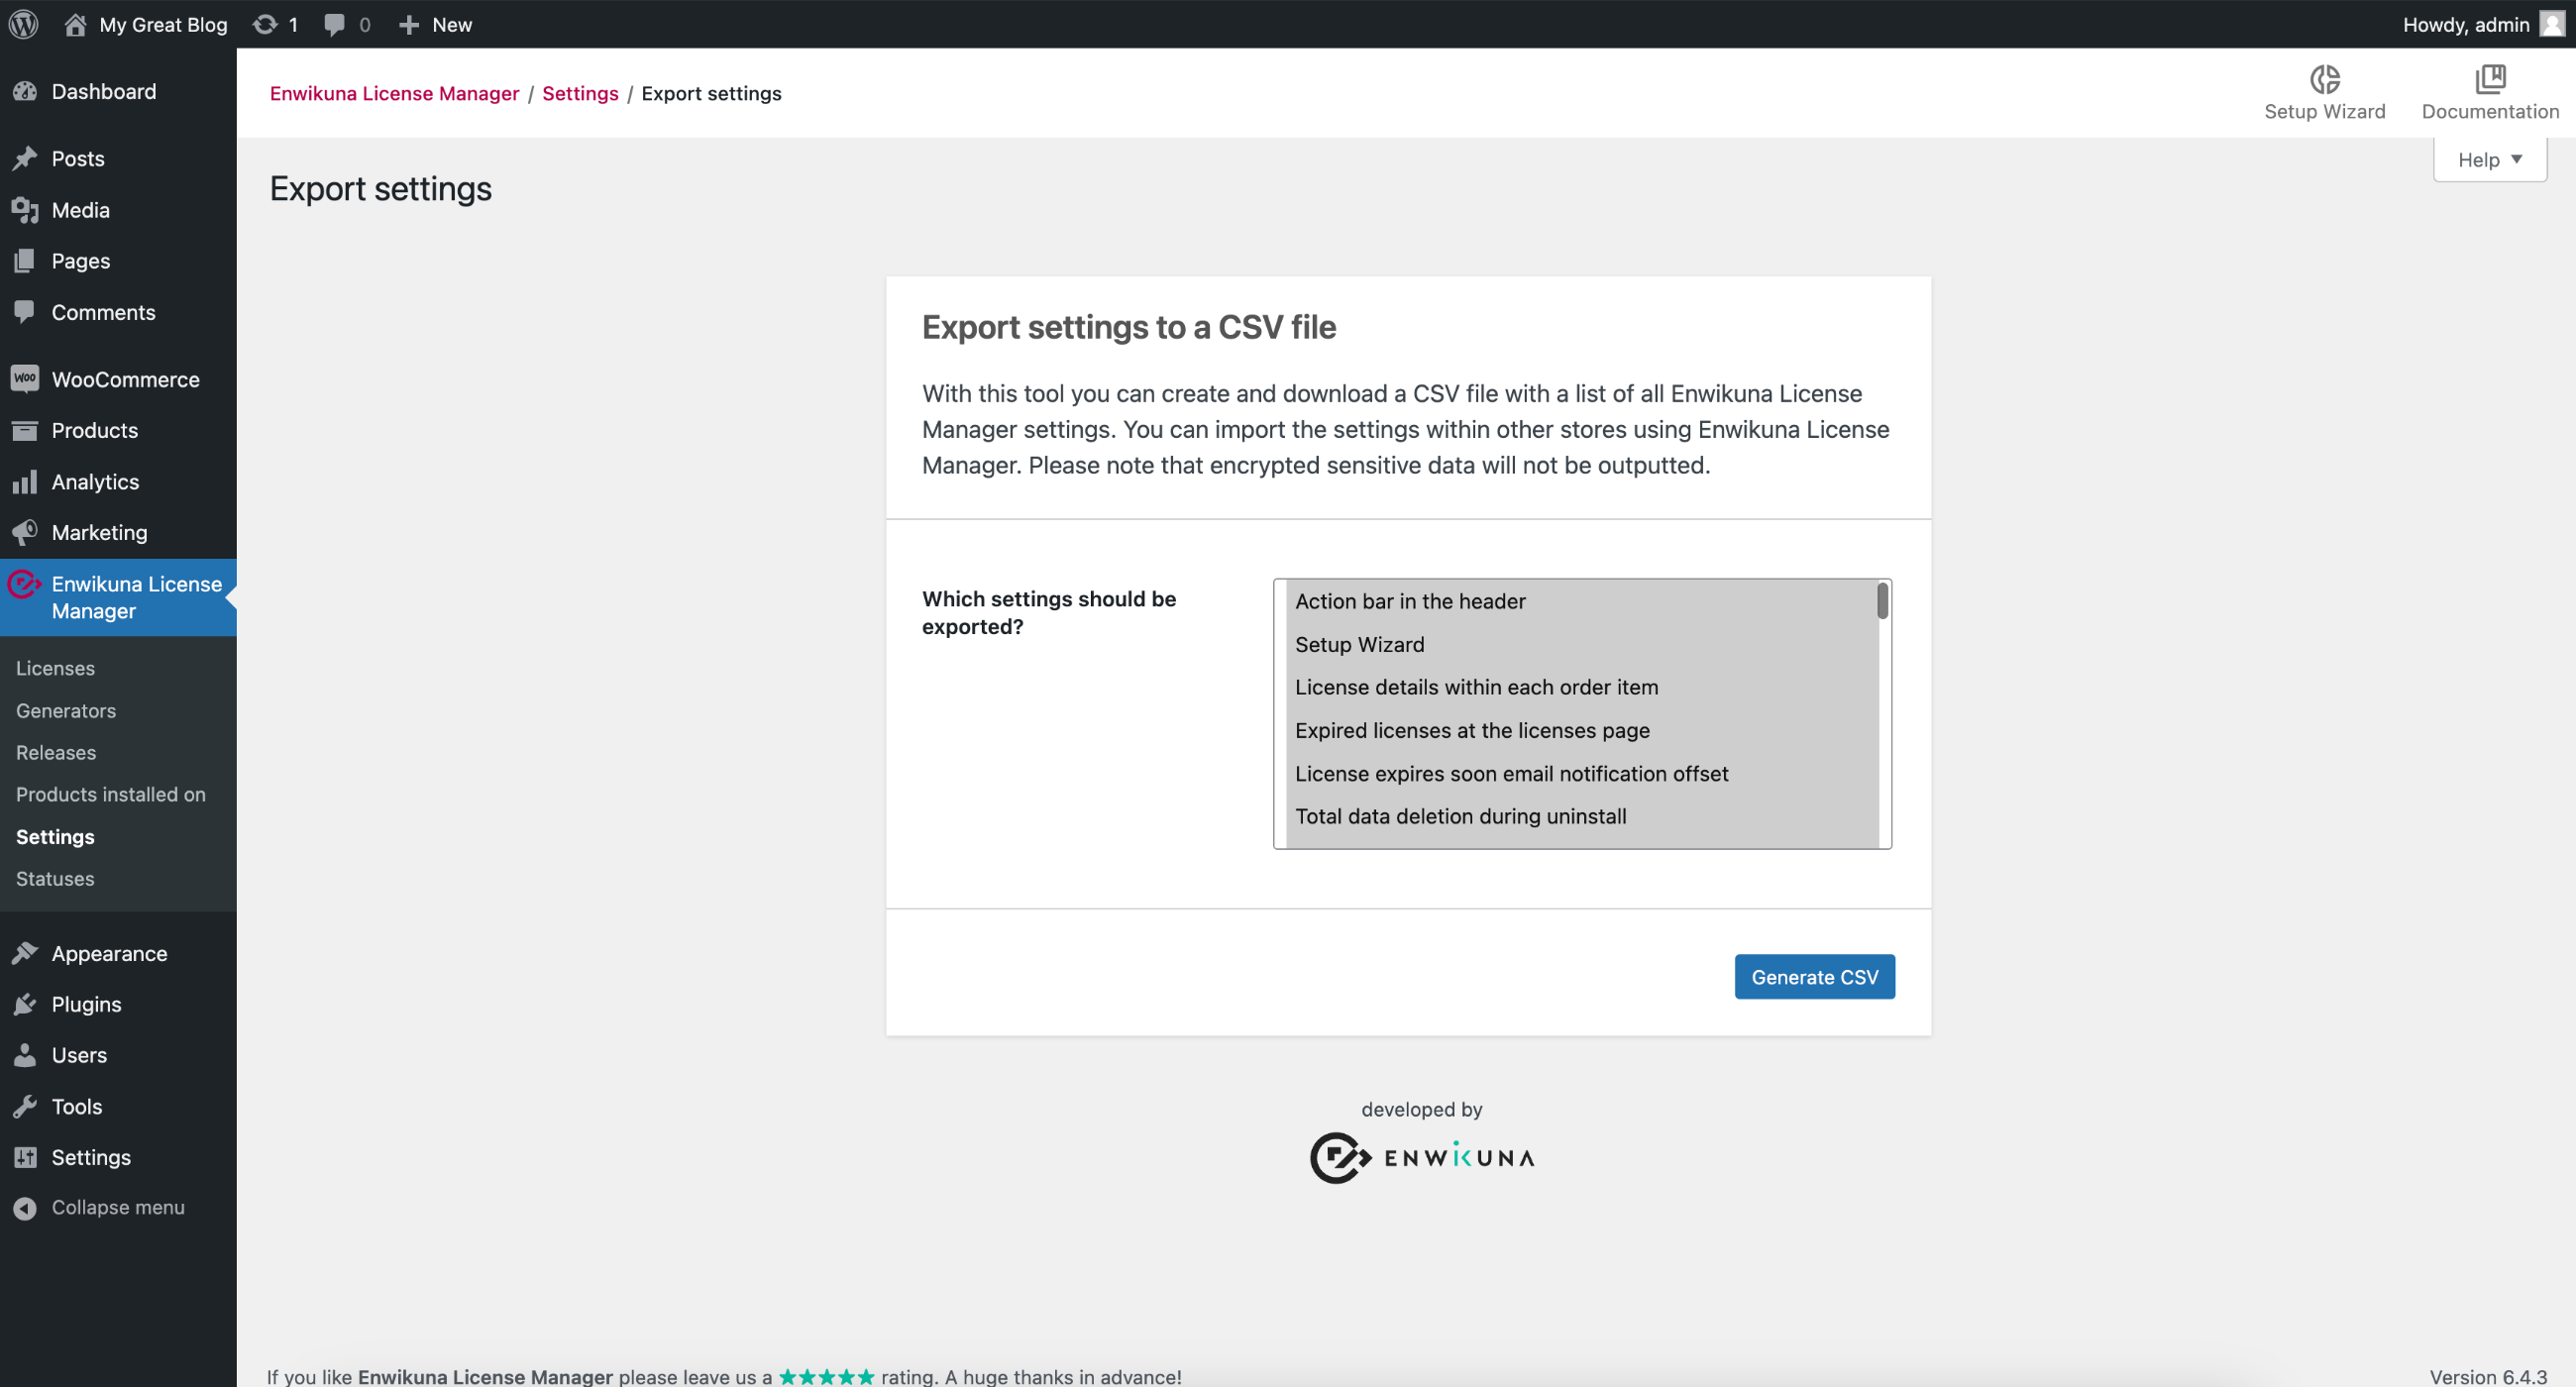
Your settings should now be exported.